

In 1984, I was working at a small garage in South London that serviced Porsches. The owner was my friend Tony, an espresso-fueled Italian with a passion for fast cars, Lambrusco wine, and petite brunettes. Looking back, I can’t imagine a more politically incorrect Italian male stereotype than Tony. I think of him every time I am forced to listen to the legally chastened presenters at cultural-sensitivity training sessions.
Most of the garage’s customers were sports car enthusiasts. Their vehicles were immaculate, and they fretted over every rattle, engine hesitation, or paint scratch. They trusted Tony and his mechanics to keep their expensive little indulgences running like the proverbial Swiss watch. One day, we got a “spirited” call from a customer who was at a garage in Belgium. He had been driving his Carrera to the German Grand Prix at Hockenheimring when the throttle cable gave out near Ghent. He called to vent some spleen and make sure that Tony knew he might arrive late to the race. Anyone who knows a real “petrolhead” will understand that this sort of thing is worse than arriving late to your own wedding. The car had been in our shop the week before for regular maintenance, and the customer wanted to know how the “expletive” we managed to miss something so “expletive” obvious. I was the person who took the call, but thankfully not the person who had worked on the car. I apologized profusely and called Tony over to the phone so he could manage the situation. Ten minutes later, the phone was returned to its wall mount. The shop went deathly silent. Tony scanned the floor and found the guilty party, who was desperately trying to conceal himself inside the wheel well of a 911. I learned a few new Italian phrases that day, most of which I still haven’t had the coglioni to repeat. I also learned that maintenance is important.
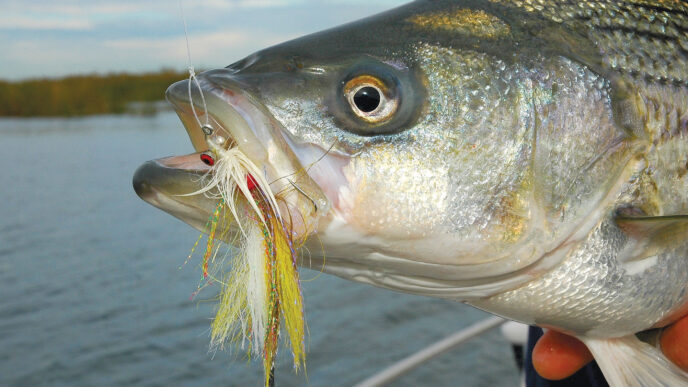
It’s no great revelation that fly fishers spend quite a bit of money on fishing equipment. Even a basic rod, reel, line, and wader combination will set you back $600. Once you start to add higher-price-point stuff to the equation, the number shoots well past $1,000. Just like the Porsche owner, we often take this gear on long road trips so we can indulge our passion. When we do, we fully expect the stuff to work when we get to the water. Care and maintenance of fishing equipment is a big part of making every fishing trip memorable for the right reasons. Fortunately, modern materials and a bit of effort on your part can make this all fairly painless.
Fly Lines and Microfiber Cloths
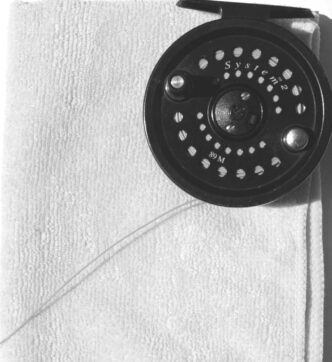
Modern fly lines are marvels of chemical engineering. These skinny pieces of plastic enable us to cast all kinds of flies in all kinds of conditions. Whether you are fishing for bonefish in the sticky, hot Bahamas or golden trout at nosebleed elevations in the Sierra, there’s a fly line for the job. Back in the days of silk lines, fly-line maintenance involved drying, cleaning, and dressing the lines on a very regular basis. If you forgot to dry the line after each fishing session, it would quickly rot. Thankfully, plastic lines are a lot more user-friendly. Most experts recommend soaking dirty fly lines in warm, soapy water, pulling them through a cloth to remove the crud, and finally rinsing in clean water before returning them to the reel. This approach certainly works, but I have found a much simpler way that works well on all but the most seriously soiled lines. Just pull the line through a clean microfiber cloth as you reel it in at the end of each day’s fishing. The cloth removes the crud, grit, and goo with just one wipe. These cloths work just as well on the new textured lines, too.
Microfiber cloths are able to remove the gunk and grime from your line without the aid of soaps or detergents because they have incredibly thin fibers. How thin? You would need 100 to match the thickness of a human hair. Through the magic of physics, these tiny fibers attract and then trap dirt using van der Waals forces — the weak forces that bond molecules together. (I knew two years of college physics would come in useful someday.) You can buy these towels at most hardware or auto parts stores for about a buck or two apiece. I carry one with me on every fishing trip and haven’t had to wash it in over two years. They are also great at letting you know if your line is abraded or cracked.
The microfibers will momentarily hang up on the roughened line, allowing you to locate and inspect any defects.

Fly Reels and Quick-Dry Electronic Cleaner
Most people hate working on reels. Fiddly springs, miniscule screws, and oddly shaped components are enough to drive even the most pious to drink. Thankfully, most reels are designed to handle the occasional immersion in water and modest amounts of dirt. Most of my freshwater reels usually go a couple of years between cleanings. Reels used in salt water, especially in the surf, are quite another matter. Even reels specifically designed for this harsh environment really shouldn’t go much more than a year between inspections and cleanings. A full strip down, cleaning, and rebuild of a complicated reel can take about an hour in experienced hands. Expect to double that time if you haven’t apprenticed in the trade. Fortunately, there is a much quicker way to clean your reels that doesn’t require jeweler’s screwdrivers, prescription-strength glasses, and the manual dexterity of a Victorian seamstress. It’s not quite as thorough as the Full Monty, but it’s darn close. All you need is a can of quick-drying electronic cleaner, a pair of latex gloves, some Penn reel lube, and some rags.
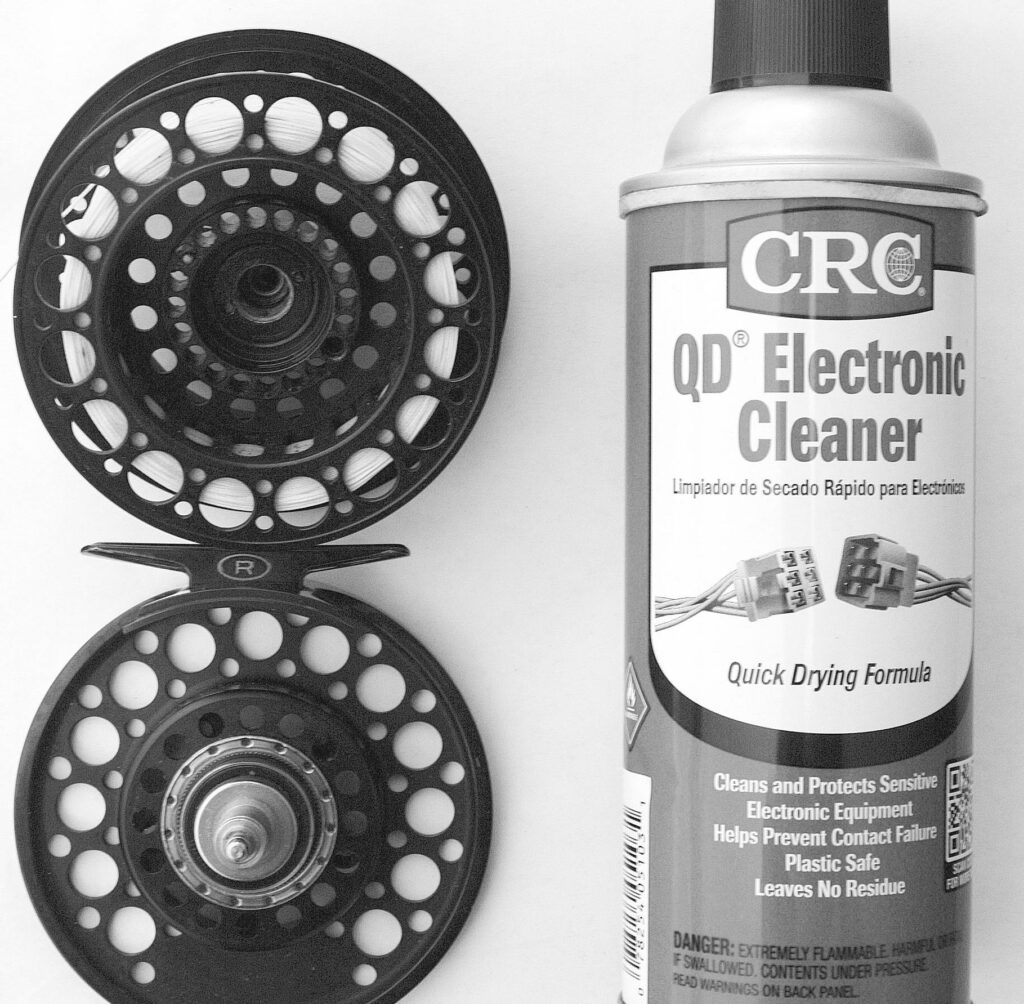
First of all, find a spot outside so you don’t inhale the cleaner. The materials-safety datasheet for most of these products suggests they probably won’t melt your cerebellum, but who can afford to lose any brain cells these days? Even though these sprays are “plastic safe,” I would recommend removing the fly line from the reel. Don’t use the nonflammable cleaners — they aren’t plastic-safe. The first thing to do is don the latex gloves to protect your hands. Next, separate the spool from the frame and place them both on top of some old rags or newspaper. Cinch down the drag so none of the solvents get into the drag washers. They will probably be fine, but why risk it? Fit the plastic straw into the spray nozzle and direct a stream of solvent down into the central hole where the spool mounts onto the main shaft. Turn the spool upside down and let the solvents drain onto the rags. Do this a couple more times and then set the spool to one side.
Now you can turn your attention to the reel frame. Direct solvent onto all of the components and allow it to drain onto the rags. When you are done, everything should look dull and dry. Now it’s time to apply lubricant. Start by putting a few drops of reel lube into the center of the spool. This will lubricate any bearings, clutches, and the spool lock. While the lube is seeping into the spool, apply lubricant to the central shaft and all the gears, springs, and fiddly bits on the frame. Applying a quick spritz of WD-40 to the frame isn’t a bad idea, either. Finally, put the spool back on the frame and give it a few spins with the drag loose and then tight. Everything should be smooth and quiet. If not, repeat the process.
Waders, Plastic Bags, Plasti Dip
Almost every California fly fisher I know has at least one pair of “waterproof trousers.” While hardly high fashion, breathable waders are clearly the hands-down favorite among California’s fly fishers. The ability to stay comfortable across a wide range of weather conditions and exercise levels makes them the perfect match for today’s multiseason, multispecies fly fisher. These high-tech pants don’t come cheap, though. A basic pair of chest-high breathables will set you back $120, while top-of-the-line stuff will have you parting with eight Franklins and several Jacksons. That kind of investment more than justifies some care and maintenance. These waders tend to develop leaks in two places: the neoprene booties on stockingfoot waders and the seams. You can keep your waders leak-free for a lot longer with a couple of simple tricks.
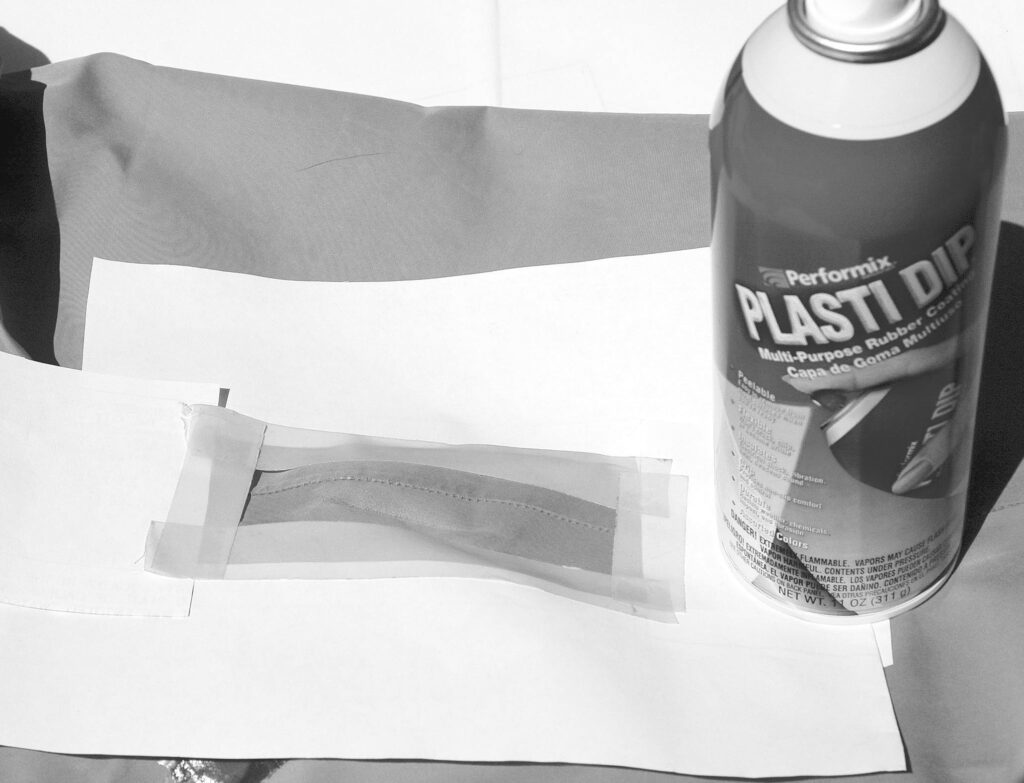
For the neoprene booties on stockingfoot waders, abrasion from sand and grit can be a fast track to leaks, especially in the toe and heel areas. Most weekends find me wading in the surf. The churning action of the waves creates a liquid sandstorm, and sand inevitably works its way down into my booties, even with my gaiters tightly cinched down. I can significantly reduce the amount of sand that comes in contact with the neoprene by putting my feet into a couple of single-use plastic grocery bags before I put my wading boots on. This simple trick has more than doubled the life of the neoprene stockingfoots on my current pair of waders. The other spot for leaks is in the seams around the crotch or knees. These areas are subject to a lot of flexing, and seams in these areas are especially vulnerable. To stay ahead of leaks, it’s a good idea to inspect your waders every month or so. Be especially careful to look for signs that the weave of the fabric is starting to loosen or shows signs of abrasion. Typically, the damaged area has a lighter color and looks slightly fluffy, compared with the rest of the garment.
Once you see this problem, it’s time to do some preventative maintenance. First of all, wash the area with detergent and rinse it thoroughly to remove any dirt or oils that may have worked their way into the fabric. Hang the waders in a dry place and allow them to dry for 24 hours. If time is tight, you can speed things up by using a hair dryer. Once they are completely dry, get hold of some masking tape and create a mask around the worn area. In the past, I would apply Aquaseal, a urethane-based adhesive. This gooey sealant was effective, but not the easiest stuff to work with. Now there is a much quicker and simpler solution. Just buy a can of Plasti Dip synthetic rubber coating from the hardware store and spray it on the damaged area. The plastic will lock the fabric weave in place and provide protection from abrasion. It also seals any pinholes that might have started. The stuff is usually dry enough for use in 4 to 6 hours, but I’d suggest giving it 24 hours to ensure a long-lasting, watertight seal. Plasti Dip is now available in several colors, so don’t be bashful about livening up the appearance of your water trousers. Just imagine how sporting you will look with a bright red crotch.


")