
I first met Morgan Thalken in 1991, when he and his father, Michael, joined my fly-fishing club. Morgan was then 12. At the time, the club was fortunate to have among its membership a gaggle of engaging, enthusiastic teens with one thing in common: a maniacal interest in fly tying and fishing (tempered, if only slightly, by their other common interest — girls). Morgan was quickly assimilated into their ranks. It was indeed a pleasure to watch these young ’uns grow physically and in their fly-fishing prowess. They cleaned clocks at outings, burned through tying classes (often teaching the instructors — including yours truly — a thing or two), and earned reputations that warned that one should avoid fishing behind them. As is often the case, I suspect, flyfishing dads and moms (and friends) watch proudly (or perhaps ruefully?) as fly-fishing offspring zoom past and away from them and establish themselves prominently in our sport. As an aside, one of that very same gaggle has appeared on the cover of Fly Fisherman magazine, holding a gigantic 30-pound-plus steelhead. Ah, yes, I knew them when . . . .
Morgan began his fly-fishing and tying journey 22 years ago, at the age of 11. As he puts it, “It soon became a sickness or a dependency, more than anything; as a young teen, fly fishing rivaled the opposite sex as my prime interest in life. Everything revolved around fly fishing: vacations, school papers, topics of conversation, you name it.” Sound familiar? As a lifelong “fishhead,” I can certainly relate to that.
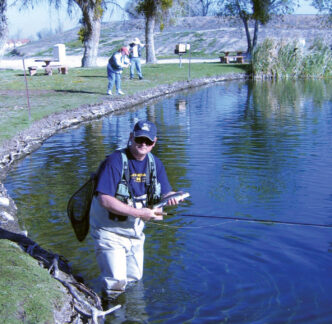
Morgan grew up with the lower American River in his backyard, affording him a unique and valuable opportunity to, in his words, “release the tension of dreaming about fish 24 hours a day.” Catching steelhead and striped bass with a fly rod on his home water synergistically fueled his interest, education, and skills. At the age of 15, he was hired by one of Sacramento’s prominent fly shops to tie custom patterns and fill their fly trays as needed. As time passed, mentoring friends provided him with instruction, tips, and techniques that, combined with the wonderful insights and epiphanies that only experience and awareness on the water can produce, firmed up his fly-tying foundations. So much so, in fact, that at age 16, he demonstrated his tying prowess while seated next to legendary Dave Whitlock at a show in Livingston, Montana.
Now, immersed deeply in our sport, Morgan is routinely invited to demonstrate his tying skills at local and national Federation of Fly Fishers events, International Sportsmen’s Expositions, and other major venues. In Morgan’s words, “With the influence of friends like Andy Burk and others, I began straying from the established patterns, thinking a little outside of the box and creating my own patterns. Many have been evolutionary failures, but a small few have succeeded and have found a permanent home in my fly arsenal and a few fly boxes worldwide.” I think he’s being somewhat modest and understated here, but then those are qualities that I admire.
Morgan has hosted numerous trips to Baja, and like many other fly anglers, calls himself “a total saltwater nut.” He spent many a day guiding and instructing while making his way through college at Chico State University. He currently works full time as a land surveyor and on some weekends subs as a “shop dog” at a Sacramentoarea fly shop. When not working, Morgan spends countless hours probing Northern
California waters with close friends or with his wife, Angie, and their two dogs. He is also a contract fly tyer for Umpqua Feather Merchants and a board member of the Truckee River Chapter of Trout Unlimited. Let’s hear from Morgan about the history of his creation, the Double Dutch Bug.
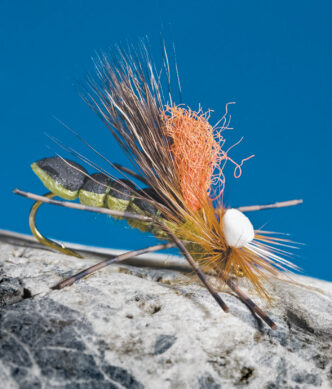
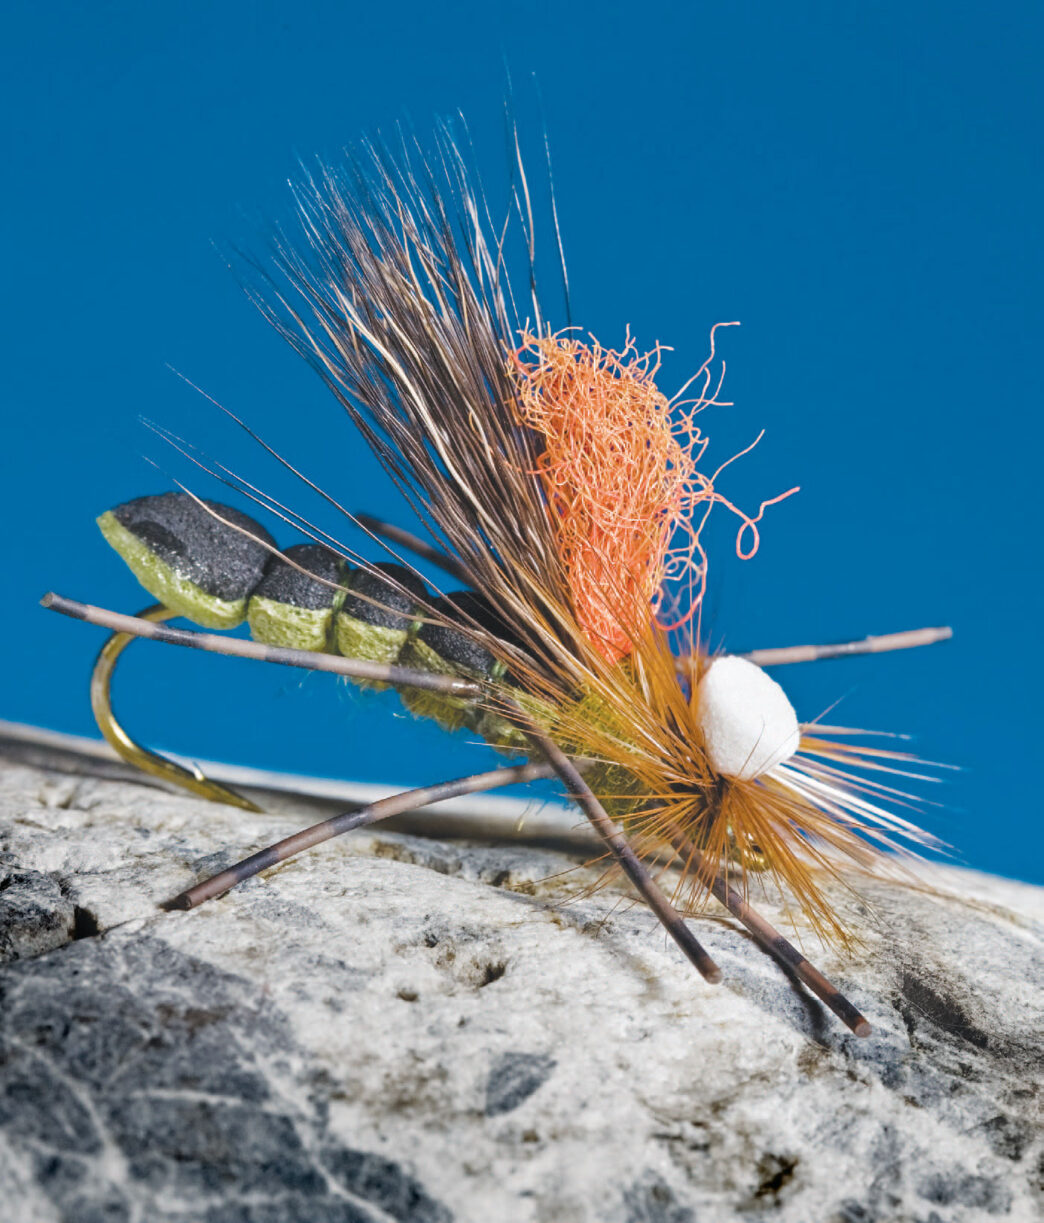
“The Double Dutch Bug is the final stage (or as final as any fly pattern can be, given our tinkering tendencies) in a series of creative experiments based on the Rubberleg Stimulator — a proven pattern that has brought many fish to my hand. Still, the Stimmie being someone else’s pattern, my obsession forced me to tweak and sculpt it into a mutation of my own creation. “My goal was to create a buoyant, durable, and enticing bug — something generic enough that a single pattern tied in a few sizes and colors could represent a broad range of aquatic and terrestrial insects. The appearance and buoyancy of patterns tied with multiple layers of foam has always intrigued me. I realized that by employing two foam layers to form the top and rear portion of the fly, I could tie it parachute style (which is a style that I prefer) and achieve the buoyancy I wanted. The parachute style allows the fly to sit flush in the surface film in a realistic manner and with an excellent overall profile. Moose body hair became my choice for wing material after some disappointing attempts with deer and elk hair. Moose body hair provides a better silhouette, is less apt to flare unnecessarily, and is much more durable than deer or elk. A respected industry friend suggested that I add an extra pair of legs in order to create more movement as the fly drifts. These and a few other factors merged during the summer of 2009, when the first Double Dutch Bug fell from the jaws of my vise.
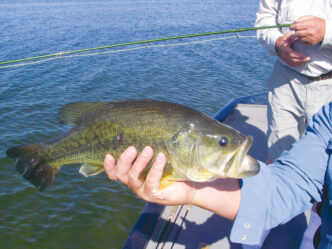
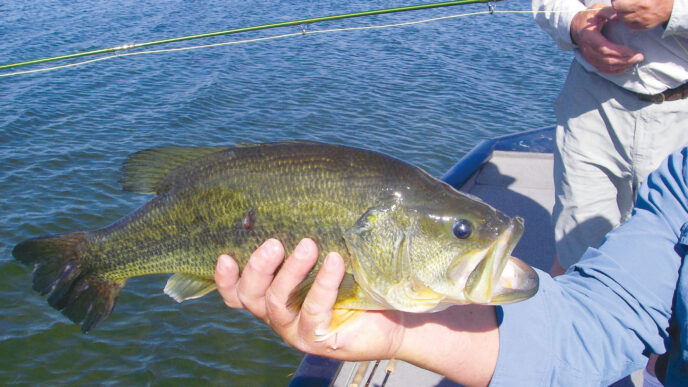
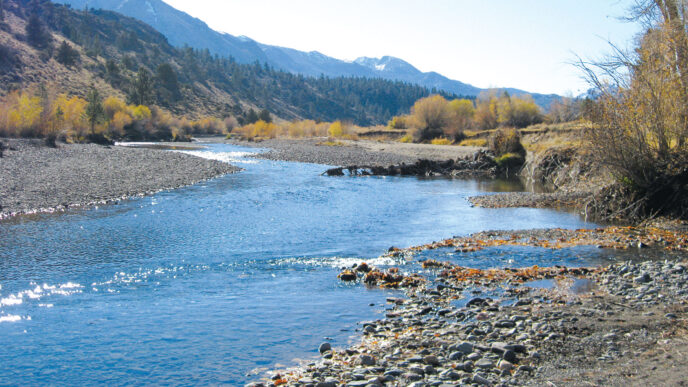
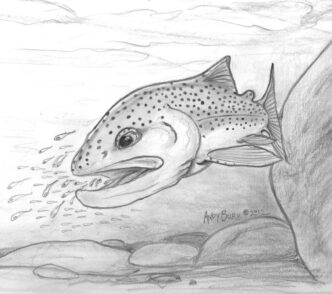
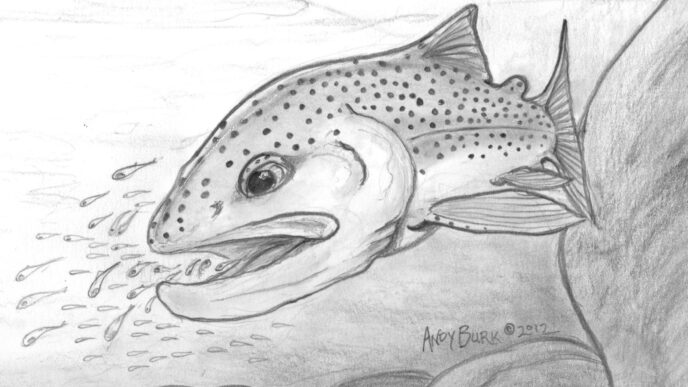
“I have been fishing the Double Dutch Bug only since the spring of 2010. In my efforts to meet my goal of spending more time drifting dry flies, I have fished the fly on many Northern California rivers. So far, it has fooled rainbows, browns, brookies, largemouth and smallmouth bass, and bluegills. Even on heavily fished waters such as the West Carson and Yuba Rivers, it has proven quite productive. Some of my largest dry-fly fish this past year have been on the Double Dutch Bug. Ironically, I was able to fool trout on that most fickle of venues, Hat Creek, after asking myself ‘Why not throw a big bug?’ to these highly selective fish. Long story short, it paid off.
“The Double Dutch Bug has become one of my favorite go-to, doeverything patterns. It can function as a hatch-specific fly for Golden Stoneflies, Skwala Stoneflies, grasshoppers, or beetles. A version tied with peacock herl has quickly become my favorite searching pattern. It also performs well when used as the top fly in the “hopper-dropper” method, with a nymph or two suspended beneath it as it bobs along in the current. The double layer of foam keeps it floating high, despite the weight of the nymphs, and occasionally a fish will grab it instead of the nymphs. The white parachute post and bright orange wing make it highly visible, even in heavy water. Because this pattern is so versatile and relatively simple to tie, having a few of them in your fly box opens up a nice array of options for a broad range of angling situations and just plain makes sense.”
Materials List
The following materials are for the olive version, which can imitate a Skwala Stonefly. Vary the foam colors to suit the situation. Black, brown, orange, rust, amber, and yellow are good alternatives.
Hook: Tiemco 2312 or similar curved-shank, 2X-long hook, sizes 6 to 10
Thread: Olive 6/0 or 8/0
Underbody and thorax: Mercer’s Buggy Nymph Dubbing in Micro Mayfly color, or any similar olive dubbing.
Foam body: Olive and black 2-millimeter foam sheet sprayed with an art fixative, sandwiched together and cut into strips. The black strip will be on top when the “sandwich” is tied in.
Parachute post: Rainy’s Foam Parachute Post, 3/16-inch for sizes 6 and 8, 1/8-inch for size 10.
Legs: Black or brown medium round rubber legs
Wing: Moose body hair
Overwing: Hareline Parapost Wing, fluorescent orange, or any suitable substitute yarn
Hackle: Brown rooster neck, dry-fly quality
Tying Instructions
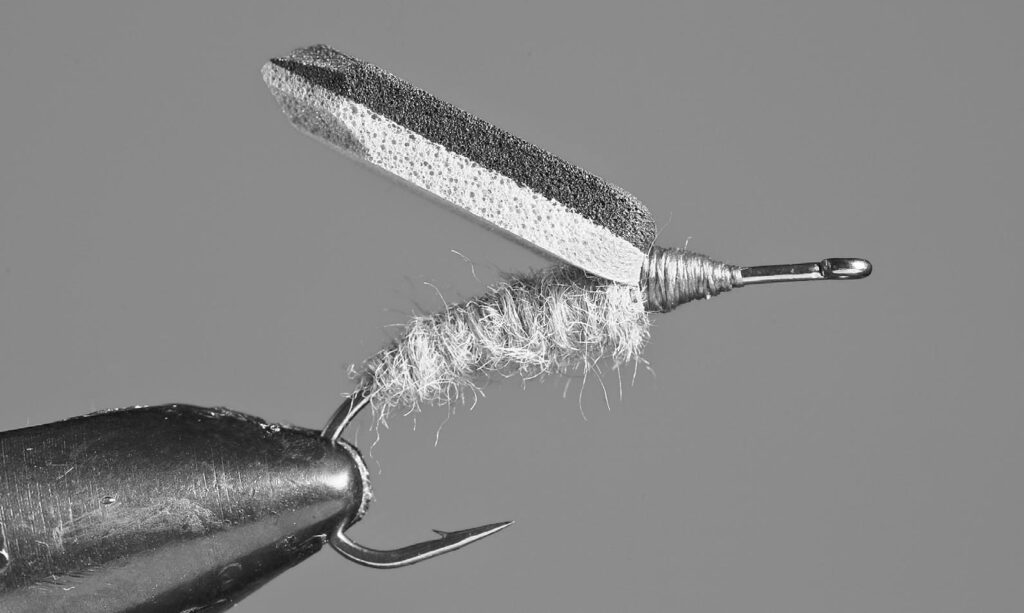
Step 1. Prepare one each of black and olive 2-millimeter foam sheets by spraying one of the two sheets with an art fixative. Wait a few seconds, then match the two sheets and push them together. Rolling a beer can or rolling pin over the sandwiched foam will ensure the sheets have bonded well and will eliminate air pockets. Using a straight edge and a sharp blade, cut the sandwiched sheets into strips; the strips should be a quarter of an inch wide for a size 6 hook, seven thirty-seconds of an inch wide for a size 8 hook, and three-sixteenths of an inch wide for a size 10 hook. A paper cutter also works well for this purpose.
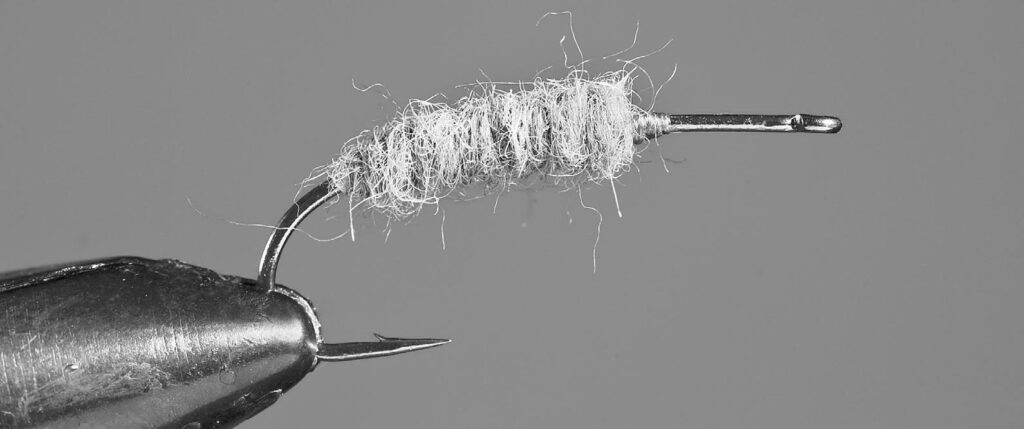
Step 2. Debarb the hook and cover the shank with one even layer of thread from one eye length behind the eye to just above the back of where the barb was.
Step 3. Apply a pinch of dubbing to the thread and dub a slightly tapered abdomen forward to the thorax area. End the dubbing body at a point about one-third of the hook shank back from the eye and leave the thread at that point.
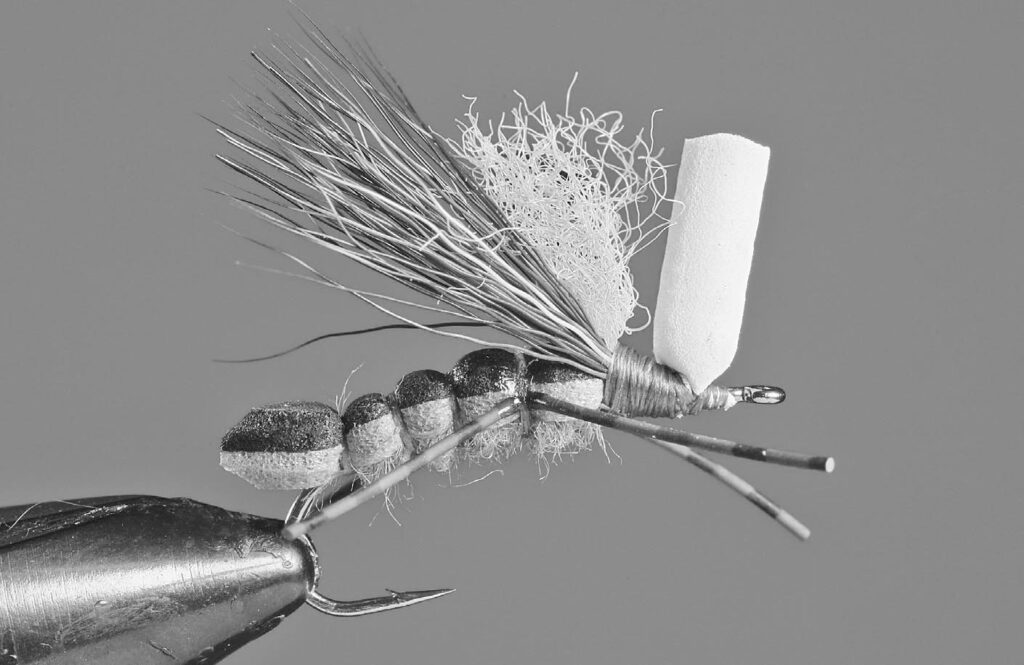
Step 4. Cut the butt end of the foam strip to a tapered point, and with your scissors or a piece of fine-grit sandpaper, round off the top and bottom sides of the foam. Place the foam on top of the hook shank so that the pointed tip of the butt extends to the rear about one-quarter of the hook shank’s length beyond the abdomen. The black side of the foam will be on top. Tie down the foam strip at the front of the abdomen. Secure it with about six to eight wraps, and trim off the excess foam. Using a whip finish or a few half hitches, tie off the thread and trim it.
Step 5. Reattach the thread at the rear end of the hook, at the end of the abdomen. With your off hand, pull the foam rearward, and tie it down securely. Tie the thread off there, using either Half Hitches or a wide-angle whip finisher. Apply a small drop of superglue to the front and rear tie-down spots. This will ensure that the two tie-down spots remain bonded in place and stay durable.
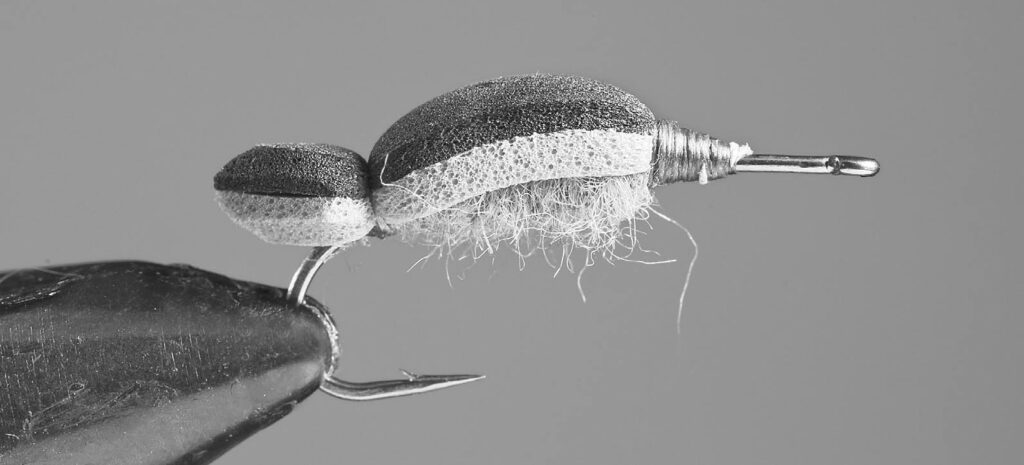
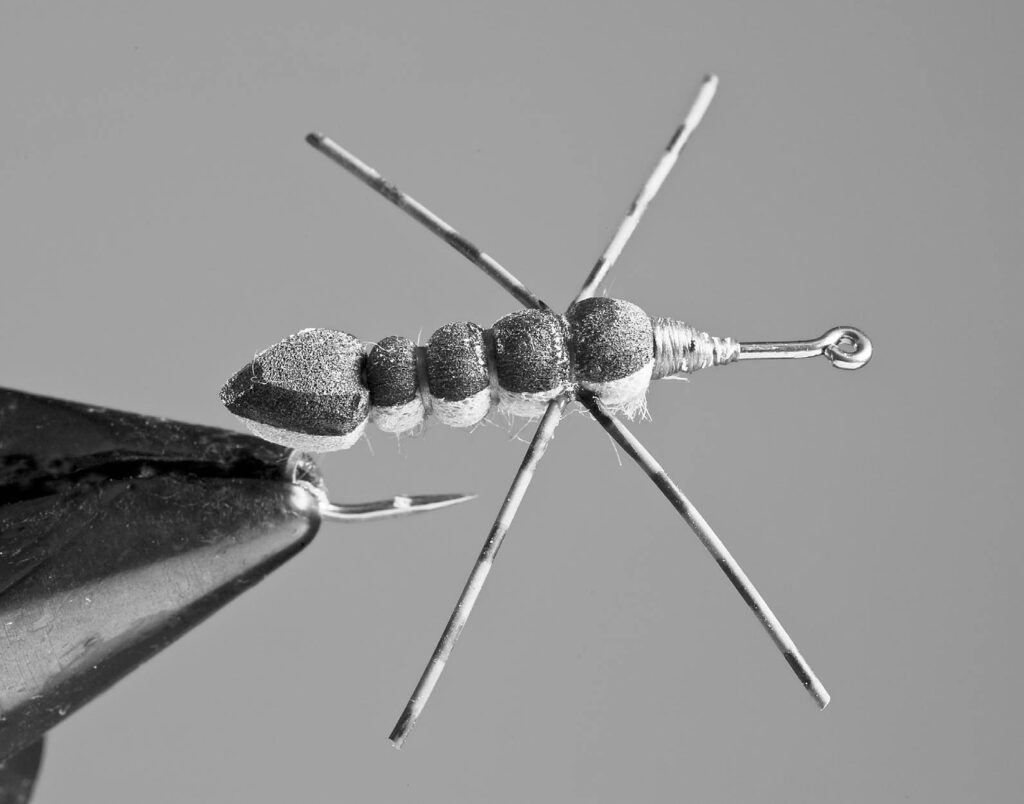
Step 6. With the front and rear of the foam tied down, the next step is to divide the body into four equal segments. Using a soft pencil, lightly mark three equally spaced tiedown spots on the black foam back. Remount the thread at the rearmost mark and form the first segment by wrapping five tight turns of thread at that point. Tie the thread off there as described in Step 5, trim it, and apply a drop of superglue. Repeat this process at each of the two remaining pencil marks, except leave the thread and bobbin hanging after completing the wraps for the segment nearest the front of the fly. Tie in rubber legs at this same point by placing the rubber-leg material against the sides of the fly and wrapping the legs down at their midpoint. This can be done either by doing one piece of leg material at a time or by doing both pieces at once. The total length of each piece of rubber-leg material should be one and one-third times the length of the hook shank, which will make each of the four resulting legs two-thirds of the length of the shank. Tie the thread off, again using either Half Hitches or a wide-angle whip finisher, trim the thread, and apply a small drop of superglue. Brush all of the legs rearward and use a rubber band or a small length of copper wire to keep them in this position so that they are out of the way for the rest of the steps.
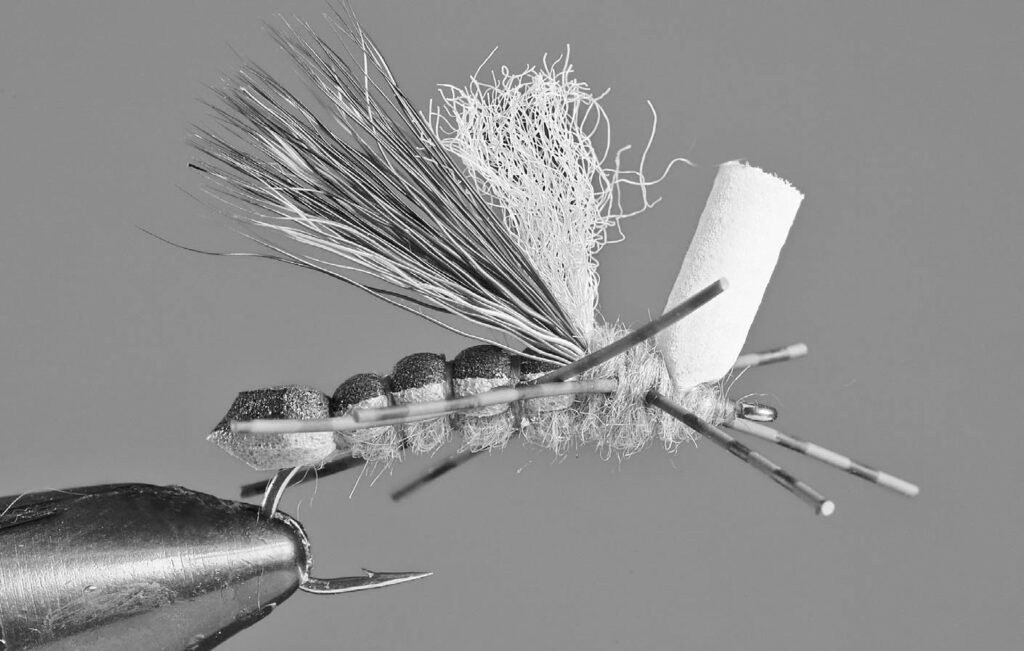
Step 7. Reattach the thread just behind the eye. Cut a piece of foam post material about one inch in length. Using the tips of your scissors, cut a one-eighth-inch-deep slice in the bottom center of one end of the post foam. Place the slice over the hook shank approximately two hook-eye lengths behind the eye, straddling the shank with the foam strip. Tie the strip down with figure-eight wraps over the front and back of the base post. This technique secures the post without excess bulk.
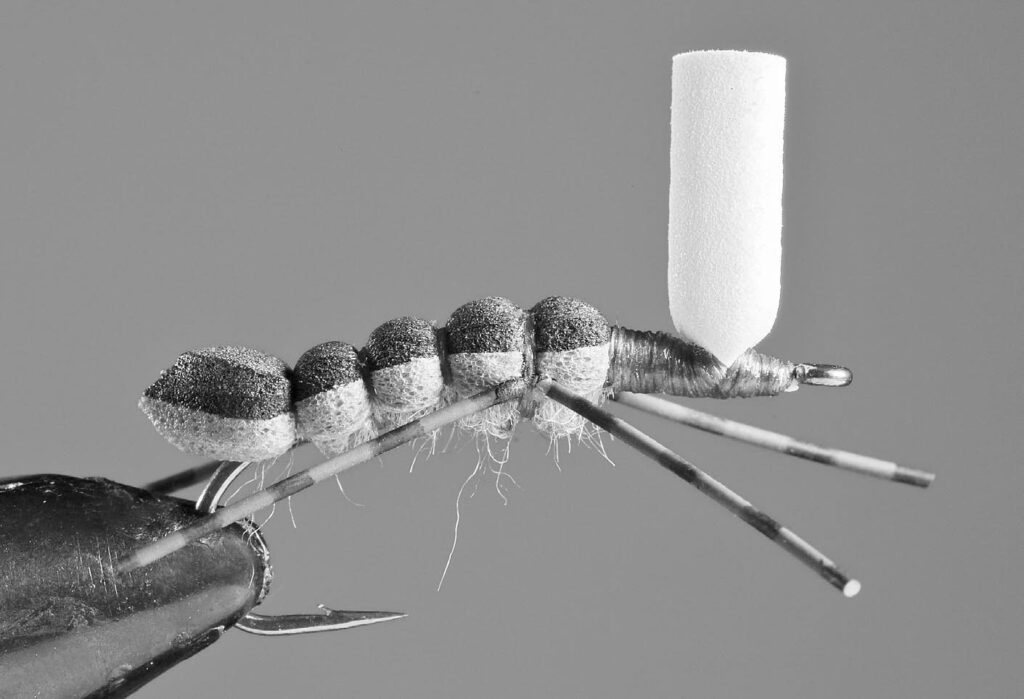
Step 8. Cut, clean, and stack a small bunch of moose body hair. Place the hair butts on top of the hook with the tips pointing to the rear. Measure the wing so that the tips extend equal to or slightly beyond the end of the foam body. With the thread at the front of the front body segment, apply several soft wraps around the hair butts to keep them on the top of the shank. Once the hair is positioned, wrap it down tightly and trim the hair butts. At the same point, tie in a segment of the fluorescent orange yarn, positioned in the center of the moose hair wing. Fold the forward-facing end of the yarn rearward, thereby doubling the bulk of the yarn, and trim it to about two-thirds the length of the hair wing. This completes both the wing and the overwing.
Step 9. Dub the space between the front of the wing and the parachute post, angling the wraps to ensure that the dubbing covers the underside below the post. Keeping a small amount of dubbing on the thread, tie in a pair of rubber legs immediately behind the parachute post, using the same technique as was used in Step 6. Leaving a bit of dubbing on the thread keeps the legs from folding inward too sharply, and they will stay at an approximate 45-degree angle to the shank. It also serves to hide the thread wraps. The legs should be the same length as the first set. Place a small bit of dubbing in front of the parachute post, keeping it about a hook-eye length behind the eye.
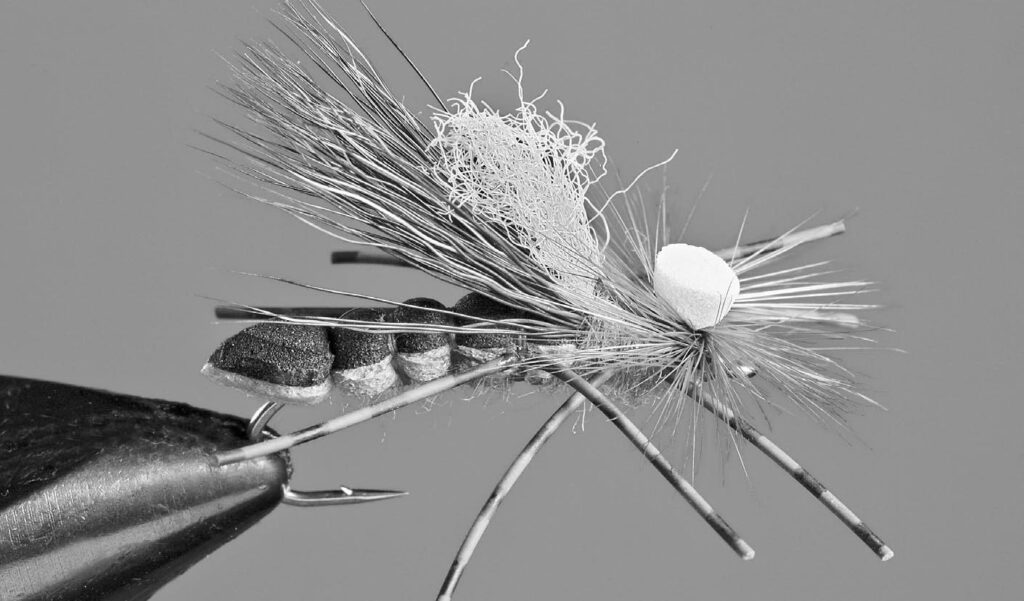
Step 10. Strip the webby fibers from the bases of two brown rooster hackles, sized appropriate to the hook. Trim the exposed quill, leaving just a small bit to tie down. Pair the two hackles together and tie them down immediately behind the hook eye with the glossy sides of the feathers facing up. Wrap the pair of hackles together clockwise around the parachute post six times. Try to keep the wraps as close to the base of the post as possible. Tie the hackle tips down just behind the hook eye with about four thread wraps, leaving your hackle pliers attached. Pull the tips tightly rearward, wrap over them with several thread wraps, and trim them.
Step 11. Form a small thread head and whip finish. Place a small drop of superglue on the thread head with your bodkin. Trim the parachute post down to a point just above the hackle wraps. Remove the rubber band or wire that holds the rear legs in place. Voila!! The fly is complete.
In appearance, Morgan’s fly bears a vague resemblance to my own pattern, Bill’s Big Fish Fly (see the September/October, 2009 issue of California Fly Fisher). In function, the two patterns are nearly identical — which, of course, is why I like Morgan’s pattern. I, for one, intend to tie up a bunch and use them this coming spring during the early stonefly hatches.
Correction: Please Note At the end of the “Gearhead” column in the previous issue ( January/February 2012), I reviewed a number of fly-tying products, one of which was the new U Series hooks by Umpqua Feather Merchants. In my review, I stated that these hooks come in packages of 25. This was an error — in fact, the hooks come in packages of 50, which is one of the features of this series that makes it an attractive option for fly tyers by significantly reducing the per-hook cost while maintaining a high level of quality.


")