California fly-fishing experiences frequently include the main ingredients for outstanding pictures — great scenery, special friends, and memorable events. Yet too often we fail to capture the experience as we recall it. Whether you have a simple point-and-shoot camera or a semiprofessional model, you can improve your results with a little practice and greater knowledge of key concepts of photography. In this article, I will focus on five topics: tools, subject matter, technique, editing, and outputting and sharing your images.
Tools: Cameras and Accessories
Your decision about specific brands and models of camera comes down to a matter of preference. However, there is a fundamental decision that precedes the brand-and-model decision, and that is which category of camera suits you best. The two main categories are digital compacts (sometimes called point-and-shoot cameras) and digital single-lens reflex (DSLR) cameras. The former are small and have a fixed lens, while the latter are larger and allow the use of interchangeable lenses. Both categories are capable of taking great photos. As a general rule, though, DSLRs take higher-quality photos, are more expensive, and have more features and manual controls that support creativity. They also produce better results in challenging lighting situations. You may also want to consider a new category labeled “mirrorless,” which is smaller and lighter than a DSLR and has a better sensor/image quality than a compact. Another intriguing option is the point-of-view action camera, which can be mounted on a helmet, moving car, or other object and, although light and small, can take excellent still and video images, underwater images, and time-lapse sequences. Finally, there are number of waterproof compacts available for people whose primary interest is underwater images or peace of mind while using their camera near water.
In terms of accessories, lenses are the first stop. Digital compacts come with a built-in lens whose quality and angle of view vary from camera to camera, while DSLRs allow you to change lenses. You should try to match your lens(es) to your shooting style and subject preferences. In general, wide angle lenses (28 millimeters and less) excel at showing big landscapes and unusual, even slightly distorted views of people and fish; telephotos (200 millimeters and more) are great for capturing subjects far off in the distance and details such as patterns on a fish’s body, insects, flowers, wildlife, and facial expressions.
Modern cameras and lenses have stabilization systems and other technology to help make images sharper. Nonetheless, a properly used tripod (or monopod) can make much sharper pictures, even when shooting with a lightweight compact. Compact and DSLR users who don’t own a waterproof camera may also want to consider a waterproof casing for underwater photography. For DSLR users with serious intent, other helpful accessories include polarizing filters for adding saturation to blue skies and/or reducing the glare and reflection from water and foliage (even when it’s not sunny); neutral-density (ND) filters for blocking light, which is often necessary to make the longer exposures required to get a silky look in moving water; and an external flash unit for adding light to underlit subjects and for filling in facial shadows in bright conditions. (While built-in flash units can be helpful, external units are normally more effective.)
Subjects: What to Photograph
This is simple — right? We create our best art from things that move us emotionally, and as fly fishers, we’re out there because of the people we fish with, the fish we’re trying to catch, and the natural environment that surrounds us. So that’s what we tend to photograph.
People, Their Gear … and Dogs
When photographing people, search for good subjects from head to toe. Obviously, a person’s eyes, mouth, and face provide the most important information, but feet and hands also illustrate what happens during a day of fishing. How about a booted foot standing on a gravel bar with some of the lake or stream in the background? Or hands gripping a rod handle, cradling a fly box, stretching a leader or fly line, cinching a fly, snipping a tippet, or managing a fly line?
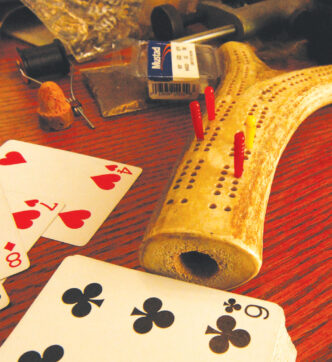
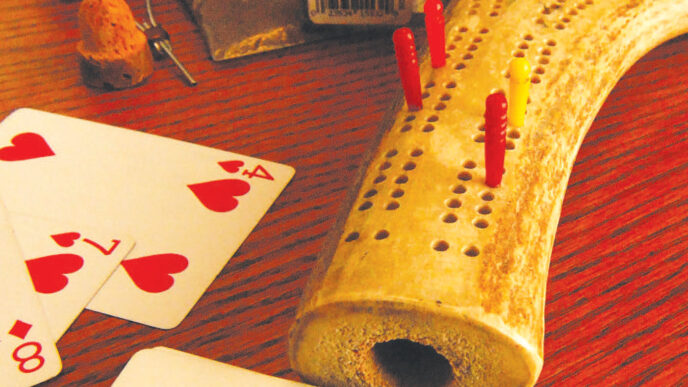
What about gear and clothing? Well, anytime people show up at a stream dressed like clowns, in baggy waders and funny hats, there must be great photo ops, right? More seriously, our accessories often express impressive craftsmanship, beautiful patterns and designs, interesting textures, a sense of mystery and curiosity, and more. And there are so many pieces and parts, each individually and sometime in groups, offering potential subject matter. Think big, as in boats, float tubes, rods, and reels, and small, as in fly boxes, nippers, hemostats, drying patches, coiled fly lines, and boot laces, among other things. And, of course, there are the hats. Shoot them from the front, back, and side and watch for interesting things hanging on them, such as slogans or flies.
Stored gear can tell a lot about an overall experience. Think about waders and boots drying around the campfire or hanging over a branch. Or what about rods or boots lined up, either neatly or randomly, outside the cabin or in a campground?
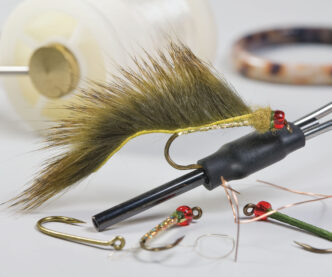
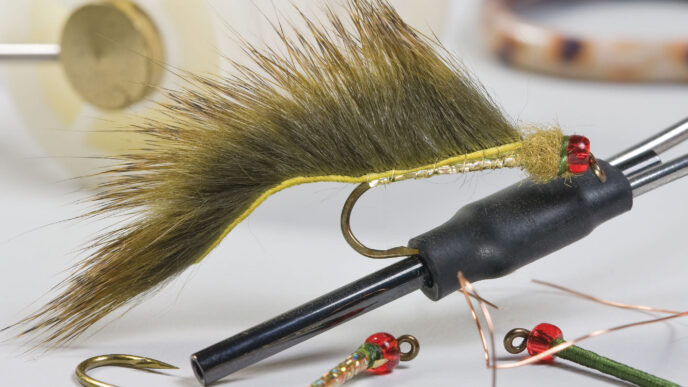
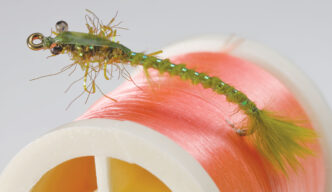
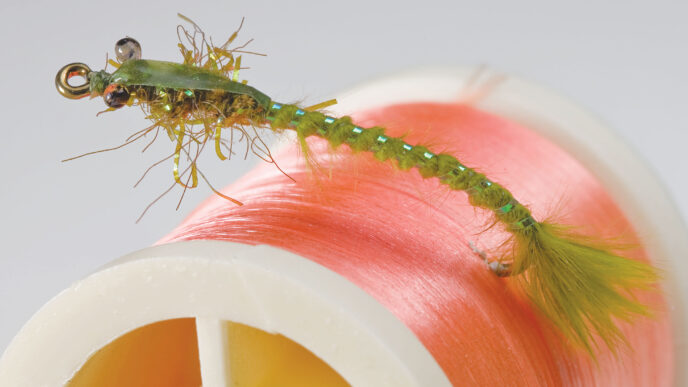
Flies? The inside of a fly box can be a rich source — look for visual patterns based on color, shape, and size. Outside the box, try isolating a single fly resting in a hatband, being tied to the tippet, or being held aloft and examined against a blue sky. For action shots, possibilities include playing or landing a fish, straining under a bent rod, casting with the fly line against a plain/contrasting background, creeping along a bank, sizing up the water, unraveling a fouled leader, pouring water over one’s head on a hot day, pointing at something, enjoying a nap or lunch break along the water, and crossing the river with wading staff propped at a visually pleasing angle. And always be alert for interesting interactions between fly fishers, including celebrating a triumph, pointing to a good spot, evaluating a fly box, and playing the role of instructor or student. Finally, don’t forget about humor — remember, this is a hobby that involves occasionally falling in the water, kissing fish, sporting silly license plates and bumper stickers, chasing hooked fish downstream, and other forms of foolishness.
Fishing dogs are an important part of the experience for many of us, too. Typically, dogs are very interested observers and can provide some poignant, funny, or telling moments.
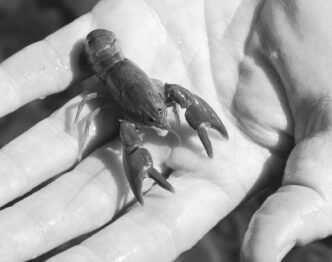
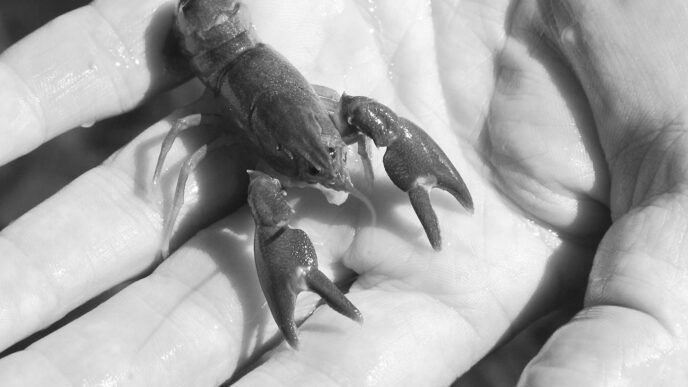
Fish
We fisher-photographers tend to be there for the important “hero shots,” but there are so many other opportunities for which we should ready. Once a fish is hooked, try for pictures of the bent rod, splashing and jumping activity (by the fish, but also by the angler), someone reaching for the fish with a net, a curved fish entering the net or being held aloft in the net, and underwater shots of fish and fly. Once the fish is landed, possibilities include the fish being carefully reoxygenated or released or swimming away.
When photographing the fish or the angler and fish together, remember that straight shots are boring and angles aren’t. Also, bear in mind that you don’t always have to take full-body shots. Showing the whole fish is important if it’s large and you want to establish its size. Otherwise, think about framing a portion of the fish — for example, an eye, its body, jawline, or mouth with the fly pinned to the corner. One pose I like is with the upper half of the fish’s body above water and the lower half submerged.
“Less is more” is often true of shots of the angler, as well. Make your images more dynamic by including only a portion of the person, such as a forearm entering the frame at an interesting angle and gripping the fish in hand.
Nature
Water, Water, Water — On rivers, look for sinewy curves, the silky motion of moving water (which normally requires a tripod and an exposure of 0.5 seconds or more), reflections, powerful white water, waterfalls, and distinctive boulders or groups thereof. On still water, be alert for color, interesting patterns or reflections (including foam lines and waves), and the point where the land meets the water.
Insects and Animals — Aquatic and nonaquatic insects can be difficult, but superb subjects in all their phases. Good images require planning, patience, a little luck, a stable platform, and a lens capable of focusing close up. The easiest phase to capture is usually the shucks left on rocks by emerged insects. Perhaps, the most dramatic is when you’re fortunate enough to run into a swarm of hatching or mating insects. Also, you’ll often encounter interesting nonaquatic insects and other fauna. Watch for aquatic birds and big raptors, especially if a raptor is in a fishing/hunting pose or with a victim, along with deer, snakes, and larger animals.
Trees, Flowers, and Rocks — Look for close-ups of individual flowers or leaves or longer views of attractive groupings of flowers or trees. Also, use trees, flowers, and rocks as foreground or background elements for shots of people fishing and the beautiful waters they’re working. Pay attention to California’s seasonal highlights, including green hills, lupines, poppies, and redbud trees in the spring; high-altitude wildflowers in the summer; deciduous trees and Indian Rhubarb in the fall; and bare trees in the winter — their structure can be elegant, intriguing, and provocative.
Time of Day, Mood, and Seasons — At times, the best fishing and photography overlap, especially the last hour of summer days. In these cases, you generally have to choose one or the other. I find it helpful to preplan and commit to times when I will photograph — although I always reserve the right to be flexible and fish. Near dawn and dusk, the opportunities are so rich that photographers refer to this period as the “magic hour.” Sunrises and sunsets are obvious subjects, but other prospects include placid waters, strong silhouettes, and active wildlife. In addition, if you’ve never shot during the 30-minute window before and after sunrise and sunset, try stabilizing your camera for a long exposure and watch for intriguing, surprising, and otherworldly images to emerge. Mood-driven photos can be occur when it’s foggy, stormy, snowy, or windy. Cloud-ridden canyons and dripping trees seem a natural setting for steelheaders. Finally, don’t hibernate in the winter — California winters bring soft and flattering light and dramatic skies.
Technique: Tips for Making Your Pictures Better
OK, you have some fresh ideas about what to shoot, and now you want to make the images better, which means taking photos with strong compositions, dynamic perspectives, good use of light, and since fish and people are central to our experience, presenting those subjects well.
Composition
Composition is defined by what you put in the frame (and equally by what you consciously choose to leave out) and where you place things in it. A strong composition enables the viewer to identify the main subject quickly and evokes an appropriate emotional response, ranging from relaxed, for a “pretty picture,” to uncomfortable, for a challenging subject.
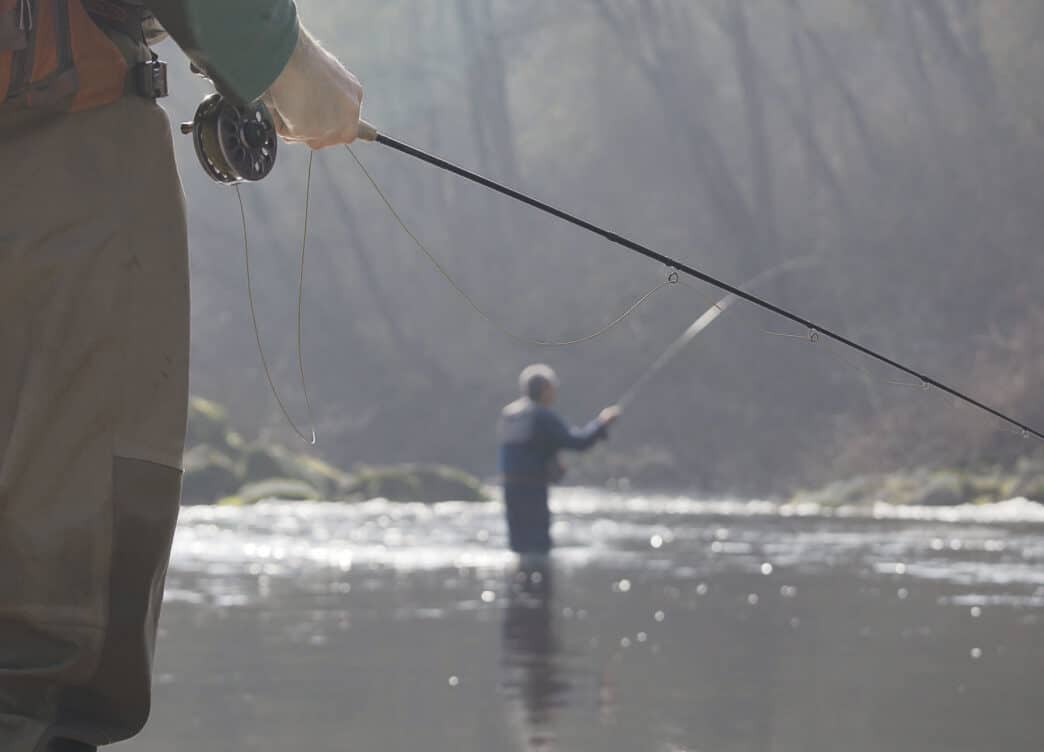
To simplify compositions and make the main subject stand out, try these tactics. Frame your picture with a simple background, such as a fish against a plain sky, an angler shot from a high angle against a clean background of water, or an individual or group portrait with, say, an unbroken stand of green flora behind the subject or subjects. Use silhouettes to hide distracting details (also to feature an attractive shape). Get closer/tighter to the subject (and then even a little closer). Shoot from above or below the subject. Or put the main subject in focus and the background out of focus by using a long lens and/or a narrow aperture, such as f4.0. An example of this principle is to feature a sharply focused fly fisher in the foreground and out-of-focus fly fisher(s) in the background. (See Example 1 on the previous page.)
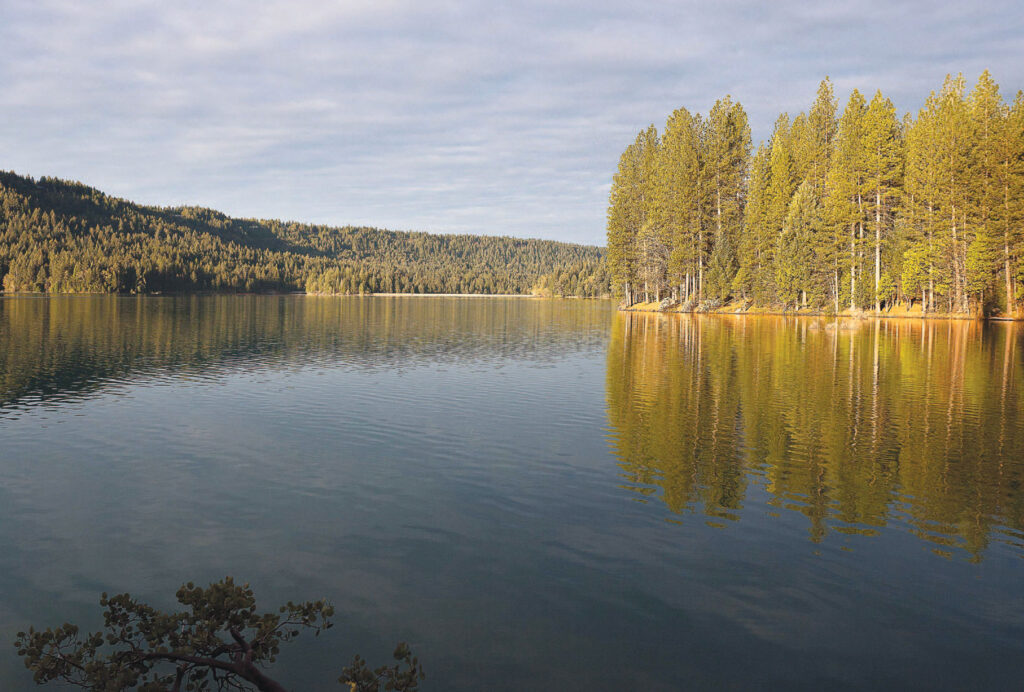
Apply the Rule of Thirds. Imagine a tic-tac-toe grid with nine squares. Strong compositions tend to result from placing the main subject in the frame at one of the four intersections of the imaginary grid lines. A corollary to the Rule of Thirds when your subject is active (for example, casting or walking) is to place her at the appropriate intersection so she is “walking into” the frame, rather than out of it. A second corollary applies when you have different foreground and background elements (for example, land and sky), in which case one of the elements should normally occupy approximately two-thirds of the space and the other one-third. (See the early morning photo of Scotts Flat Lake in Example 2.)
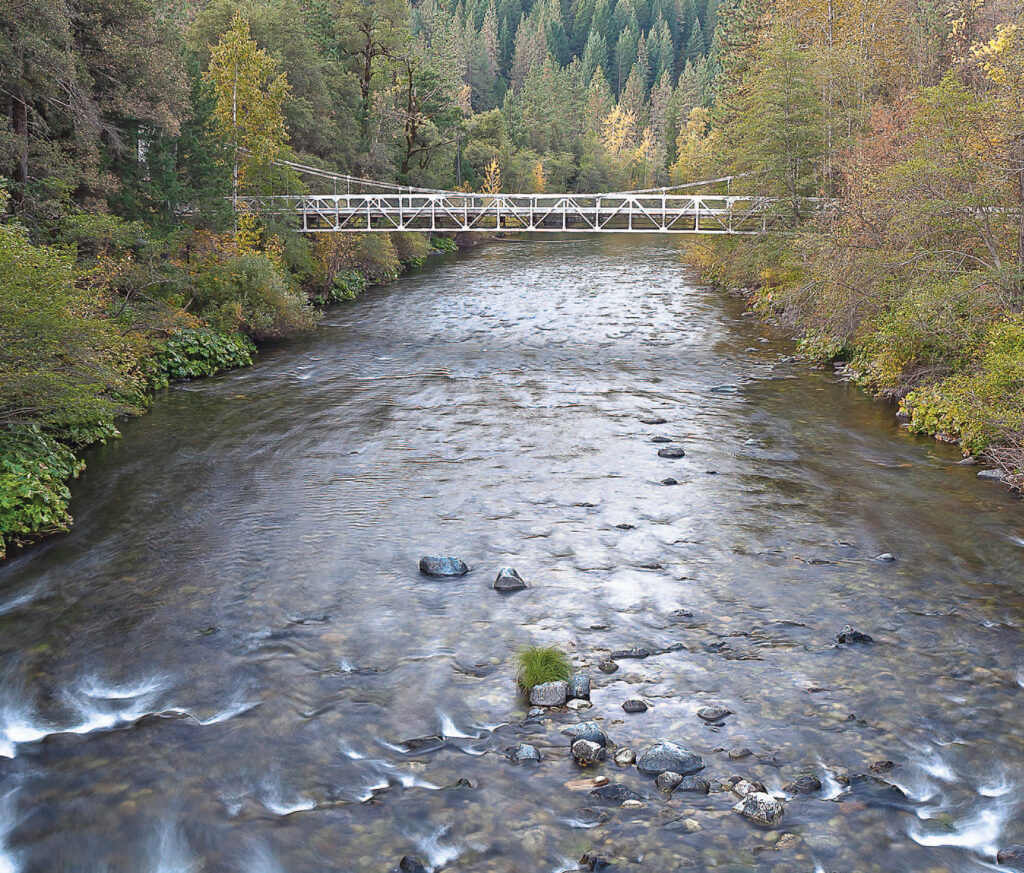
Our eyes and brains instinctively respond well to certain organizational concepts. Take advantage of these principles by composing with S-shaped curves, lines that lead into a picture (see the upper Sacramento photo in Example 3 on the next page), circles and semicircles (which suggest unity), strong colors, and groupings of a certain size. Groupings of three tend to be pleasing, whereas groupings of four seem more martial and less relaxing. Also, try to organize your compositions around angles, rather than straight lines (horizons, excepted), unless you’re specifically trying to emphasize order, patterns, or uniformity and abundance.
Watch the edges of the frame carefully — avoid distractions such as a small twig, a random body part, or light-colored or shiny objects. To the extent possible, try to place dark things on the edges to hold the viewers’ eyes inside the frame. Natural picture frames, such as a canopy of beautifully shaped leaves in silhouette, help accomplish that purpose.
Perspective/Viewpoint
Take risks by choosing perspectives that deviate from the normal straight-on documentary style. Shoot from a high vantage point looking down or from a low vantage point looking up or ahead. (Yes, you can even get on your belly or back.) Use an extremely wide-angle lens to emphasize scale and space or an extreme telephoto to emphasize detail and to separate the foreground from the background. Show scale by framing small things against big ones and vice versa. Time permitting, move around the subject and test different perspectives and angles. This will give you options later in terms of different compositions, backgrounds, and lighting.
Light (Direction, Color, Quality)
The essence of a photograph comes down to subject matter and lighting, the latter of which is defined by the direction, color, and quality of the light. Direction is normally described based on the location of the sun or other light source relative to the subject. Front lighting, the least dramatic, but easiest to control, puts light on the entire scene and displays colors well. Backlighting is good for emphasizing shapes. (Think silhouettes, at the extreme.) Side lighting emphasizes texture, as does lighting from above and below, and conveys a sense of depth, which can be great for landscapes.
In terms of color, warm outdoor light, which is found early and late in the day, appears red and orange and can contribute drama to a scene and a soft, pleasing look to a portrait. Cold outdoor light found near midday appears blue, especially in the shadows, and can often be improved by adjusting the color balance settings on your camera or in the editing process.

The quality of the light describes it hardness (direct) or softness (diffuse). Soft light created by overcast, fog, or the sun below the horizon can be flattering for portraits, foliage, and flowers because of the absence of shadows. Hard light creates shadows and can be useful when trying to express depth.
Presenting People and Fish
Pick the right place to focus, which in most cases for people will be the eyes, sunglasses removed, and, if possible, looking slightly upward, with the center of the eyes toward the corners.
Put your human subjects in a relaxing position, for example, sitting on a rock, crouching, pointing with a finger or rod at something interesting. Don’t pose the subject with arms hanging straight against the side of the body.
Avoid cutting off human subjects in the middle of body parts. On the other hand, don’t be afraid to place them in partial profile “coming into the picture” from the right or left edge of the frame.
Think about motion — accentuate motion with long shutter speeds and freeze motion with short shutter speeds.
Use your flash routinely to fill in shadows when you have to shoot under high-contrast lighting conditions.
Keep clicking — take multiple photos to improve the odds of getting the best expressions and poses. Try to sneak in some shots before your subject is ready, as well as after the “official shot.”
Flatter your human subjects — aim up if you want to suggest power; aim slightly down to avoid double chins and reduce heavy body types.
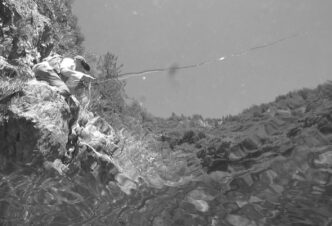
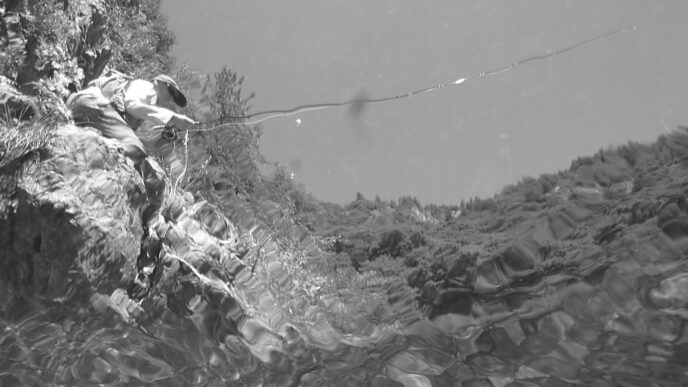
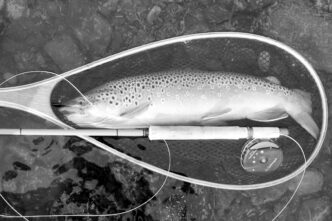
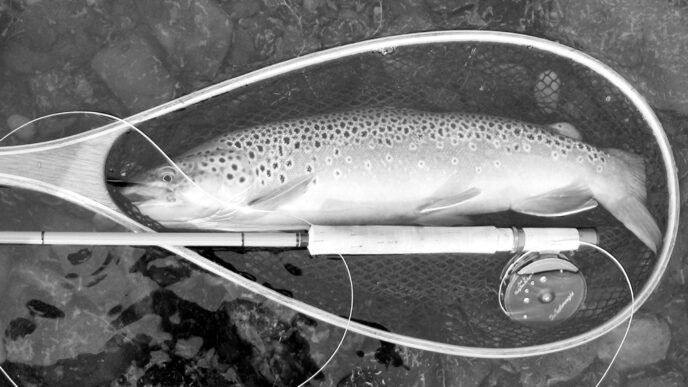
When photographing a fish, be sure not to hide it — have the fly fisher grip the fish just above the tail, supporting it gently underneath the middle, and remember, look for simple backgrounds and good angles. For underwater photos, where framing involves some guesswork and luck, take several shots, disable the flash, and experiment with different mode settings. (Friends tell me to try Sports mode.)
Most of us find it very challenging, but often necessary, to take photos of our own fish. Fellow photographer Kirston Koths excels at these images and gives this advice: “Take that compact camera out of your readily accessible pocket, set it to ‘Macro’ for good close-up performance, and then take a picture with your camera (or the fish) held at arm’s length.
“Compositions that show both the fish and the water from which it was taken make more interesting photos. Including a reel, net, or hand also adds interest and provides a sense of scale. Consider moving a few feet to a location with cleaner water or a more interesting background.
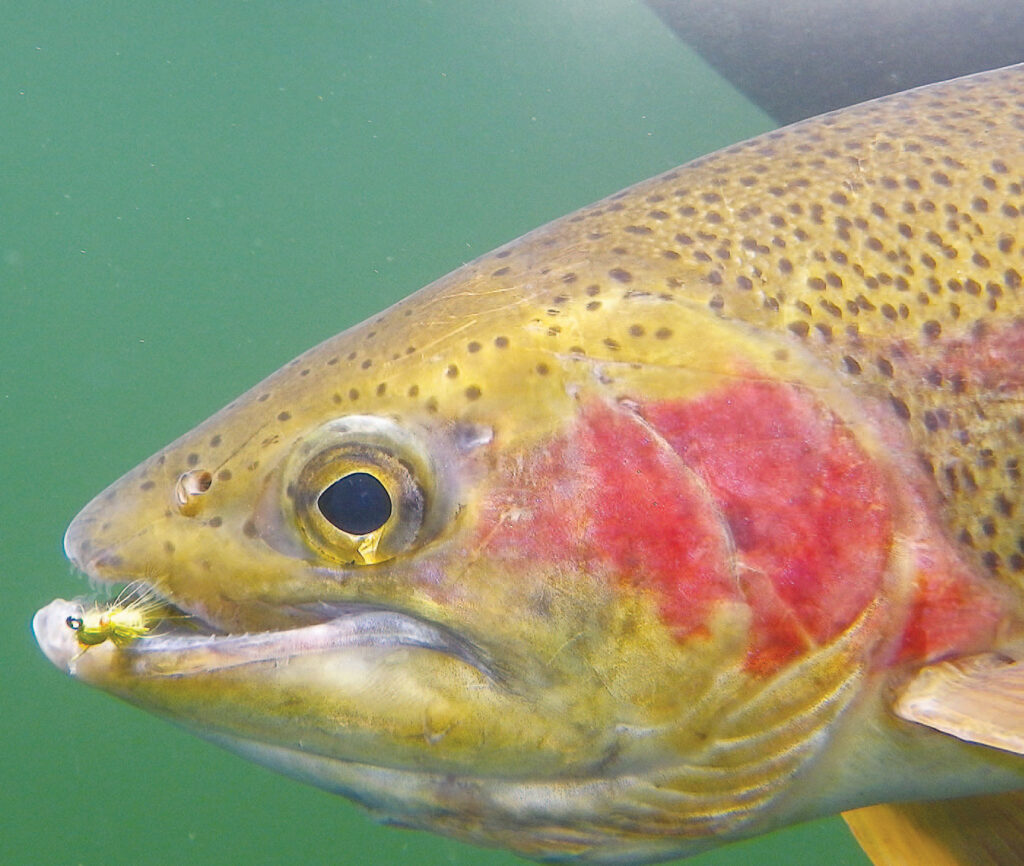
“If your camera is waterproof, try shooting close to the water’s surface, with the fish half-submerged, or try shooting an underwater close-up. [See Example 4, Kirston’s underwater shot at Manzanita Lake.] Leave the fly in the fish’s mouth as a record of what it ate (and to keep it from escaping before the shot is taken).
“Just remember that the fish is exhausted, and its survival is more important than any photograph. Wet your hands before handling the fish, don’t put it on dry rocks or gravel, and try to keep it underwater in your net while you set up for the shot. If you don’t get a perfect photo after a few 10-second out-of-the-water attempts, release the fish and go catch another.”
Editing and Output
Most images can be improved with some editing, either because of things you couldn’t have avoided at the moment (such as bad light) or failed to avoid (such as a distracting branch at the edge of the frame). Upon taking the photo, most capture formats such as JPEG run programs that will evaluate and (usually) improve your image, mainly through adjustments to color, contrast, and sharpness. Beyond that, you can improve your photos with editing software once they’ve been loaded on your computer or smartphone. Some software is free, including the product that probably came bundled with your camera or computer browser, and open-source software is available for downloading from the Internet. (GIMP has a great reputation.) Photo-editing software that you can purchase ranges from about $20 to $600 and includes Adobe’s Lightroom, Photoshop, and Photoshop Elements and Apple’s iPhoto and Aperture, among others. There’s also a category of specialized programs called plug-ins that complement the general-purpose editing programs and support subsets of the creative and technical process, such as sharpening, applying custom filters, and doing black-and-white processing.
Editing
This topic is too big to cover in detail. In general, editing begins with making global adjustments, especially straightening horizons, cropping, adjusting color, tone, contrast, and saturation, and sharpening. Then, if your desire, skills, and software package support it, you can make local adjustments on specific parts of the image. On the next page is an example of how editing can improve a photo. I start with an underexposed image of a friend fishing a lake at sunset, followed by a screenshot of the edits I applied in Adobe’s Lightroom 3 RAW editor, and then the final image, which retains the drama of the sunset while bringing out some of the details in the angler and surrounding forest.
Outputting Your Images
Not so long ago, the what to do with your fishing photos was pretty straightforward. You went fishing, came home, dropped your film at the photo store, picked up your prints, showed them to your spouse or fishing buddies, and put them in a photo album — or perhaps in a shoe box. With the advent of digital photography, however, there are many new possibilities for viewing and sharing your images.
On the Web itself, you can display images by creating a Web gallery, either by using a template-driven photo-hosting site such as SmugMug or by building a customized site yourself, again with the aid of templates supplied by a hosting company. At the other end of the spectrum, you can easily share your digital images as attachments to e-mail or smartphone messages. One disadvantage of this easy option is that you are limited to sending relatively small files, restricting the quality or number of images you can send. The file-size problem is solved by posting on social media sites or a specialized photo-sharing site. These specialized sites, such as Flickr, Kodak Gallery, and Snapfish, frequently offer related services such as photo editing, image storage, and printing, and they allow you to send an e-mail message with a hot link that will take recipients directly to your online album.
Another option, especially for important excursions, is to create a photo book, which is a bound album that you can lay out using a vendor’s built-in templates. The vendor then prints and ships the book to you and your friends. To create a book that tells a great story, make an inventory of shots you will want to use and keep a checklist as your excursion progresses.
Other creative ways to output digital images include calendars, note cards, T-shirts and other clothing items, and even drinking mugs. Generally, you can order these items from the same vendors that offer prints or hosting services.

Study and Practice
These suggestions should help make you a better fisher-photographer, but like any enterprise, photography can best be learned by study and practice. Study and observe good photographers and photography. In the fly-fishing world, outstanding California photographers include Val Atkinson, Jeff Bright, Andy Guibord, Rick Martin, Andrew Maurer, Ken Morrish, and John Sherman. Outside our state, check out Barry and Cathy Beck, Brian Grossenbacher, and Brian O’Keefe, among others. Good photography can be found in many fly fishing print magazines and online publications, the latter category including Catch Magazine and MidCurrent Fly Fishing News. Finally, one book I recommend for the pictures (the content is great, too) is Bill Sunderland’s Fly Fishing the Sierra Nevada (revised edition). The photos by Pulitzer Prize–winning photographer Rick Martin superbly demonstrate many of the concepts I have described in this article. As you study these sources, bear in mind my suggestions about subject matter, composition, light, perspective, and so on and try to start discerning what makes a successful photo, why it’s successful, and what decisions the photographer made to ensure its success.
Read the manuals for your equipment and experiment with taking your camera settings off “automatic.” Be sure to learn about focusing, shutter speed, aperture (lens opening), fill flash, and the capabilities of different modes (Sports, Night, Macro, Panorama, and so on). Many of these tools are available on compact cameras as well as on DSLRs.
Digital images are practically free, and that means that you can (and should) experiment. Try some side-by-side comparisons — for example, try shooting the same subject with a short shutter speed versus a long shutter speed; with a wide depth of field versus a narrow one; with an aperture-priority setting versus a shutter priority setting; with a high ISO (film speed) versus a low ISO; with the foreground in focus and background out of focus and vice versa. Then evaluate the photos side by side on the largest monitor you have and look for cause-and-effect relationships that you can apply in the field.
Our fly-fishing lives are filled with transitions. As we become more curious and more skilled, we often migrate from fishing for trout to targeting other species, from moving to still water, and from fresh to salt water. These journeys usually involve some sacrifice and pain, but eventually add pleasure to our fly-fishing lives. A similar investment of time and effort in expanding and developing your photographic skills will enable you to catch better fly-fishing images and enrich your fly fishing experiences.
Assistance on the Web
Many online resources address topics discussed here. For starters, try the websites listed below. A search engine such as Google can also be of help for research and problem-solving.
- For camera and gear reviews: http://reviews.cnet.com/digital-cameras.
- For a list of websites that will store and allow you to share your photos: http://www.1stwebdesigner.com/design/photo-sharing-websites-online.
- For a list of (mostly) free photo-editing software options: http://www.computerhope.com/issues/ch000760.htm.
- For those who have need to e-mail large files of photos (or videos) up to 100 megabytes, check out Adobe’s free SendNow service.
- Two areas that I was unable to cover but that in my opinion can significantly help committed photographers are the RAW capture and edit format and the use of histograms, especially in the editing phase. To explore RAW in more detail, see http://en.wikipedia.org/wiki/Raw_image_format. To learn more about the use of histograms, start with http://en.wikipedia.org/wiki/Image_histogram.
Robert Marshak