

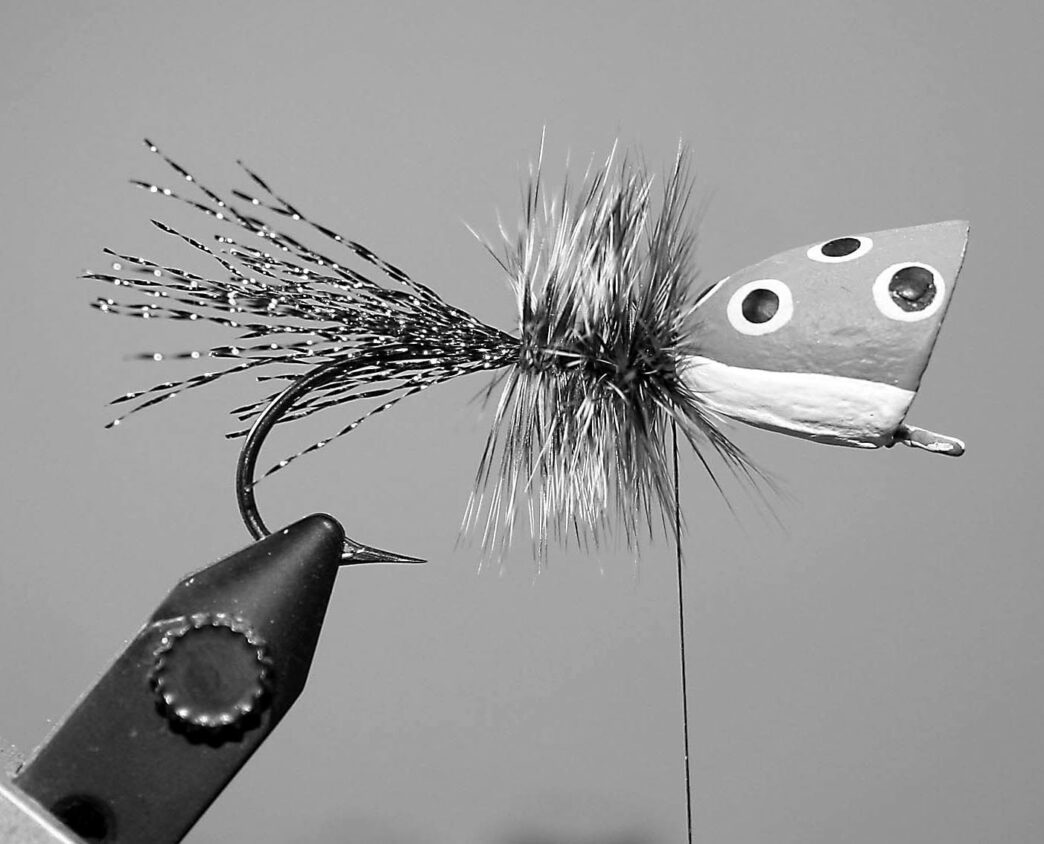
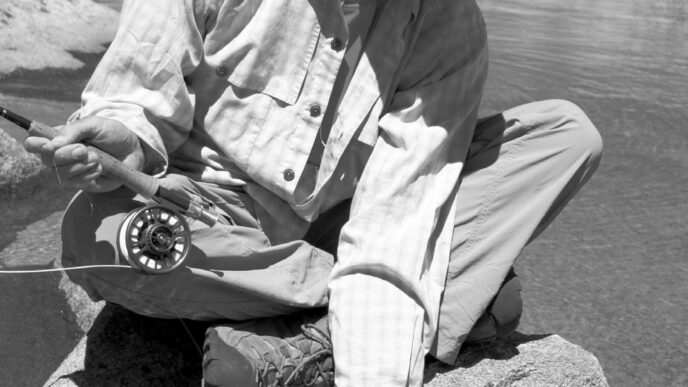
Poppers are the “dry flies” of the bass world. For fly fishers, few things beat the rush one gets when a bass intercepts a popper and inhales it with a commotion that’s equivalent to someone throwing a sack of cement into the water. Of course, with winter now upon us, that kind of action is difficult to find. But although you might be cooped up in your home, this is the perfect season to begin filling fly boxes with poppers. The warm, sun-filled days of spring, with their promise of top-water action for feisty bass, are only a few months away.
Bass poppers are fairly simple flies, but unlike trout flies or even bass streamers, both of which primarily involve winding fur and feathers on to a hook, poppers call for crafting large floating bodies out of such materials as cork, balsa, and foam. None of these materials are hard to find, and I’ll talk more about them and how to build durable popper bodies in the next “Warmwater Angler” column. However, these materials need to be worked using tools and techniques that you don’t need when tying an Elk-Hair Caddis or Pheasant-Tail Nymph.
Sandpaper is where you start when assembling the tools needed specifically for tying bass poppers. I’ve made great use of the emery boards that my wife buys for her fingernails. These have two different grits of sanding surface, and are easy to find and inexpensive. If you want to get really fancy or want to create many dozens of popper bodies, you can invest a few dollars in a Dremel tool kit. This small electric grinder comes with a large assortment of sanding discs, grinding tools, and other goodies for shaping a variety of materials. I tie a lot of bass poppers, so I actually have two grinders: a Dremel and a Chinese knock-off from Harbor Freight, which allows me to have one in the garage with my other tools and one at my tying bench.
Another useful tool is a razor or Xacto knife for cutting a slot in the belly of the popper where the hook will be placed. A thin-bladed, hobby razor saw is great for cutting the belly slot in hard foam popper bodies. I also keep handy a short length of a fine-toothed hacksaw blade with a bit of duct tape wrapped around the blade as a handle. The slightly thicker saw cut that I get with this works wonders for mounting stout hook shanks in big popper bodies.
If you plan on tying a lot of poppers, consider building small jigs that will hold the popper body so you get the same cut for the hook every time. A useful reference book for this work is Bug Making by C. Boyd Pfeiffer (Lyons and Burford, 1993).
Of course, once you’ve cut the slot and fitted the hook, you have to add glue to secure the hook. I’ve pretty much settled on ordinary three-minute epoxy for my popper building. It works well with closed-cell foam bodies, as well as with cork or balsa bodies.
One artist with cork, feathers, and paint is Cliff Hamilton. A fly tyer from Orange County, Cliff ties a beautiful replica of the locally famous Bass Poison popper created by the late Hank Neverka. He told me some years ago that he favors cyanoacrylate “super glue,” rather than epoxy, to glue the cork body on the hook. To fill up the slot in the bottom of the popper body after the hook is glued in, Cliff uses either a quality wood-filler material or the thicker type of super glue known as Zap-a-Gap.)
Also consider using the specialized hooks that make your poppers less likely to twist in the popper body. A number of hook manufacturers, including TMC, Eagle Claw, and Mustad, fabricate and sell kinked-shank hooks.
Mustad 37187 stinger hooks are excellent for creating bass bugs, but they don’t have a kinked shank. Until a few years ago, Mustad made a kinked-shank version called the 37190, but it has been discontinued. There are other makes of stinger designs, but most don’t have quite the gape of a Mustad stinger. However, you can make a kinked-shank hook out of a straight-shank hook. A pair of needlenose pliers and some brute force will do the job, but it’s a lot easier just to wrap the shank with thread or fine copper wire before installing a cork body. This gives the epoxy something to grip. You can also roughen the shank with a bit of sandpaper, and that helps, as well. Still, a hook with a kinked shank is preferable for keeping the hook properly aligned in the body.
For large poppers, such as those used for saltwater species, Cliff Hamilton recommends soldering on a rib or something similar that will hold the body upright on the shank, because it is far too difficult to try to bend saltwater hooks to create a kinked shank. Small strips cut from a tin or aluminum can work quite well for this purpose. You can solder a tin or steel rib in place, whereas an aluminum rib will need to be epoxied.

Other tools are at least helpful and sometimes even necessary. Epoxy, once mixed, quickly hardens, so I try to get at least half a dozen bodies ready to install on hooks before mixing just enough epoxy to do the job and applying it to all of the bodies at the same time. At that point, keeping the epoxy from running or sagging becomes a necessity. I have a homemade drying rack created from an old rotisserie motor and a Styrofoam disc obtained at a craft store. I can hang about a dozen drying poppers on it, and the slow rotation keeps the epoxy (and paint, too) from running or sagging. You can buy similar rotators at fly shops.
As you’re perhaps now suspecting, an assembly line is the basic approach to building bass poppers. First do whatever you need to do to get the hooks ready, then shape or cut bodies for at least half a dozen poppers. Bring the two together and glue, then set them aside on the rotating drying rack to cure while you are getting the next six together. Repeat until you have a dozen or two (or ten) ready for painting.
Yes, painting — another thing you don’t do with trout flies. Lacquer paints are one option, but on poppers with foam bodies, the chemicals in lacquer can interact with the foam and destroy your handiwork. I prefer acrylic paints, which are easy to clean with water and when dry are quite hardy. I often use flat-finish colors, then cover the body of the popper with a coat of clear gloss paint. Actually, like much of what we do, it probably doesn’t matter a hoot to the fish, but poppers with a shiny finish look better to our peers.
Recently, while thumbing through a magazine article by Bob Clouser on building poppers, I noticed that he recommended using Flex-Coat, a clear epoxy rod finish, for this final coat. It works quite well, but does have a long drying time, so be prepared to keep your newly coated popper bodies on the rotating drying rack for at least several hours to avoid runs in the finish.
You can paint great-looking bass bugs and poppers with a brush, but if you want to get fancy, a small spray gun or an artist’s airbrush is great for making scale patterns on the back and sides of a popper. A bit of plastic window screen material can serve as the mask for the scales. Some fly tyers recommend using old scraps of lace curtains for this purpose, but when was the last time you saw lace curtains?
I like to paint my poppers so I can see the face of the bug in low light. This calls for colors such as bright red, yellow, or white. The body of any popper, conversely, should have an imitative appearance. For slender pencil poppers, think about scale patterns with a dark back, slightly lighter sides, and a white or silver belly. This is the color scheme that nature has selected for most small fish. Amphibians such as frogs should also be darker on top and lighter on the bottom (I like yellow on the bottom and any kind of green and/or brown for the top).
After the base body coats are applied, you can dress up the popper with spots, dots, half moons, or any other design you like. You can easily paint on eyes. The best way is to dip wood dowels or the heads of finishing nails into the color and then apply a single dot just where you want it. A couple of sizes of these “dot makers” will give you an eye and a pupil in the right proportions.
Of course, you can just skip the painting and use the stick-on and glue-on eyes sold by fly shops. I also use tiny glue-on bulged doll eyes from craft stores for some of my bass poppers (preferred sizes are 2 millimeter and 3 millimeter). I like them because they add a bit of extra floatation and also a tiny amount of movement that the fish might see.
To finish the fly, consider adding hackle, tails, and, if you choose, legs. These are materials that even a trout-fly tyer is likely to have. One of the nice things about popper building, though, is that you don’t need expensive hackle. Hen hackle dyed in various colors and in natural shades is about all you really need. I like to add a bit of Flashabou or Krystal Flash in the tail, especially on pencil poppers, which are colored to look like tiny fish. On more traditional bass-bug designs, you can add flared tails of hen and a wrapped collar of cheap saddle hackle, a few strands of rubber legs, and you have a bass popper with built-in action. Don’t overdo tails, though. One of the all-time best popping bug designs is Lefty’s Bug, a popper for smallmouth bass that barely has a tail. So head for the garage, the craft store, the paint shop, the home center, the hobby shop, and wherever you keep the tools you already have and haul them to your tying bench. As spring nears, you’ll be ready to tie the hard and soft-bodied poppers that I’ll discuss in the next issue.


")