
A few years ago, while fishing the Pit River with my friend Chris Parsons, he and I were talking about short-line nymphing. Chris, who, like me, is a guide, remarked that short-lining is about as close as you can get to pure fly fishing. I didn’t think much about that little gem at the time, but its seed took root somewhere in my psyche. Now and again it pops to the forefront of my consciousness, usually after I catch a big fish, causing me to try to parse its meaning. I think perhaps I’ve finally come to terms with it.
Short-lining pits the angler and his or her rig against the trout in a very direct manner in an environment foreign to the angler, but home to the trout, thereby demanding that the angler know exactly where the sunken flies are during the drift and exactly what they are doing, all without the benefit of a floating indicator. To sum this gestalt up, I’ll use another of Chris’s aphorisms: The angler must learn to “be the fly.” I can’t express it any better than that.
Catching trout that are feeding subsurface seems to be a mystery and a source of frustration for many anglers. I have heard this frustration expressed by my guiding clients many times. My usual response is that it’s just another skill to be learned — indeed, one that must be learned, since fish feed subsurface, we’re told, 90 percent of the time. I make a point of telling them that there are no absolutes, and a lot of nymphing options are available, including floating indicators with a dead-drift approach — mostly a passive system, once the drift is set up. I also explain that there are active systems that don’t rely on a floating indicator in which the angler sets the drift up and controls it by various means other than mending the line.
My favorite among active nymphing systems is the short-line technique. For now, think of short-line nymphing as a method that uses a heavy rig lobbed upstream with only two to three feet of fly line outside the top guide and a drift that maintains a tight connection between the rod tip and the flies. More detail on the elements of this system is provided below.
Just as there are many approaches to nymphing, there are a number of short-line nymphing concepts, each of which has bred sundry variants and nuances. (See, for example, Andrew Harris’s excellent article “Short-Line Nymphing” in the May/June 2010 issue of California Fly Fisher). All of these can be effective when practiced by a competent nymph fly fisher. As diverse as they may seem, they share a common objective that, for me, at least, is the holy grail of successful nymph fishing: consistent and reliable visual take detection through communication between the angler and the flies. “Visual” is the operative term in this paradigm; the angler who waits for the “feel” of the take is missing most eaters.
So why reprise Andrew Harris’s article when the theme — short-line nymphing — is the same? The short answer is that I have a slightly different perspective on the subject, having taught it for over twenty years. Disparate perspectives, in my view, are good. The longer answer (which I’ll keep short) has to do with providing more detail on the “how to” of presentation, line control, and rigging.
The “Tight-Line” Style
Among the various short-line nymphing systems used by fly fishers, the one that I find most effective in pocket-water situations is what I call the “tight-line” method. Many years’ experience with this method, demonstrated to me a very long time ago by my friend and fellow guide Ron Rabun, has proven to me that it can outperform other systems in the hands of a good nymph fly fisher. In California, the tight-line system can be traced back to the late Ted Fay, the guru of the upper Sacramento River — in fact, many older anglers (I’m one of them, folks) refer to tight-lining as “the Ted Fay method.” But I’m told that the late Mr. Fay learned the technique from none other than the venerable Joe Humphreys.
“Czech nymphing,” which is probably tight-lining’s closest relative, is a relatively recent practice, at least in this country. The Czechs’ idea is to give the flies as much upfront and personal time with bottom-hugging fish as possible by limiting casting activity to what is essentially a lobbed upstream roll cast. Multiple heavy flies get the rig down and keep it there without adding weight on the leader, and slack is minimized by controlling the drift with a short line and a horizontally positioned rod that leads the rig downstream. As will be seen below, this approach closely resembles the modified Ted Fay–Joe Humphries system that I use. Who knows, maybe the Czechs came here to learn from Joe and Ted.
The heart of the tight-line system is keeping slack entirely out of the line, from the rod tip to the flies. This skill is aptly termed “line control” — meaning control not just of the fly line, but also of the leader, right down to the flies. To maintain line control once the line is cast upstream, the angler must accurately judge the location of the flies and their drift speed and move the rod tip downstream ahead of the flies while keeping the line and leader tight to them. If there is no slack, there is a direct connection between the flies and the top of the leader, so that any unusual or subtle line movement or action, such as slowing, stopping, or changing direction, is visible to an observant, attentive angler. If slack is present between the flies and the upper part of the leader, the slack will absorb any aberrant leader movement or action, and the take will not be visible. I suspect that many candidates for fish of a lifetime have been missed because of slack in a nymph rig’s drift — that is, because of lack of line control.
For those of us who are visually challenged (which includes me, but apparently not Ted Fay) and who can’t clearly see the leader where it enters the water, it is essential that the leader incorporate a visual aid that will help detect aberrant movements. Ron Rabun addressed this problem by designing a form of in-line indicator made of three short sections of Amnesia monofilament — two of red and one of green — knotted together and placed between the leader and the end of the fly line. (I’ll present below a full description of the in-line indicator that I use.)
The elements of the tight-line system are relatively simple to master with a modicum of practice and concentration. They are: gear and rigging, reading the water, the cast and drift, take recognition, and proper hook-set technique.
Gear and Rigging
My rod of choice for this system is a 9-foot or 9-1/2-foot medium-action stick made for a 3-weight, 4-weight, or 5-weight line. The line should be a neutral-colored, weight-forward floater that will readily turn the rig over. Weight-forward lines abound, but you should look for one that has a short, relatively heavy front taper. Lines that feature a long belly work well for mending line during a floating indicator drift, but don’t seem to work as well as the heavily front-loaded types for turning over a weighted rig. The entire leader, including the butt section (if any), the in-line indicator, and the tippet, should approximate the rod’s length.
The in-line indicator consists of three pieces of 25-pound-test monofilament, each about 4 inches long after the double Uni-Knots that join them are tied (Ron Rabun used Blood Knots). The first and third pieces should be fluorescent red or orange, and the center piece should be fluorescent green. The two middle knots thus will be bicolored, which greatly aids concentration as the rig drifts, since for many people, the eye will tend to focus on these knots. The indicator is looped at both ends — another of my modifications to Ron Rabun’s setup. One end of the indicator is looped to the line’s butt section or fly-line loop, and the other end is looped to a 7-1/2-foot 3X or 4X leader.
(There are other options available for in-line indicators. For example, before Ron introduced me to his system, I simply slid a short piece of pink or green fly line, with the core removed, over the butt of the leader and watched that during the drift. Colored plastic sleeves are also available, and I’ve used leaders with a red butt end, colored sticky foam, and strike putty. These all worked passably well, but once I began using Ron’s solution, I never looked back. )
Next, cut off and discard the last 24 inches of the 7-1/2-foot leader and tie a 30-inch length of 3X or 4X tippet to the end of the leader with two Uni-Knots, but leave these knots untightened and apart at first. (You can find instructions for jointing two lines with these knots at http://www.fish4fun.com/Joining2Lines.htm.) Between the two knots, tie in a 10-inch piece of 3X tippet material with another Uni-Knot and tighten it down after moistening. With the tippet and the leader in hand, moisten the area between the two untightened Uni-Knots and pull them together tightly. Then pull the tag ends tight and clip them. The result is a dropper that is perpendicular to the leader.
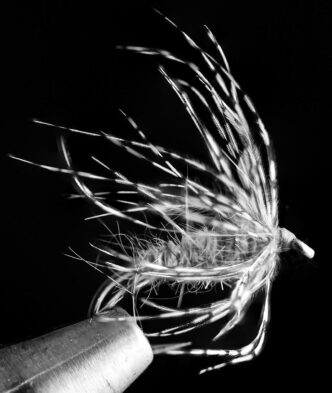
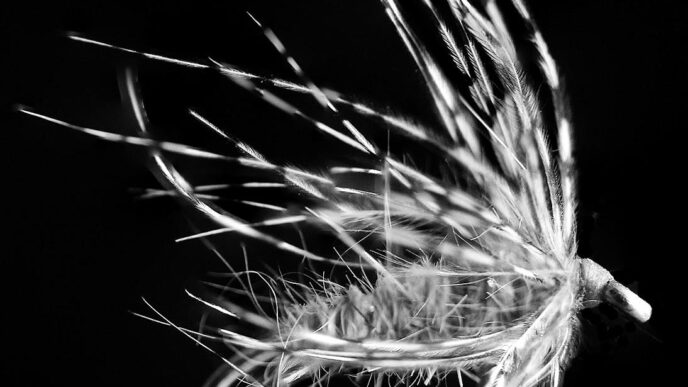
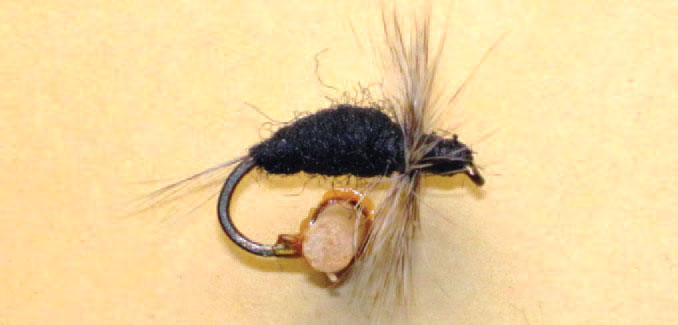
After cutting the dropper back to around 5 inches, tie a nymph to it. I prefer some kind of loop knot for the dropper fly, preferably a Nonslip Mono Knot or a Perfection Loop. The loop knot allows the fly to move freely during the drift. Then attach the point fly at the bottom of the tippet using the same knot. I normally use a small fly on the dropper and a large fly in the point position, but this is not an immutable rule. (A third fly, which I call a “stinger,” can be added by tying a short piece of tippet material to the bend of the bottom fly.)
(There are other options for making a multifly rig. A dropper can be created by using a Blood Knot and leaving one of the tag ends long. Alternately, a piece of tippet can be tied to the bend of the top fly, and the second fly can then be tied to the other end of the tippet. Or the piece of tippet can be tied into the eye of the top fly, which allows that fly to protrude perpendicularly from the leader. While all of these are functional, I have found the system mentioned above to be highly effective and easily replaced when necessary. I carry half a dozen extra premade tip sections and can have the rig back in the water within minutes. Time is fish, right?)
Now back to the rigging. Squeeze weights in the form of BB-size shot onto the tippet between the two flies at a location approximately 12 inches above the point fly. The reason for this placement is to allow the flies to drift at different levels within the water column. The proper number of split shot is a function of current speed and depth, variables that must be assessed as you approach each pocket, riffle, or run. However, as a rule of thumb, I generally rig with two BBs to begin with, unless the water is flowing high and/or deep. I prefer green-colored nonlead weights.
Reading the Water
Unless the flies actually drift through the spots where trout hold, the angler may just as well be practicing in the parking lot or the grass alongside the stream. Here’s a quick overview of reading pocket water.
The savvy pocket-water angler looks for current seams, boils behind boulders, foamy water caused by small falls or break-over ledges, in-stream obstructions, and other objects that slow the current’s flow — in particular, those dark green spots in and around large rocks, slots, or bedrock configurations. “Reading the water” is simply shorthand for the acquired ability to quickly assess each of these situations and intuit the proper presentation.
Put another way, trout have three basic needs: cover, food, and oxygen (assuming an even distribution of optimal water temperature). Usually, trout will be found where these three factors are most amenable. However, while the factors mentioned above are the general rule for parsing out fish lies, there are many variables that will create exceptions. In other words, what is a good trout lie at one time may not be so good at another time.
Here are a few of the many variables that will affect the quality of fish habitat and trout behavior. The time of day can make a big difference. For example, when the sun is directly overhead, a seemingly optimal lie will likely be devoid of fish if the sun lights it up. Why? Even though oxygen and food might be found there, cover is lacking, and predator-averse trout will seek refuge elsewhere. Later in the day, when the sun is more oblique, the light will be flat, and the water surface will be opaque with glare, which provides cover, and trout will return.
Seasonal changes affect fish behavior. For example, in the early fall, larger fish stay tucked under foamy boils and lurk in deep slots and dark holes. Because the water is likely to be low, clear, and somewhat warmer during this time, cover and oxygen can be scarce. The foamy boils provide both of those elements, and deep water is ideal for cover, as well. Trout lies that were good during the spring and summer generally thus lose their appeal in the early fall. During the late fall, when the weather cools significantly, the water thins, and colorful leaves adorn the current and the bottom, trout may be found on shallow bars, in open water, and in the tails of pools — sometimes actively feeding with their backs out of the water. Perhaps trout in these conditions feel relatively safe from predators in the camouflage of wild color and flat light.
Weather conditions can be a major factor, too. Usually, but not always, cloud cover will affect the value of individual trout lies. A cloudy day produces flat light and glare, potentially affects insect activity and food availability in a positive manner, and prevents water temperatures from rising significantly, which keeps oxygen saturation higher.
There are other variables that affect habitat suitability, but the point here is that the water must be read differently at different times and under differing conditions. The angler who fails to understand this concept and adjust accordingly will be at a disadvantage.
The Cast and the Drift
Experience has taught me that the first cast to a fishy-looking spot can be the most productive cast, requiring a cautious, thoughtful approach, a cast that is executed properly and accurately, a tight drift, and focus on the in-line indicator for any telltale aberrant movement. Too often, I have observed fly fishers cast quickly into a nice pocket before properly adjusting weight and line length — in other words, using the first cast as a “test” or “adjustment” cast. This is, to be blunt, a serious error, irrespective of whether the angler is nymphing or drifting a dry fly. Make that first cast count!
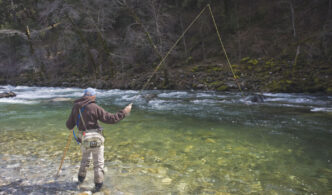
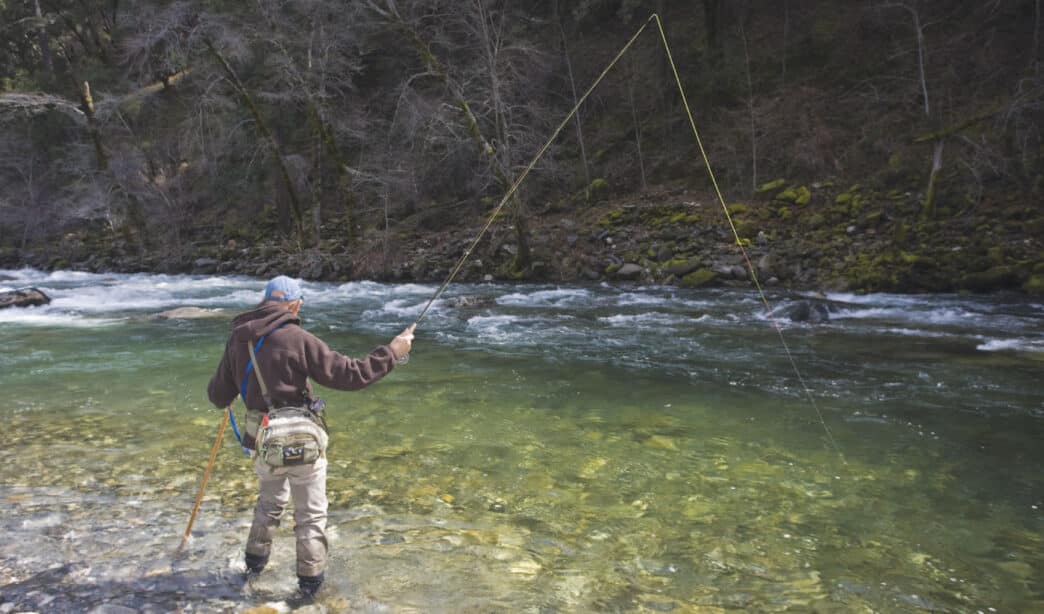
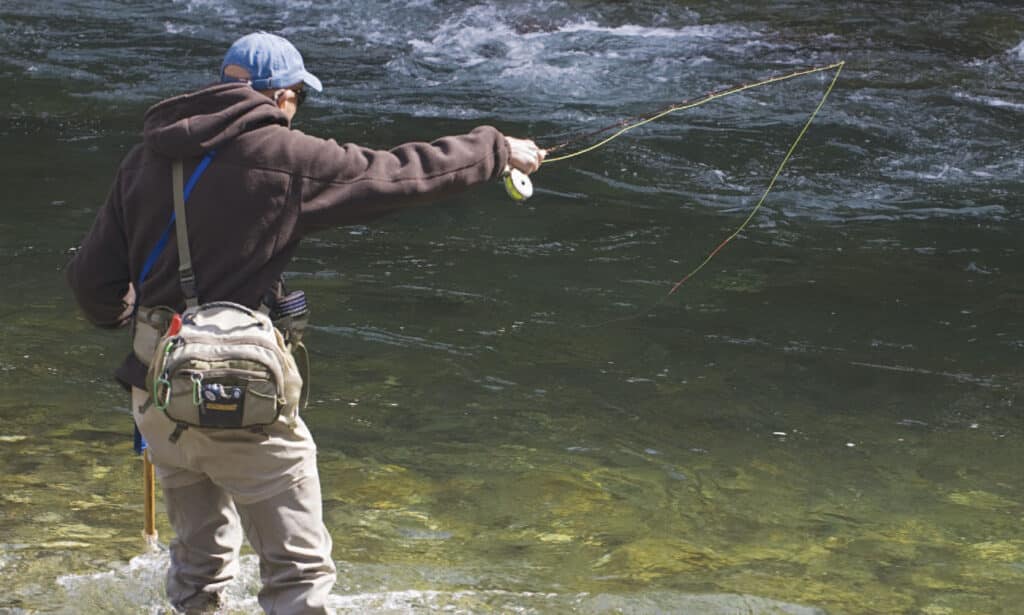
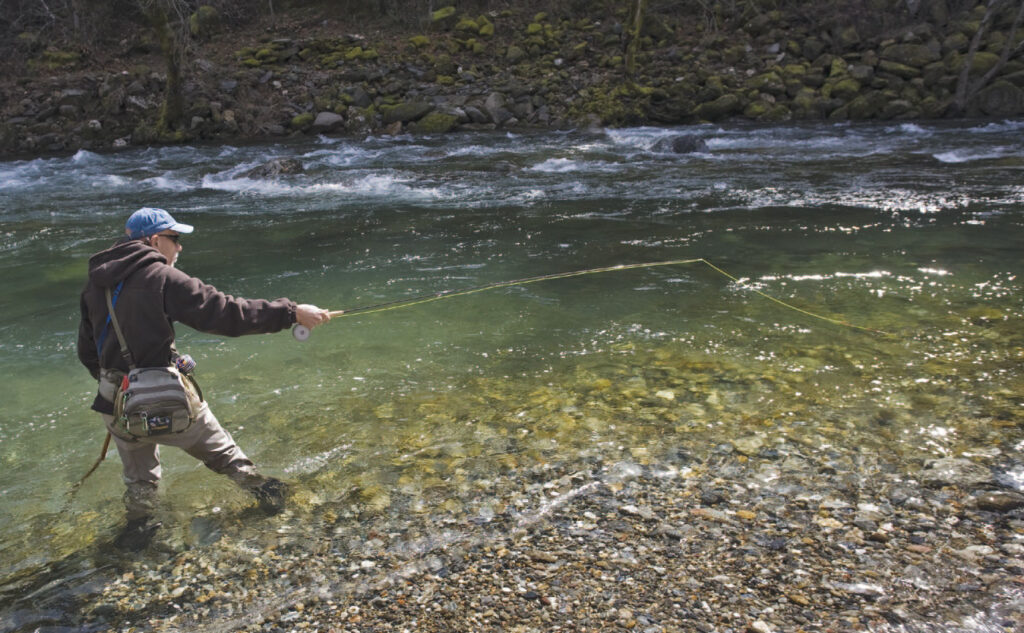
Casting the tight-line rig is not a pretty sight — it’s actually more of a lob than a cast. Let’s begin with the “how” of the cast. The cast begins with approximately two feet of the fly line outside the top guide, with the rig positioned downstream. Raise the rod to nearly vertical and hold it there momentarily to allow the rod to load and to aim the cast. In other words, the cast is not one fluid motion. Then snap the rod forward with the tip pointing at the desired drop spot for the flies. There should be no slack in the line at this point, because the line and leader are stretched out by virtue of the cast. From here on, it is up to the angler to establish and maintain line control in order to keep the drift free of slack.
Next, let’s look at the “where” of the cast, meaning the direction in which the rig is cast, because correct fly placement is critical to an effective drift. With the tight-line method, the flies should land at a 45-degree angle upstream of the angler. There are, to be sure, situations where a likely looking pocket across the stream can be reached only with a perpendicular cast because stream depth or strong current prevent safe wading to an ideal casting position. But these occasions are the exception, rather than the rule, and most casts should be made upstream.
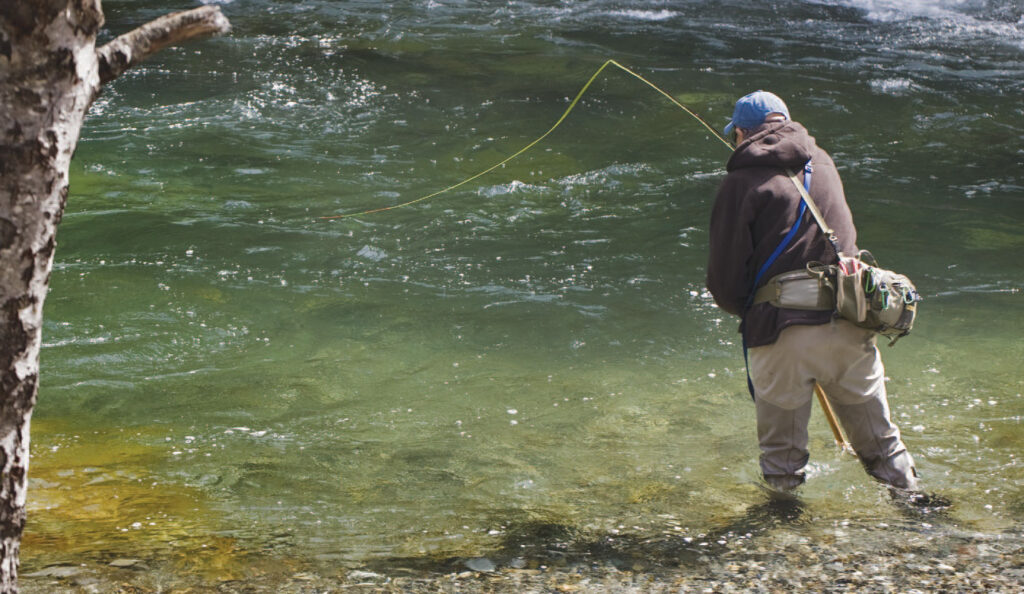
Now let’s consider the drift. As soon as the flies hit the water, immediately lift the reel and point the rod tip down; the rod itself remains horizontal for the drift. If you lift the tip, only one thing can happen, because the line is tight: the flies will be pulled up from the bottom and away from the fish. For the tight-line method to be effective, the flies must drift on or near the bottom. Remember: the drift begins with the splash of the flies. Don’t pause the downstream movement of the rod on the assumption that the flies need to sink, because they will sink immediately. Don’t be concerned that the noise generated by the splash of the flies will put the fish down, either. There is plenty of ambient noise in pocket water already.
With the rod horizontal, lead the flies downstream with the rod tip, keeping the line, leader, and indicator taut without pulling the flies unnaturally. The flies should never be allowed to drift under the rod, because this results in loss of line control (slack) and therefore loss of communication with the flies. The leader should enter the water at and remain at a 45-degree angle between the water’s surface upstream and the rod tip downstream during the drift.
It’s essential to pay careful attention to drift speed during the drift. If the leader or in-line indicator is moving at the same speed as the top of the water, judging by bubbles or floating debris, the subsurface flies will be dragged along and move too fast, because in general, the current at the bottom is slower than on top, due to the effects of friction. The remedy for this is additional weight, which, besides getting the flies down, also functions to slow the entire rig down to proper drift speed. With experience, this situation will become easy to spot and remedy with the right amount of additional weight.
Once the line, leader, and flies have drifted to a point directly downstream of the angler, the next cast can begin. After the entire pocket has been thoroughly covered by successive casts, you can cover adjacent areas in the same manner without changing position by adding another foot of line outside the top guide. With experience, you should be able cover even more water from the same point by casting with four or five feet of line outside the top guide while still maintaining the constant line control that is critical to success with the tight-line system. In general, as you lengthen the cast, you also must add weight incrementally to the system in order to maintain good line control.
Take Recognition and Hook-Setting Technique
Success with the short-line technique requires skill in both recognizing takes and setting the hook because trout are lightning quick and seldom take the flies with gusto. Indeed, most takes are subtle and not particularly easy to spot, irrespective of what type of rig and indicator you use. My experience has been that when the take is sharp and the leader jumps, the fish is generally small. When the take is subtle and the leader/indicator barely pauses or just slows down when it shouldn’t, there is a good chance that it is a large fish. But that’s just a rule of thumb, and sometimes there are no rules.
Avoiding the “vertical” hook-set technique when nymph fishing for trout will greatly reduce fly-fisher stress and, with enough practice, will increase hookups. When the rig leaves the water because of a vertical rod lift, a lot of unpleasant things can happen. These include acquiring an unwanted earring, getting practice removing massive tangles and knots, learning how to extract the rig from the tree canopy or berry bushes, or experiencing all of the above at the same time.
To eliminate this bothersome fuss, the angler needs to learn to set the hook with a quick horizontal downstream flick of the wrist. The rig remains in the water, allowing completion of the drift if the hook-set motion is not answered by the tug of a fish. Gravity does not bedevil rod movement, and the flies move unhesitatingly and directly. No earrings, leader snarls, or line-snatching trees or berry vines kink one’s day. Life is good.
But when to set the hook? Simply put, anytime that the indicator twitches, hesitates, or moves in an inexplicable direction, just do it. The culprit can be a fish, a rock, a stick, a leaf, or . . . whatever. Since the “take and spit” happens so quickly and the price of not setting can be loss of a fish, there is simply no time or room for speculation. In other words, don’t second-guess — just react. When I hear “It was a rock,” I ask “Are you certain?” We all know the answer to that question.
Because in-line indicator activity (or just plain leader activity, if an in-line indicator is not used) is often quite subtle, focus and concentration are a must. The correlation between distraction and lack of productivity is clear and direct. For most fly fishers, the detection of subtle takes is a skill acquired after long days of paying dues on the stream. As a guide, I often find myself patiently describing the client’s many undetected takes when the client expresses the typical frustration experienced by beginning or intermediate nymph fishers. Still, I have found that such gentle prodding is instructive, assists the client in maintaining focus, and produces results. I’ve been very fortunate to have had the opportunity, over many years, to teach the Ted Fay–style short-line nymphing technique to many anglers. Most stay with it and become intuitive short-liners. Some find it too difficult or frustrating. For me, short of the grab of a winter steelhead on a swung fly, there is nothing sweeter than spotting a subtle take on a short-line rig, setting the hook, and feeling the head shake of a surprised and angry trout.


")