Warmwater and saltwater fly fishers can find themselves casting flies into places riddled with snags. Whether it’s bonefish rummaging on a grass flat, or largemouth bass loitering in a tangle of roots and branches, a fly that hooks fish, but not the scenery, can be essential. As a result, these folks tend to have an assortment of weedless flies in their boxes.
But what about fly fishing for trout and other coldwater species? If you think about it, slamming streamers at riverbanks, dropping hoppers inches from overhanging vegetation, or running weighted flies through deep, boulder-riddled runs can be just as problematic. A less-than-perfect cast or a mischievous current can send the fly on a one-way path to Snag City.
Yet very few coldwater fly fishers tie or buy weedless flies. For some reason, we have decided that losing flies is just the cost of doing business in a rough neighborhood. Maybe it’s just me, but this seems like a lame and expensive excuse for littering. Sure, you’ll miss the occasional soft bite with a weedless fly,but it happens less frequently than you might imagine and almost certainly less often than hooking the scenery.
If you are a fly tyer, it’s easy to tie a few weedless patterns for snaggy settings. But what if you don’t tie flies? Do you cast your fly into unfriendly territory or move on to safer waters? The $64,000 question is, “Can you easily convert regular flies into weedless ones?” Over the years I have figured out six solutions, including a couple that were so simple it’s hard to believe others haven’t written about them. If they have, I apologize.
MUSTACHE KNOT

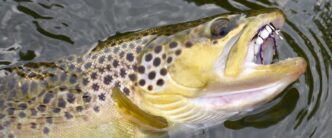
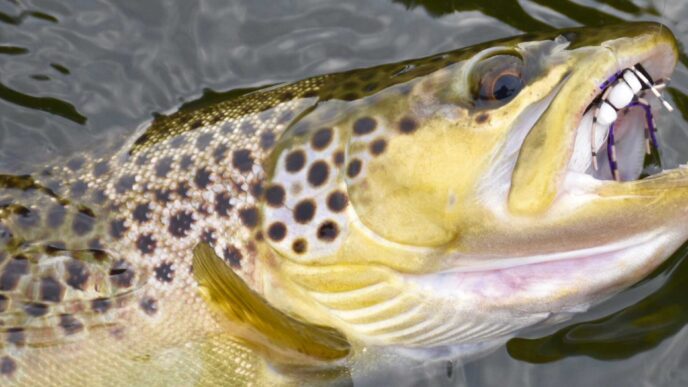
A common type of weed guard uses monofilament bent into an inverted V and tied in behind the hook eye. This mustache-like setup has proven effective against weeds, tree roots, rocks, and coral. You can duplicate this by inserting a V-shaped piece of mono into your hook knot without impacting knot strength.
First, you need to make the weed guard. For trout dries and nymphs on size 10-16 hooks, 4X tippet material works well. Choose 2X if you are fishing a heavier pattern, such as a hopper or streamer. If you are throwing lead-eyed flies, 20lb test mono or the butt end of an old, tapered leader will do the trick.
Cut about three inches of mono and bend it in the middle to create a V shape. You may need to use forceps with heavier mono. Start your knot (clinch, Trilene, uni, and Orvis knots all work), but don’t cinch it all the way down. Insert the mustache bend into the space between the eye and the knot. Hold the mustache so that it sweeps down in front of the hookpoint and when everything looks good, cinch the knot tight. You may need to do some post-cinching adjustments to get things properly aligned. Snip the two prongs so they terminate just below the hook point.
While you can create the mustache on the water, it’s easier to make a bunch in the comfort of your home and pop them into your fly box. You can color them with marker pens to look like legs, antennas, or gills.
UV MUSTACHE
If the mustache knot isn’t your cup of tea, UV epoxy provides another solution. Just tie the fly onto your tippet with your usual knot and cinch it down. Hold the fly in forceps and add a small drop of UV epoxy to the top side of the knot. Place the mono mustache onto the epoxy and point the hook upwards at about 45 degrees so that gravity pulls the two prongs just ahead of the hook point. When everything is lined up, expose the knot to sunlight or zap it with a UV light. Add and zap another drop of epoxy if needed.
JIG HOOK PRONG

One of the advantages of flies tied on jig-style hooks is that they tend to be more snag-resistant. However, particularly snaggy spots can
still cause headaches. For those situations, you can make them almost snag-proof by adding a single mono prong. It’s ridiculously simple: just knot a piece of suitably strong mono onto the eye as if it were a second piece of tippet that sweeps back over the fly. This gives you a fly that sinks fast and can be bounced through areas many fly fishers can’t or won’t fish.
TWIST TIE
If you are fishing with flies on a size 4 or larger hook, a wire weed guard can be quickly mounted just behind the hook eye. The only requirements are that the eye can accommodate both the wire and knot and that there’s a millimeter or two of bare thread wraps behind the eye.


Remove the wire from a grocery store twist tie. A single strand of wire works well for most applications. Insert a quarter inch of wire up through the hook eye after you have tied it onto the tippet. Bend this wire tag over the head of the fly and pinch it against the fly with your thumbnail. Pull the guard wire straight down and then wrap it over the head and tag two or three times. Manipulate the wire so that it is below the eye and in line with the hookpoint. Sweep the wire back so that it extends a few millimeters beyond the point. Cut or break the wire at this point.
BLOB LOOP
Some folks prefer a mono-loop guard, which starts at the head of the fly, loops over the point, and is secured to the hook bend. This design tends to move the fly more smoothly over snags than pronged setups. Fly tyers hold the mono in place with thread; the on-the-water option uses a lighter and some heat-shrink, or soft PVC tubing. This system works with flies tied on hooks larger than size 1. I am currently experimenting with 1 mm diameter silicone tubing for smaller flies.

Take a few inches of mono and burn a blob on one end. The blob needs to be thicker than the opening in the hook eye. Next, cut a piece of heat shrink tubing (1/16” or 3/32” works well) about half as long as the hook gape. Tie the fly onto your tippet and pull the guard mono through the eye so the blob sits on top. Slip the un-blobbed end of the mono into the tubing and slide the tube and mono over the hook point and onto the bend. Adjust the mono in the tubing so that its arc just clears the hook point. Wet the fly thoroughly and pull any body, tail, and wing materials away from the hook bend. Hold the fly with forceps and gently wave a flame under the tubing until it shrinks against the hook. Trim the end of the mono close to the shrink tube.
If you have trouble with the mono melting, forgo the lighter and use Pepperell’s Pony Bead Lacing which is a soft PVC tubing. If it’s a bit loose on the hook add a drop of UV epoxy or superglue.
SPLIT TUBE
Conventional bass anglers fishing plastic fluke lures often use a technique called skin hooking. The hook point is buried less than a millimeter into the soft plastic, which provides exceptional protection from weeds and snags but is quickly exposed when the angler strikes.

Fly fishers can mimic this technique on larger flies such as streamers and big nymphs with a piece of Pony Bead Lacing. Instead of being buried in the tubing, the hook point is slipped into the end of a section of tubing that has been carefully split on one side. This keeps the point covered until a fish closes its mouth, which pushes it out through the slice.
The split tube isn’t as stiff as the mono and wire weed guards, so it’s more likely to expose the point if an errant cast smacks the fly against something hard. However, the softer setup can make it better at converting tentative bites into hookups.
Making the split tube is simple but is best done at home. You’ll need sharp-pointed scissors or a single-edged razor blade, a marker pen, and a sewing needle. The tube has to be tailored to the hook’s eye-to-point distance, so unless you fish one size fly you’ll need to make a selection. Fortunately, split tubes are reusable, so a half dozen made in different lengths will last you many seasons. I have some that have been in service for almost a decade.
Cut a piece of tube that is long enough to run from the back of the hook spear to a quarter inch beyond the hook eye. Cut one end on a slant and make a pen mark about one-eighth of an inch from the end. Take a needle and make a small (tippet-size) hole at the pen mark.
The next step is to make a small slit at the other end of the tube. Tie your fly onto some tippet, then pull the other end of the tippet through the hole you just made. Slide the tube down so that the end covers the knot and butts up against the hook eye. Place the tube alongside the point and cut off any excess so that it covers the hook point and spear.
Slide the tubing onto the hook point and adjust it so that it is aligned with the hook shank. You should be able to see the spear and point through the tubing. Carefully run a marker pen over the tubing directly above the spear so that the mark extends just beyond the hook point. This will be the hook slit. Either cut the slit with a pair of fine-point scissors or use a sharp razor blade. If you use a blade, you’ll find things are easier if you place a toothpick inside the tubing before you cut. Don’t hurry this step. The hook won’t exit the slice as easily if it’s not in line with the shank.
Once you have a few split tubes tailored for your flies, put them into your fly box. It can also help to add a small needle to get tippet through the hole.
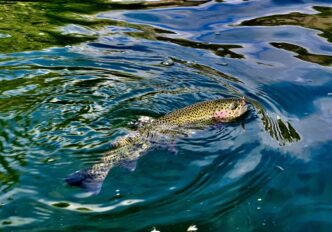
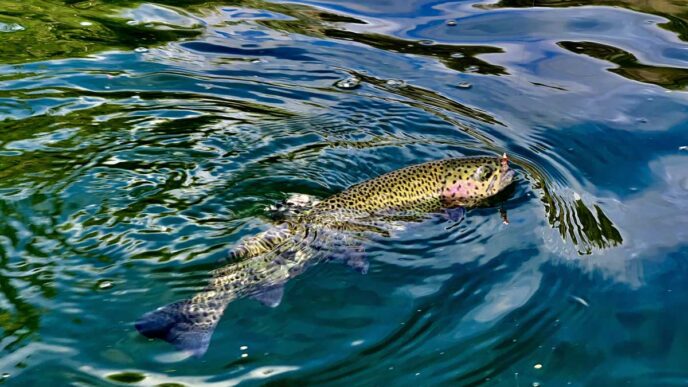
The next time you spot a large fish swimming perilously close to a snag and figure it’s too risky, give one of these DIY guards a try. I promise they’ll reduce your snag-up rate and thereby increase your hook-up rate. Whether they stop your hands from shaking when you cast toward the fish, I can’t say.