This isn’t a hunting story. But there’s a rifle-shot animal involved, a cow elk felled through a dense tangle of windblown trees, and if that kind of thing bothers you or pisses you off, you might want to skip to the pattern and tying instructions, glance at the photos, and leave it at that.
I won’t hold it against anyone. Yet there is a long history in fly fishing of flies tied from the hair and feathers of wild game, and you don’t have to go very deep into the psyche of many anglers to find a passion for stalking and ambushing creatures of the wind and water and woods — a passion that nudges up tight to lust, though an easier name for it might be, simply, fun. Some of our time-honored patterns, of course, come directly from remains of the kill. The Elk Hair Caddis, the Pheasant Tail Nymph, the Gold-Ribbed Hare’s Ear, nearly all of the traditional soft hackles — these and countless other flies owe their existence to anglers familiar with the tint and texture and fetching beauty of the palette of materials unique to animals brought down by bullet and arrow and shell. There’s good reason we don’t fish with a Cow’s Ear Caddis or Pig Tail Pupa. Traditionally, fly fishers and hunters were often one and the same, and even when not, they usually belonged — at least until recently — to a community of outdoorsmen that extended beyond other anglers.
All of which brings me to the moment relevant to our subject at hand. No, not the moment when I looked past the shoulder of my pal, the fish biologist Joe Kelly, who was holding a rifle, and through a long tunnel in the chaos of crisscrossed trees spotted a cow elk looking directly our way and thought, He’s got a shot. Nor was it the instant afterward, just as I completed that thought, when the roar of the rifle filled the woods and the cow elk crumbled to the forest floor. And it wasn’t when we gutted her there where she fell, nor during the struggle to drag her out of the woods and load her into the pickup and then drive her to another buddy’s place where we could finally hang her and skin her.
Instead, the moment we care about here came the next morning, when Joe and I drove back to the site of the kill, prepared to discard the hide where we had left the viscera, already visited by creatures of the woods happy to discover such unexpected bounty. An elk hide is a formidable charge. It was still wet with skin and fat, and it took both Joe and me to lift it from the tail gate and carry it to the edge of the wooded draw. Among the complex emotions I’d been feeling since this stately wild animal dropped to the ground, and especially while we peeled off her heavy hide, transforming a once-live creature into something suddenly resembling simply meat, I was now struck by a sense of waste, a twinge of guilt for discarding what was obviously a wealth of raw material for — what?
Joe suggested I take a knife and slice off a couple of hunks of hide.
If you’ve ever tried to treat and preserve potential fly-tying materials brought home from the field, you’re probably familiar with any number of challenges — or disasters. I live alone; that helps. The first thing you’re sure of is you have to get things dry; coarse salt seems like the obvious answer. Still, when I found half a dozen ticks sprinkled about the garage floor, I knew I needed to be careful.
Then, because it was near the end of hunting season, the latter weeks of fall, I set two dinner plates filled with elk hair patches, of various hues, underneath the woodstove to dry completely and even season for a while.
My oldest son, visiting for Thanksgiving, found what we hoped was the last tick.
For Christmas gifts I was able to mail off an assortment of pretty patches of elk hair to unsuspecting, but immediately appreciative friends. (They’re all married; I didn’t mention any ticks.) I tied up a handful of Waking Muddlers with hair ranging from blonde to nearly black, all taken from my small swatch of the original hide, but by this late in the season, river temperatures had dropped, and I couldn’t really expect to move steelhead to the surface, no matter how much I tried.
But as spring approached, and my thoughts turned to trout, I looked again at my gallon baggie labeled “Joe’s Elk 11/16.” The obvious place to start was Al Troth’s standard Elk Hair Caddis, a pattern for which I nearly always substitute deer hair for the wing, because the elk hair I generally encounter proves too stiff and springy for my tastes and tying skills. Of course, the deer hair wing suggests I’m really tying something more along the lines of the old Bucktail Caddis, but without the tail. Should we even care about these delineations, these names? If you’re anything like me, you tie your caddis imitations to work on the waters where you fish them, tweaking them this way and that to match the size and color of the caddisflies you see, as well as in accordance with the speed and temper of the water where you find fish feeding on these ubiquitous summer bugs.
For me, that often means the sort of slick, greasy-looking water that large trout move into when searching for easy pickings during the low light at the end of a hot summer day. The last thing I want in these challenging conditions, when fish push through the surface with the deliberate resolve of turkey vultures picking over a road kill, is a fly that rides high atop the water, an attitude that suggests an insect about to take flight. In these smooth-water situations, I want the body of my caddis pattern to sink into the surface film, a position from which a trout knows a bug can’t suddenly lift off and vanish.
Of course, as usual, I’m making this all up. To claim a trout knows anything is as silly as believing that something I say or do might jinx the weather or the Dodgers’ next home game. All I’m really sure of is that a caddis riding low in the water generates more rises for me than the common type with hackle palmered through the length of the body. Needless to say, my sparsely dressed, low-riding caddis imitations are the patterns I tie most often to my tippet, which admittedly invalidates completely any comparisons to other patterns I might try.
So it goes. We catch fish with the flies we fish with. Which is why I hesitate to claim that the Peacock Caddis, tied with elk hair fresh from the hide, can solve all of your problems the next time you find yourself during the evening caddis hour faced with a bunch of big trout nosing through the surface, but refusing your perfectly cast flies. I know better; in fly fishing, as in life, there are too many good ways to fail.
The Peacock Caddis is not a close imitation of any particular caddisfly.
I use it the same way I would use an Adams, except that in the case of the Peacock Caddis, I’m fishing waters rich in caddisflies rather than mayflies. It falls close to the category of flies that Dave Hughes, in his monumental book Trout Flies, calls a “searching dry fly” — a nonspecific attractor pattern that floats well, that the angler can see, and that looks buggy “in the eyes of the trout.”

The fly is only close to being a searching dryfly, because it’s really too specific to be a general, across-the-board attractor pattern. Also, unless you wind a hackle through the herl, palmering the body, the Peacock Caddis won’t float as well as Hughes states is necessary for the most successful searching dry. And though the blonde wing is easy for the angler to see, the fly sits low enough in the water that it can still test your eyesight as soon as you start to lengthen your casts or the water has much in the way of current or grain or other texture.
So it’s probably better to call it a “searching caddis fly”: given that you’ve got the right size, you can fish the Peacock Caddis during any caddis hatch and feel like you’re in the game. Yet short of an organizing principle for a book — or your fly boxes — naming the type of fly you’re using seems a little like an exercise in semantics, with not a whole lot to do with fishing.
Still, rather than a searching dry fly, I could call the Peacock Caddis a hunting fly — but you might get the wrong idea.
Materials
Hook: Standard dry fly hook, size 12 to 18
Thread: Black
Body: Peacock herl
Rib: Fine copper wire
Wing: Blonde (unbleached) elk hair
Hackle: Brown or furnace
Tying Instructions
Step 1: Secure the hook and start the thread. Wind the thread back toward the bend of the hook. As you approach the bend, tie in a length of fine copper wire. Continue winding the thread to the start of the hook bend. Position the copper wire out of your way.

Step 2: With the thread still at the hook bend, create a dubbing loop. With the loop held in place by the weight of a dubbing tool, advance the thread to the tie-in point for the wing, approximately one-third of the hook shank back from the eye of the hook. Wax the legs of the dubbing loop and between them slip the ends of two or three strands of peacock herl. Spin your loop, using your other hand to help the thread catch the herl and form a braid-like rope. Wind the braid of herl to the wing tie-in point, catch it under a couple of turns of thread, and clip the excess.

As a side note, I feel obliged to encourage, again, the use of a dubbing loop — and some sort of dubbing tool, if only your hackle pliers — for practically any dubbing material, but especially for peacock herl. The fragile herl withstands poorly any touch of a trout’s teeth. But spun into a tight rope of thread, and then, in this case, secured further by wraps of copper wire, a peacock herl body becomes virtually indestructible, exactly what you want for a fly destined to get fished in failing light.

Step 3: Advance the copper wire with three or four evenly spaced wraps. Secure the wire ahead of the body with your thread and clip the excess.

Step 4: Clip a tuft of material from your patch of elk hair. Comb out and thoroughly remove any underfur and short fibers. (This is a crucial step; you don’t want to tie in any excess material.) Place the hair tip first into a stacker and tap it firmly a few times against your bench top or other hard surface. Carefully remove the hair from the stacker. Hold it by the butts and measure so that the wing reaches the bend of the hook. Position the wing with several light turns of thread, then secure it with increased tension on the thread. Make sure the wing is secure. There’s nothing worse than a wing that spins around the hook when you go to wind your hackle.

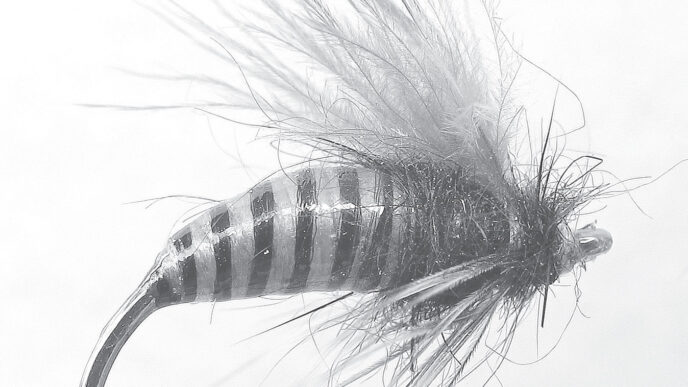
Step 5: Clip the butts of the wing hair. Unlike with the Troth-style caddis, your aim here is to get several turns of hackle in front of the wing, plus finish the fly with a conventional whip finish directly behind the hook eye. It always feels a little tight. Strip the base of an appropriately sized hackle feather, the fibers about one and a half times the hook gap. Secure the hackle stem directly on top of the thread wraps at the front of the wing. Advance the thread to the hook eye. Take three or four turns of hackle, one tight against the next, until you reach the hook eye. Tie off the excess hackle with a few wraps of thread. Clip the excess hackle. Whip finish and saturate the wraps with lacquer or head cement. (The finished fly is shown on the opposite page.)