

Steve Cooper and I became acquainted at a long-ago fly-tying event. Like so many other enjoyable things we do regularly, tying events seem to run together into a colorful amalgam of experiences and memories, some invented, some real, but I still remember Steve sitting across from me at the tying table as we traded fish stories, laughs, tying techniques, and assorted guy stuff. I’m not sure why I remember this discussion, but I believe it may have been the interest he piqued when he spoke animatedly of the smallmouth bass fishery on the Grande Ronde River in Oregon and Washington — or maybe it was the fact that he stood a good head taller than I do when we left our seats. Whatever. He handed me his card, which I still have. I wrote “Grande Ronde” on it and filed it with my collection, making a mental note to visit that stream with Steve at some future time. During the ensuing years, we talked at fishing shows, as acquaintances always seem to do, but the conversation inevitably drilled down to smallies on the Grande Ronde . . . and when could we go fish for them together?
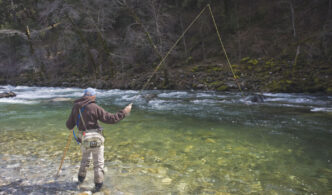
It wasn’t until I was scheduled to present a program for the Delta Fly Fishers in Stockton, where Steve is a member, that I finally got serious about taking Steve up on his Grande Ronde offer. We talked about it that evening, settling on timing and other matters. A few months later, three friends and I found ourselves in eastern Oregon, camping and fishing our way north via the Blitzen, Owyhee, and Wallowa Rivers to the Grande Ronde, where we’d meet up with Steve at Boggan’s Oasis resort in Anatone, Washington, and begin our three-day float north through the southeast corner of Washington, down to near Lewiston, Idaho. Our flotilla of three colorful pontoon boats and Captain Steve’s big blue raft with one of our group aboard launched from Boggan’s Oasis early on the first morning, placing our faith in Steve’s knowledge of the river, its fish, its dangers, and its rewards.
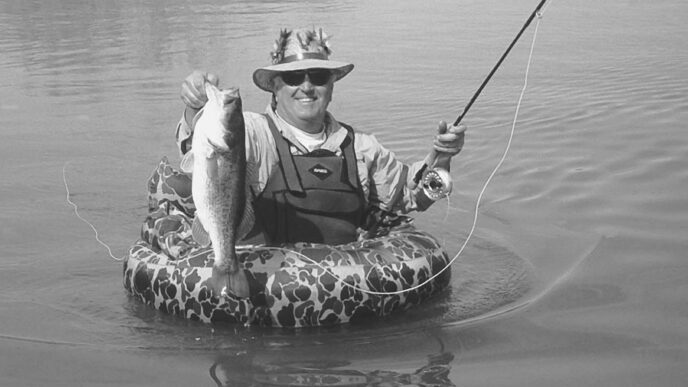
We found Steve to be a good host, a good cook, and a knowledgeable river guide . . . although he did become a little vague when it came to discussing a few of the looming tricky spots — a small detail that I still rib Steve about to this day. We caught many fish, learned a lot, and oh, yeah, I remember staring incredulously 10 feet down at my new digital camera resting on the Grande Ronde’s rocky bottom as I drifted downriver to the next cataract. Since then, I’ve fished again with Steve on the Grande Ronde and plan to meet up with him on the Owyhee this summer to lift a few and nab some of its frisky browns and rainbows. For now, let’s listen to Steve talk about his “Boilmaker” streamer pattern.
“Smallmouth bass are class-one predators and carnivores, genetically prone to aggravation, with a voracious appetite. They rarely pass up a good meal, and any unfortunate critter that fits in a smallie’s mouth is fair game. To me, it’s a simple paradigm: big, mean fish love to chase and kill small fish, whether it’s because they love the chase, are angry, or are just plain hungry. I suspect the “chase-and-kill” theory explains why smallies will often chase baitfish even when other food sources such as crayfish may be more abundant or easier to catch. The two key characteristics of the Boilmaker — its large profile and sensual, fluttering motion — trigger that chase-and-kill instinct by imitating a frantic baitfish trying to escape its fate.
“It pays, of course, to know the characteristics of the baitfish that inhabit the water you are fishing — fish respond best to what they are used to seeing. By varying color and size, the Boilmaker can be tied to represent a wide variety of potential bass victims, including threadfin shad, small trout, rough fish, and baby bass. I carry Boilmakers that imitate all of those species, in sizes ranging from three to six inches in length.
“If you fish for smallmouth bass, you probably understand why I call the fly ‘Boilmaker.’ I have witnessed smallies move off cover over 10 feet away to attack the fly viciously, creating a definite boil at or near the surface. This, of course, makes for a very visual experience.
“The fly, being unweighted, is generally fished just under the surface on a floating line. Designed to pull fish from deeper water or cover, the Boilmaker has a large, long, slender profile, and by virtue of the materials used and the manner in which they are applied, it moves from side to side erratically when retrieved. You can see the fish take the fly, an experience so exciting to novice smallie hunters that they tend to set the hook too soon or pull the fly away from the fish. It’s hard to do, but waiting for that beautiful boil and executing a well-timed strip set will pay big dividends in the form of solidly hooked fish.
“As is the case with most good fly designs, the Boilmaker has evolved through time with experience gained from putting its design concepts and materials to the ultimate test. It’s an ongoing process: experimenting with new materials, adjusting balance, and just plain tinkering around trying to produce that one elusive, perfect fly design. Originally, I tied the Boilmaker for smallmouths on the Grand Ronde River, which presents anglers with virtually every possible water type and cover imaginable: fast water, slow water, clear water, rocks, ledges, trees, rapids, and pools. I needed a fly that would cast easily, land softly on the water, produce a large silhouette, have neutral buoyancy, and produce that all-important fluttering, side-to-side motion. My first effort was tied with an Estaz chenille body and a head made from ‘ Woolhead Dubbing,’ a material available, at the time, from Feathercraft. It worked well, but I felt that there was room for improvement.
“The first improvements came when I met Enrico Puglisi at a show in San Mateo. He showed me how to use his EP Fibers to make the head and body. The result was a fly that was easy to cast, had a great profile, and moved seductively from side to side on the retrieve. After testing it on the Delta, I thought I had landed on the perfect fly.
“But then, after watching Kelly Galloup’s video on tying large trout streamers using palmered marabou for a body, I changed the Boilmaker’s body again. The palmered marabou added even more motion than the EP Fibers, presented a good profile, and did not affect castability. I have used this version successfully for several seasons with excellent results.
“While I haven’t modified the fly itself since then, I have learned more about manipulating it to impart the maximum amount of side-to-side motion. Jay Fair taught me his method of making a fly move seductively, which entails moving the rod tip in a circular fashion while retrieving the fly. This is a deadly technique, and Jay’s record of catching monster trout is proof enough. After trying that method, I modified it a bit by substituting an upstream roll of the rod tip while simultaneously short-stripping the fly. This method produces perfect fly motion and for me is a bit easier to execute than Jay’s method. Fly rods designed specifically to throw large bass bugs work well for this type of fishing, even with their short length.
“There are a few important points to remember about tying and fishing the fly. First, size matters. Try to attune fly size to the baitfish that inhabit the water you intend to fish. If that’s not possible, start small (fry size) and work up from there. If, for example, you are going to fish a stream for large brown trout, tie some three-inch or four-inch rainbow-trout-colored Boilmakers, cast them to likely brown habitat, and strip them fast as the fly swings.
“Although hook type is a matter of individual preference, my choice is a straight-eye, large-gape hook such as the Gamakatsu B10S, designed as a ‘stinger’ hook with a shank of sufficient length to tie streamers. The straight eye allows me to keep the fly pulling on a level plane just beneath the surface, where I can see it.
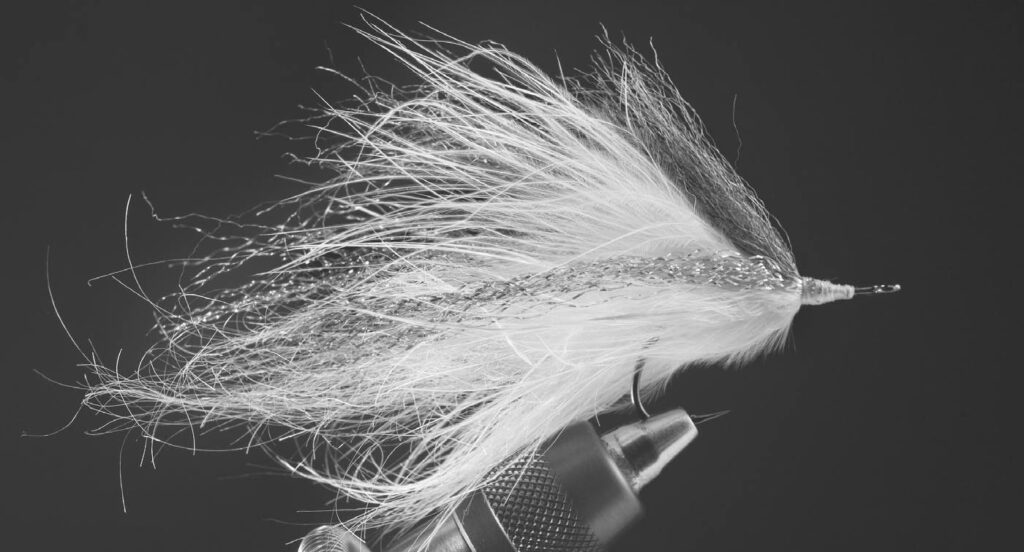
“I carry Boilmakers tied with varying amounts of flash, so I’m prepared for different conditions. The good news about flash material is that it can attract fish. The bad news is that it can also scare them off. If the water is colored, more flash will usually help attract fish; if the water is clear and low, sparse flash is more appropriate. I tend to favor Krystal Flash in an array of colors, but there are many different flash products on the market. Use what you already have.
“Body-material colors should follow the target baitfish; I favor the rainbow trout and shad color sets, with black-and-chartreuse as a close third, but there are many other combinations that will imitate local baitfish.
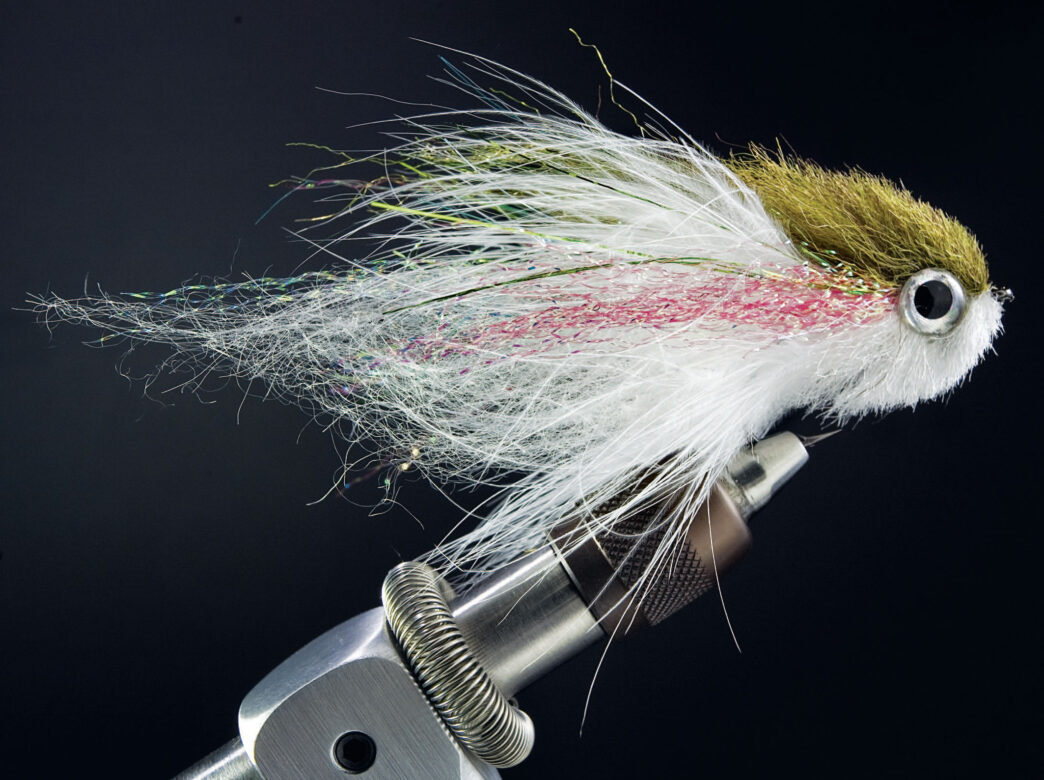
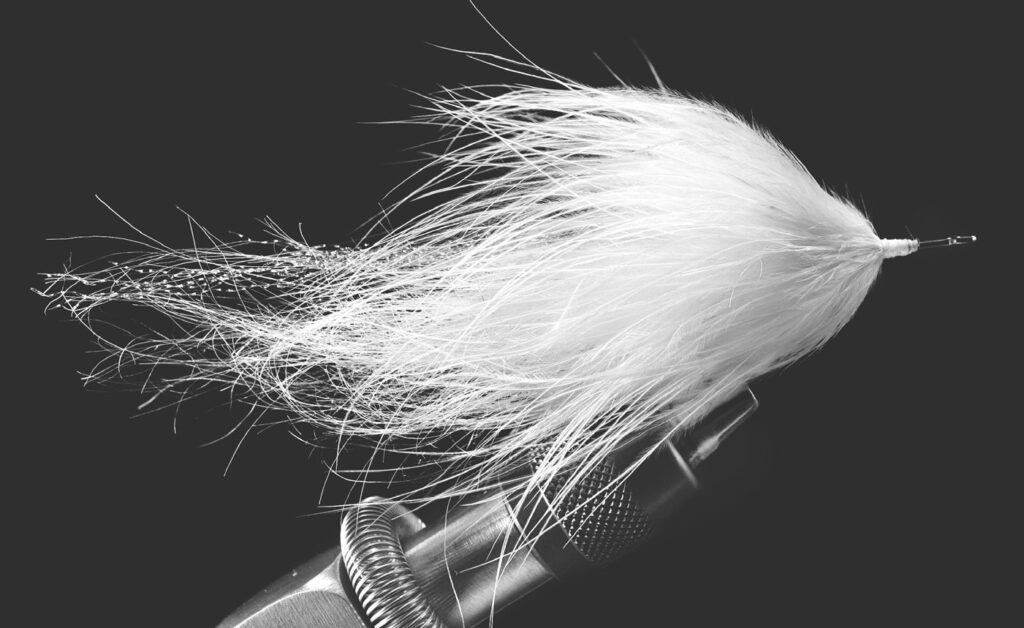
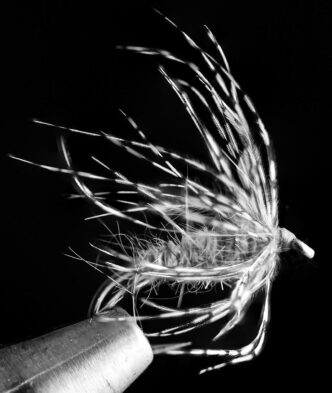
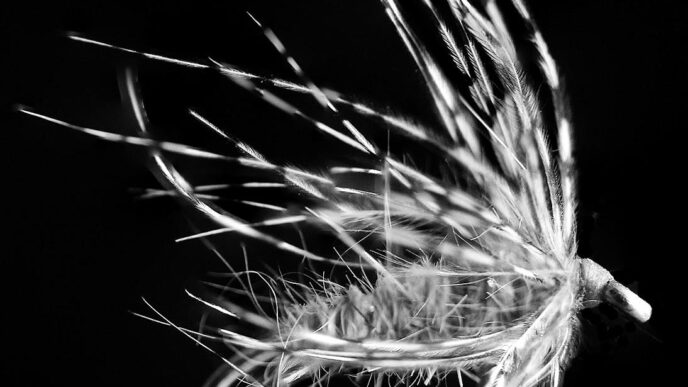
“The two most important construction characteristics are the head and tail. The head must be trimmed to a very thin vertical wedge, yet be left large enough to show a good silhouette and to produce a seductive side-to-side motion. The sheephair tail, which moves like marabou in the water, should be approximately three to four times the length of the hook shank.
“I fish the Boilmaker just under the surface, always in sight. The speed of the retrieve is a function of water temperature, light penetration, and seasonal conditions. But to simplify it, when fishing for smallmouth bass during their prespawn phase, retrieve about twice as fast as you think you should be retrieving. At all other times, slow down to twice as slow as you think you should be retrieving.”
Now let’s tie a Boilmaker to imitate a rainbow trout. For other species, simply modify the list as appropriate.
Materials
Hook: Gamakatsu B10S, size 4, or a substitute stinger-style hook such as Tiemco’s 8089
Thread: White 6/0 Uni-Thread
Tail: White Icelandic sheep hair and pearl Krystal Flash (or substitute other flash material)
Body: White strung marabou blood feathers, with Krystal Flash
Topping over body: Rainbow-green EP Fibers, or a substitute such as seal hair, strung marabou, or peacock herl
Flank: Pink Krystal Flash
Head: Top, rainbow-green EP Fibers; bottom, white EP Fibers
Eyes: Large 3-D doll eyes
Tying Instructions
Step 1: Smash the hook barb and start the thread at the midpoint on the shank. Wrap back to above the hook point. At that point, tie in a long bunch of Icelandic sheep hair, three to four times the length of the hook shank.
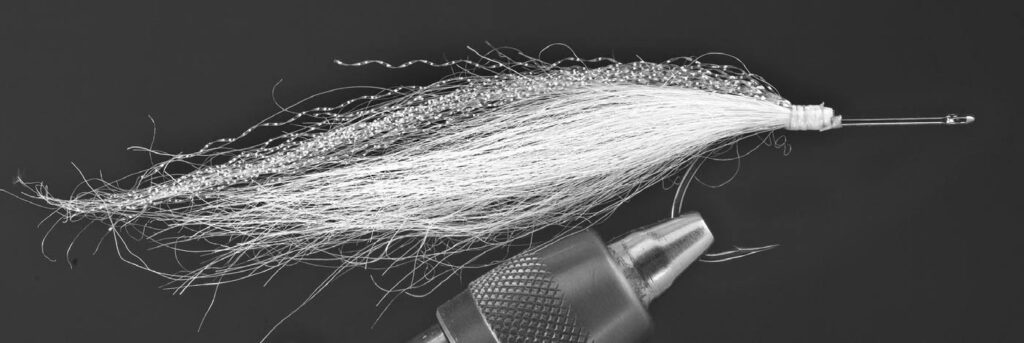
Step 2: At the same point, tie in a bunch of pearl Krystal Flash (or substitute). The length should be equal to that of the tail plus a half inch. The amount of flash is a matter of choice. For low, clear water, keep it sparse; for heavy or stained water, increase the flash volume accordingly.
Step 3: Prepare several plumes of white marabou by preening the barbules downward gently, isolating the tip of the feather. Tie the first one in by the tip just ahead of where the tail was tied in (there will be a small lump remaining from the sheep hair). Move the thread ahead toward the eye so it is out of the way.
Step 4: Palmer the marabou forward with close wraps, making sure that the wraps don’t overlap. Back wrap the thread and secure the marabou stem butt. Sweep the marabou rearward and take a few thread wraps over the butt of the marabou to keep its swept-back appearance (this also serves to strengthen the marabou).
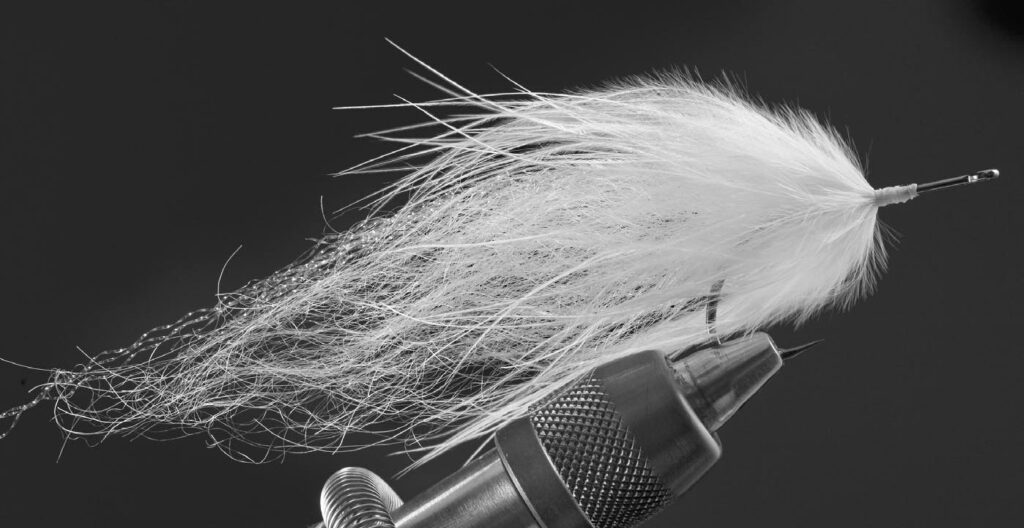
Step 5: Repeat Step 4 with more marabou plumes until you have reached a point that is one-third of the shank length behind the eye. Depending on the size of the fly, you may need three to five plumes.
Step 6: Immediately ahead of the marabou body, tie in an overbody topping of rainbow-green EP Fibers or a similar substitute. The topping should extend to a point just past the tie-in point for the tail. You may want to add a second bunch of topping to produce a larger profile. The green color is designed to imitate a rainbow trout. If you are imitating a different baitfish, vary the topping color to “match the hatch.”
Step 7: At the same point, tie a small bunch of pink Krystal Flash (six to ten strands will be sufficient) on each side of the shank. This will imitate the reddish-pink line on a rainbow trout’s side. The pink flash should extend to the tail tie-in point.
Step 8: At this point, you should have most of the front third of the shank free for construction of the head. Cut three or four two-inch sections of green EP Fibers or the substitute material of choice. Each bunch should be approximately half the width of a pencil. Tie in one bunch just ahead of the body with two tight wraps of thread placed directly in the middle of the bunch; pull both halves of the bunch upward so that it is seated directly on top of the hook, Mohawk style. Don’t trim the butts yet. This will be the final step after all bunches are tied in.
Step 9: Prepare three or four bunches of white EP Fibers as in Step 8. Rotate the vise so that the bottom of the hook is facing upward. Tie in the first bunch of white fibers directly beneath the green fibers, using the same procedure as in Step 8.
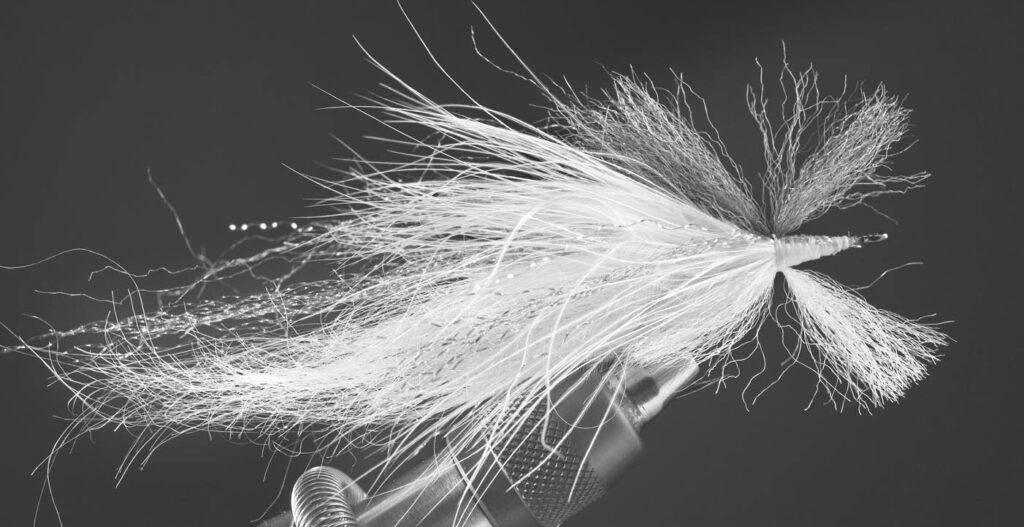
Step 10: Repeat Steps 8 and 9 in an alternating fashion until you have reached the hook eye, completing the head. It is important to pull each bunch upward as it is tied in so that it is perpendicular to the axis of the hook. This will create the thin profile of the head, which is instrumental in creating the side-to-side motion that makes the Boilmaker so effective. A good estimate for the head width is three-sixteenths of an inch.
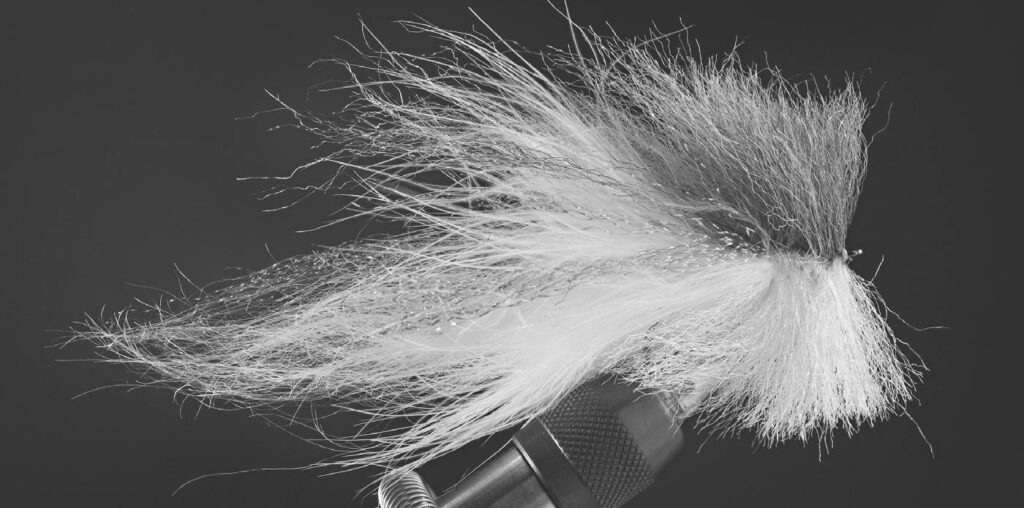
Step 11: Whip finish, and do an initial trim of the head so that it “flows” into the body and topping. Use Goop or a similar product to cement the doll eyes to the head of the fly and finish up with a final trim on the head.
Tie a few of Steve’s Boilmaker pattern and pay a visit to your local smallmouth stream. Be sure to have a variety of baitfish imitations, each with a few different sizes. When fishing these flies, whether in a lake, stream, or on the Sacramento–San Joaquin Delta, try using the roll-and-strip retrieve technique described by Steve.


")