

In one of his recent fly-fishing videos, master angler and fly designer Kelly Galloup made the statement that every new or different technique that a fly fisher learns is another arrow in the quiver of available tools, and it makes no sense to abjure any particular technique as inferior to others. For the most part, I agree with that position, because in my view, once we anglers decide (consciously or otherwise) to cease learning, we may as well turn in our fishing licenses and put our gear on Craigslist. The challenge of new or different ideas, insights, and techniques and of being open to understanding them, I believe, is what makes fly fishing such an eclectic and intellectually provocative sport — and importantly, what makes a good fly fisher a better one.
The same can be said of fly design. To prove my point, just ask a fly designer (professional, nonprofessional, or whatever — it matters not one whit) the “Why” question. Chances are, you’ll get a thoughtful look and a nonspecific answer, because most often, the design will have been triggered by a host of factors: an on-stream observation, something overheard or read, or maybe just a stray inspiration that bubbles up into a fly tyer’s consciousness from her cache of experiences. The point is that when it comes to flies, fresh ideas shouldn’t be eschewed simply because they depart from traditional tying techniques or because they call for new or nontraditional materials. Rather, at least in some cases, they should be embraced, and where it makes sense, become arrows in a fly tyer’s quiver.
Fresh ideas are what this month’s featured tyer, Hogan Brown, brings to the table. As an example, consider Hogan’s S&M, a highly successful Baetis nymph imitation, and compare it with a standard Pheasant Tail Nymph — a very hard act to follow, because the latter pattern has to be one of the top 10 nymphs in terms of number of fish brought to the net. There are similarities among the various materials used for the two flies, but there are also significant differences in design — one salient difference being the supertiny profile of the S&M, which is why it is one of my guiding and fishing go-to patterns during a Blue-Winged Olive hatch. Its performance in the canyon environments where I spend a large percentage of my time is exceptional. I haven’t quite pinpointed the reason for that, but I believe it may have to do with the rather miniscule size of the natural Baetis in that type of harsh bug and fish habitat.
Hogan began fly fishing during his junior high school days. Living five miles from the lower Yuba River, which became his fly-fishing classroom, he hitchhiked Highway 20 with fly rod in hand to attend “class” there at every opportunity. He also began tying flies at about the same time. During this period, any tying skills came the hard way — the self-taught type of acquired knowledge that makes for a very independent, thoughtful angler. Later, during his high school years, he began hanging around the local fly shop in Nevada City, soaking up angling and tying tidbits like a sponge — and thus began Hogan’s “formal” angling and tying education. Other knowledgeable fly-shop regulars served as his mentors, letting him tag along on fishing excursions. At age 17, he began working at the shop, acquired his guide license, and began guiding shop clients, first with walk-in trips on the Yuba River — both the lower river and the North Fork near Downieville — and then at the oars for steelhead on the lower Yuba and Feather Rivers. This gig not only kept him supplied with gas money for his elderly Jeep and for other necessities through his community college days, but quickly furnished a base of experience that would later have a profound effect on his unique approach to fly fishing and tying.
In 2001, Hogan transferred from community college to Chico State University. He began working for a local Chico fly shop, where some of his original fly patterns were sold. As time passed, Hogan was tutored by some of the area’s top guides and soon became one of them. Here’s how he puts it: “I spent two years hanging with Lonnie Boles and Ernie Denison, fishing the lower Sacramento, Feather, and Trinity Rivers. That was my master’s degree program in guiding, so to speak.”
Regarding his original fly patterns, he tells me this: “I always tied and fished my own patterns, rarely ever fishing any commercially tied pattern — not because I didn’t have faith in them, but because I just always had this idea that if I was fishing flies the fish had never seen, ones I came up with that were a bit different from the ones in the bins at the fly shop, I had a better chance of catching fish.” With a nice touch of modesty, he adds: “My flies catch fish all over the country and have become staples on rivers I have never fished and some I couldn’t even find on a map. I never planned or went out looking for that, but I guess I can take credit for the ideas behind the flies. Still, from my viewpoint, it happened because somewhere along the way, someone had enough faith in me and my ideas to take a chance and commercially tie and distribute my patterns.”
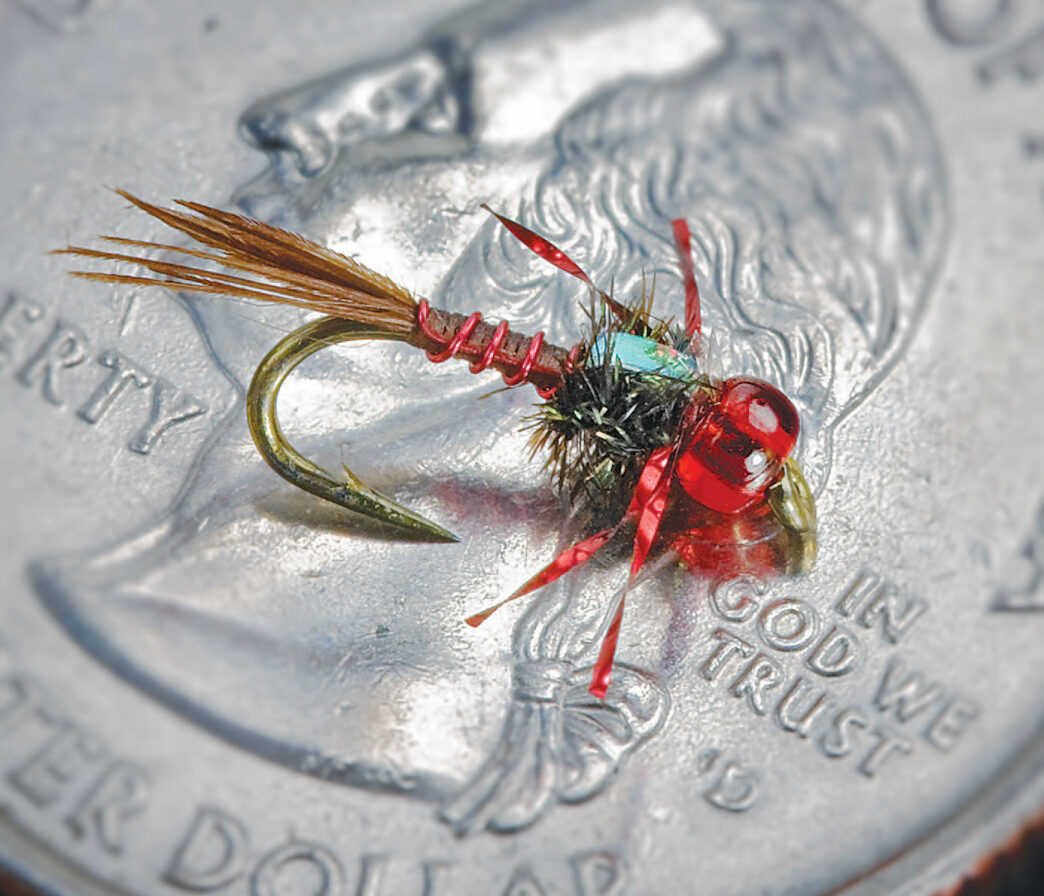
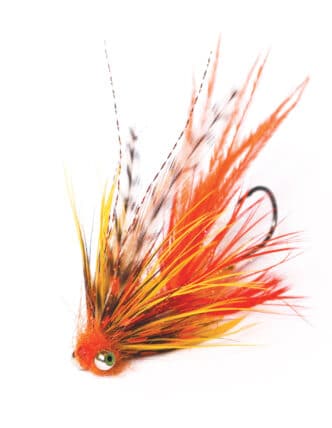
Now let’s hear from Hogan about the origin of his Red-Headed Stepchild.
“Necessity, as they say, is the mother of invention. As a young guide, I was faced with the necessity, on group guided trips, of catching fish while fishing behind some of the best guides in Northern California. This pressure-cooker situation has been the genesis of some of my best patterns, including the Red-Headed Stepchild. I needed flies that the fish hadn’t seen and that would enable me put up some respectable numbers of fish behind my employers.
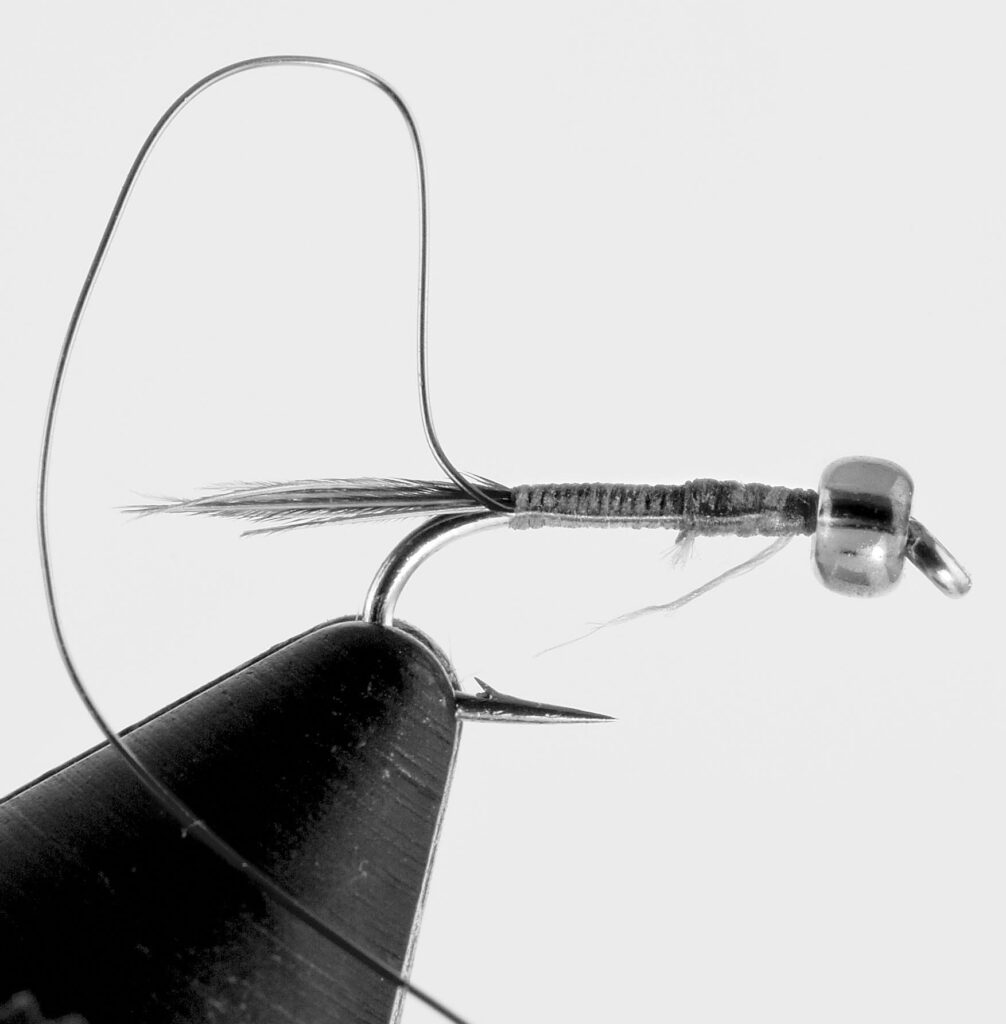
“During a Trinity River group-guided trip, I was fishing my clients behind several very experienced guides. The hot nymphs that day were small red Copper Johns and even smaller S&M Nymphs, ends to a point, and tie that end in at the forward end of the abdomen on top of the shank. The long end of the Mylar tinsel should protrude out over the back of the fly, because it will ultimately be pulled over the thorax to form the wing case. Leave the thread at the forward end of the abdomen.
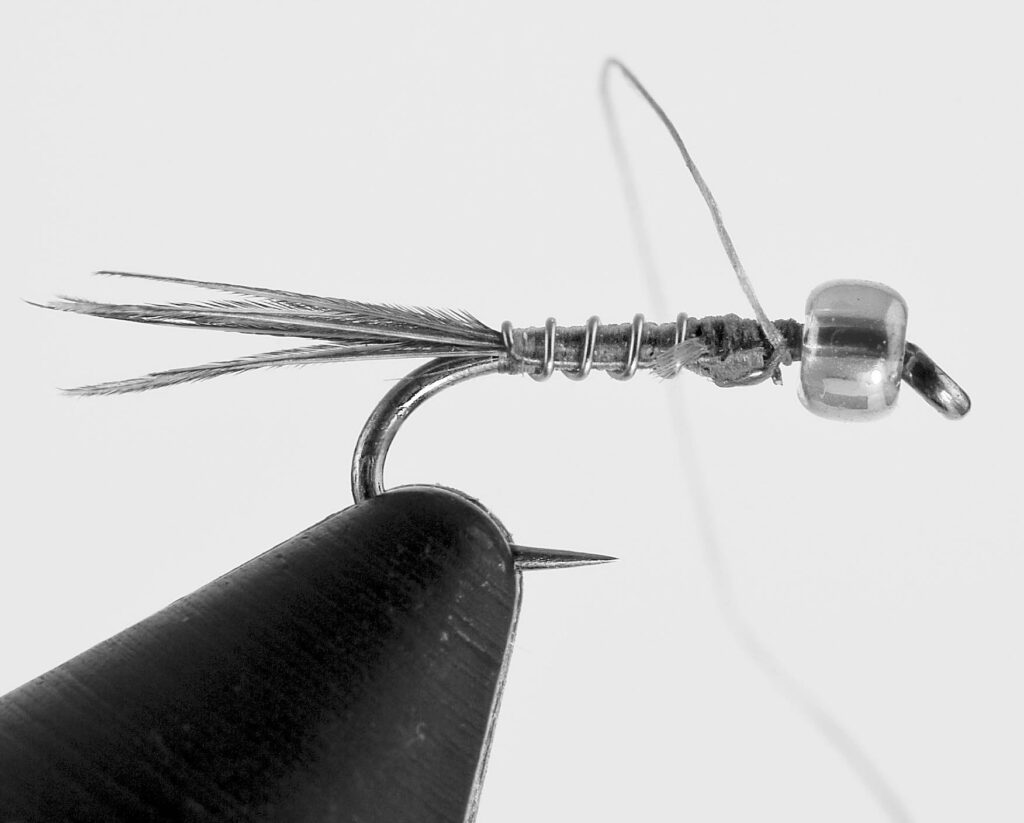
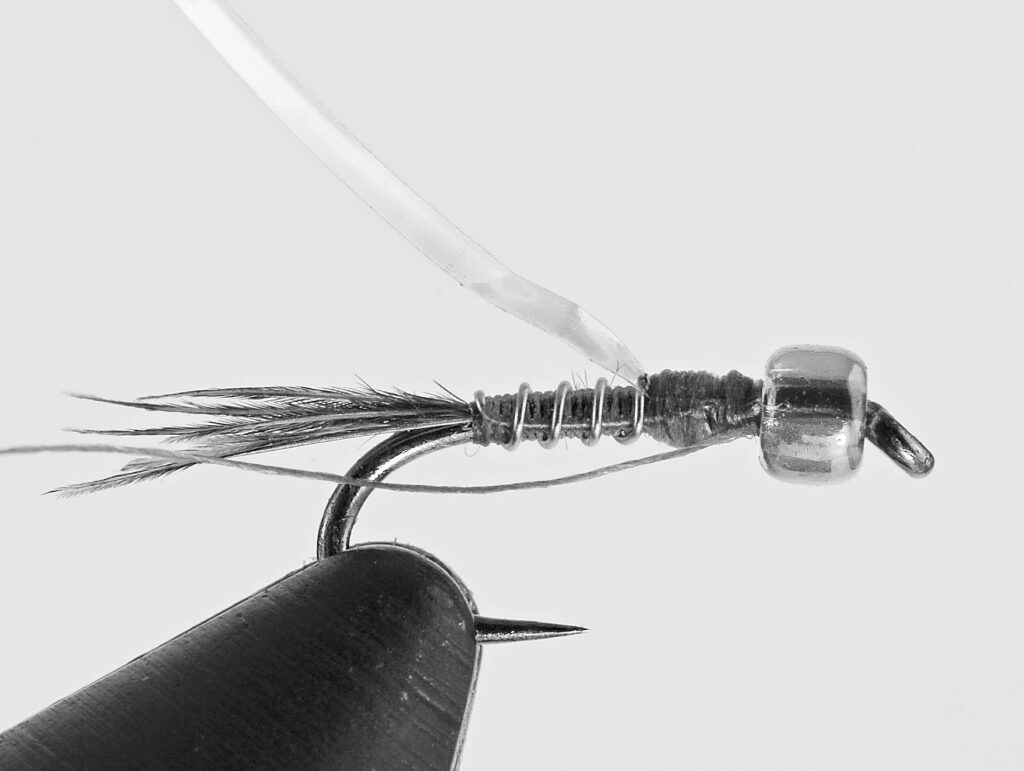
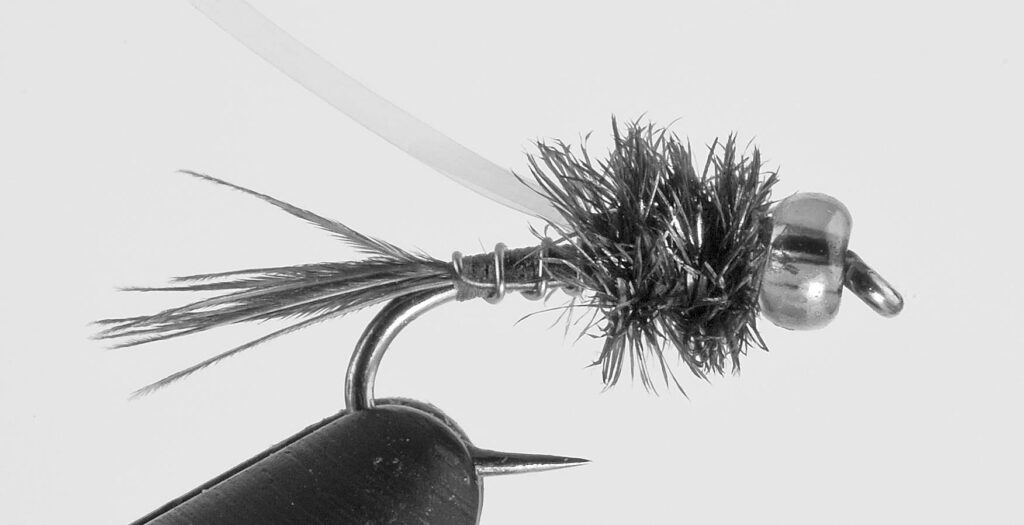
Step 6. Cut three barbules of peacock herl from the stem and even up their tips. Tie these in by their tips at the forward end of the abdomen. Twist them counterclockwise into a “rope” and wrap them forward to the bead, forming an iridescent thorax. Tie them off at the back of the bead and leave the thread there.
Step 7. Cut a two-inch piece of red Krystal Flash from the hank and double it over. Tie the doubled-over piece in at its midpoint right behind the bead so that one half of the piece hangs out to the left and the other half hangs out to the right. These pieces will become the legs.
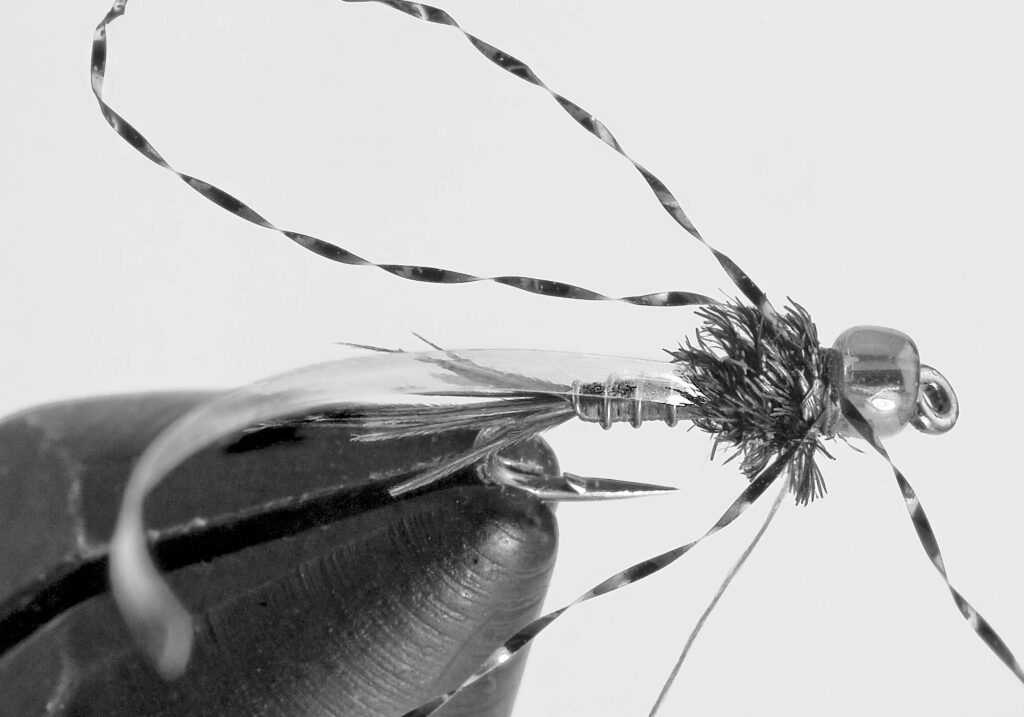
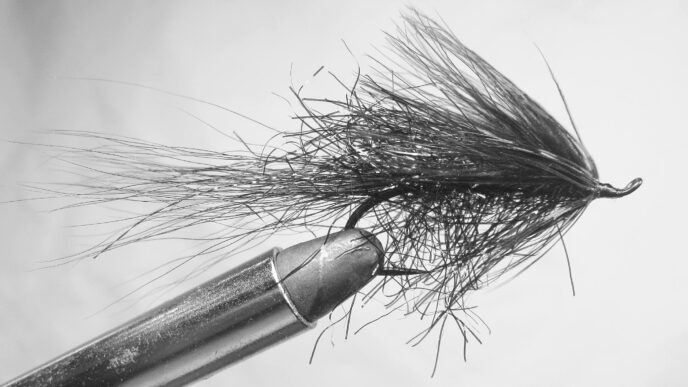
Step 8. Pull the Mylar tinsel over the top of the thorax to form the wing case and tie it down behind the bead. Whip finish and trim the Krystal Flash to create the legs. The legs should stretch just past the rear of the thorax. Place a tiny drop of head cement or superglue on the point of your bodkin and apply it behind the bead. And there you have the Red-Headed Stepchild.


")