

PHOTOS BY ANDY GUIBORD
For the life of me, I can’t recall where it was that I first met Gene Kaczmarek. I suspect, though, that it was a long time ago at one or another of the fly-fishing or tying events sponsored by the Northern California Council of the Federation of Fly Fishers. In fact, when I think of that intrepid organization, Gene’s smiling face comes immediately to mind (along with those of a few other stalwarts), probably because he has been so instrumental and faithful as a volunteer helping to guide it over many years, and he’s always there at those events, being himself.
To say Gene is enthusiastic is an understatement, as anyone who knows him can attest. His enthusiasm is boundless, as well as infectious. I recall a particularly fine example of this character trait that occurred at an NCCFFF tying event. Gene was sitting behind a very unusual vise and tying platform that was bedecked with unique tying tools. He was, in his usual manner, talking vigorously to a group of people crowded around his table and was gesticulating excitedly like . . . well, an excited Italian guy in explanation overdrive. (I’m a full-blooded Italian, so I can get away with this.) My companion and I stopped to see what Gene was up to this time. We soon realized that he was demonstrating how a disabled person — a wounded war veteran, for example — could tie a fly with one hand using the specialized vise and tools assembled before him, all of which were the product of the fertile and compassionate minds of Ken Brunskill and Ed Huff, a couple of fellow tyers. Needless to say, the group surrounding Gene, including me and my companion, were transfixed by the whole thing. Gene’s demonstration and explanations were simple, clear, and convincing. I’ve never forgotten that bit of charity on Gene’s part, I guess mostly because it is such a prime example of Gene’s character.
Over time, I’ve had the opportunity to tie flies at shows while sitting next to Gene. The first time this happened, I was a bit bowled over by his ebullient manner at the vise. His voice, shall we say, carries.
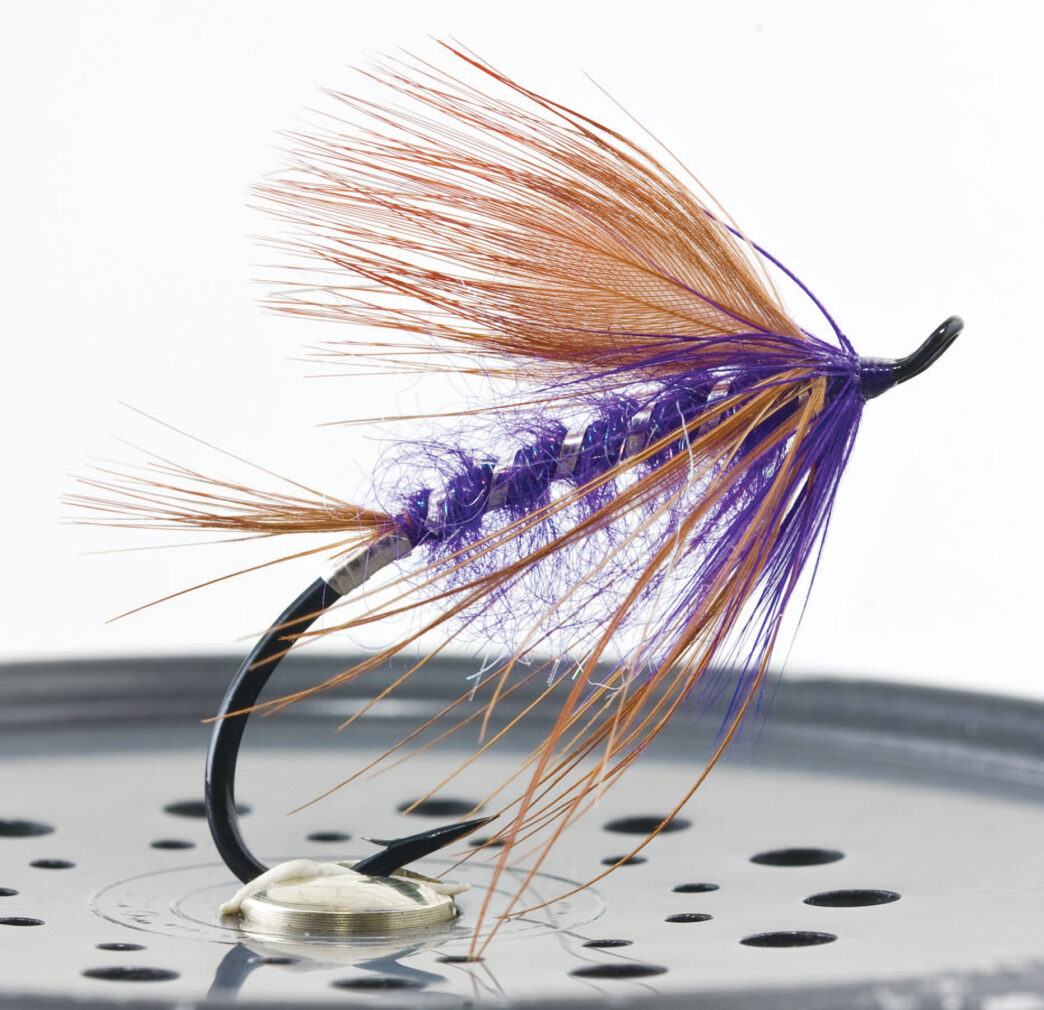
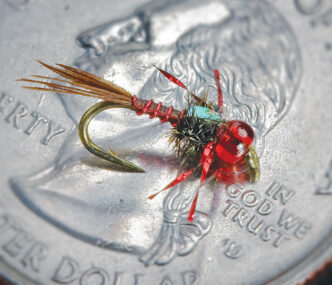
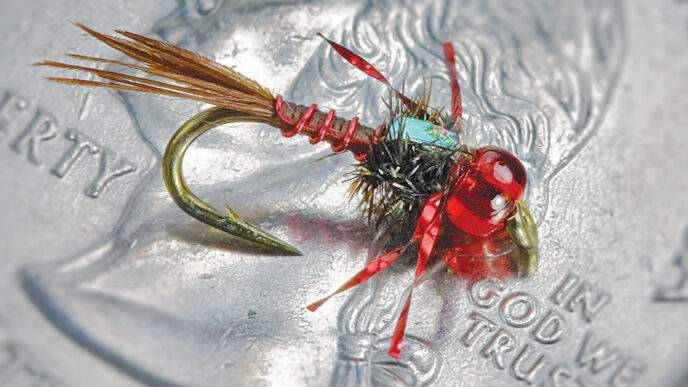
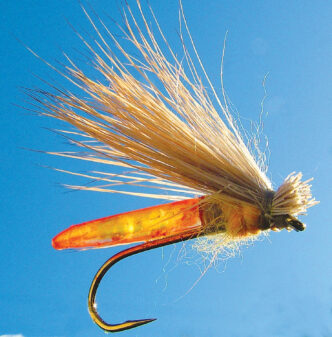
To be candid, I must admit that my first reaction was something like, “Gee, maybe I should have chosen another table.” But as that day’s session wore on, I began to smile and enjoy the . . . er, ambiance. By the time our session was over, all of that had faded into the background and stowed itself away in my memory as part of a fun, humorous, entertaining afternoon. Now Gene is a favorite among my stalwarts in the lineup of tyers I assemble for the International Sportsmen’s Exposition in Sacramento, where the ability to speak clearly and kindly to the gathered audience is just as essential — if not more so — than technical tying skills. That’s not to say that Gene is lacking in the tying-skills department — nothing could be further from the truth. He is fully capable of tying everything from tiny dry flies for trout to large, artistic patterns that lure steelhead to the hook. His Deep Purple Pseudo Spey pattern, which is the subject of this column, is an example of the latter talent.
One more little story about Gene before moving on. As you will note from Gene’s comments below, he is fond of a grand old steelhead fly pattern known as the Green Butt Skunk, so fond, in fact, that he has regularly used it as his demonstration fly at the various Northern California show venues. The standard pattern for this fly calls for a white bucktail wing. Instead of using bucktail, Gene would reach into his tying bag like a magician reaching into his hat and, with a wry smile, pull out a black pelt with a wide white stripe down its back — yes, a real skunk pelt. This little ploy always drew chuckles and not a few questions from his audience. I can’t remember exactly how Gene acquired the critter’s hide, but I suspect it has something to do with a onceodiferous road kill.
Now let’s hear from Gene as he tells us about himself and how the Deep Purple Pseudo Spey fly came to pass.
“I live in Fremont, California, with Terrie, my wife of forty-six years. We have two children who have given us five lovely grandchildren. I am retired from a career of sales and marketing in Silicon Valley. By way of hobbies, I rallied sports cars with the Sports Car Club of America for 10 years, but I decided to give that up and go fly fishing, and I’ve never looked back.
“Early on, I joined Mission Peak Fly Anglers, my home fly-fishing club for the past 20 years. I have served the club in many capacities, including a stint as club president and as the fly-tying chairperson. I remain active in the club, helping with events and meetings.
“One of the main focal points of my fly-angling career has been the Northern California Council Federation of Fly Fishers, where I have served on the board of directors for the past 16 years. I am currently the council president and have previously served as vice president for marketing, vice president for communications, and fly-tying chairperson. I am one of the original members of the board of governors for the Federation of Fly Fishers Fly Tying Group, and currently I am the standing fly-tying chairperson for the federation’s annual conclave.
“In 2002, I was honored to be chosen as the inaugural recipient of the prestigious NCCFFF Ned Long Memorial Fly Tyer of the Year award. My fly-tying experience, which has extended over a period of more than 20 years, has included instructing beginning, intermediate, and advanced students. I have also demonstrated advanced steelhead tying techniques at a number of Western fly-fishing shows, including FFF tying events, the International Sportsmen’s Exposition show in Sacramento, the Fly Fishing Show in Pleasanton, and at fly-fishing clubs. Fly tying has become a passion for me, and not just a hobby. Although I tie everything from trout flies to saltwater patterns, steelhead flies are my first love, because in my view, they provide me with the opportunity for freedom of expression like no other tying style. “I have always had a soft spot for the genre of steelhead flies tied in the Spey style. One of the prominent features of a Spey style fly is the long, flowing hackle palmered up the shank, beginning at the second turn of the fly’s ribbing and ending just short of the head. The soft hackle points flow gracefully past the hook bend.
“Scottish anglers along the River Spey developed the Spey style of tying in the early 1800s. Among the earliest recorded Spey flies were simple patterns listed in fly angler and poet Thomas Tod Stoddart’s 1846 book Angler’s Companion to the Rivers and Lochs of Scotland. While modern Spey patterns resemble the older style of tying reflected in those early patterns, they are tied in a somewhat sparser manner. However, the long, flowing hackle remains a key structural element of a classic Speystyle pattern.
“The Deep Purple Pseudo Spey is a variation on the fly known to veteran steelheaders as the Deep Purple Spey pattern, a traditional Spey fly apparently originated by a gentleman named Walt Johnson and featured in the fine 1992 book by Dick Stewart and Farrow Allen, Flies for Steelhead. At one time, the Deep Purple Spey and the Green Butt Skunk, another hoary old steelhead pattern that is a great dark-colored fly for tailouts and riffle/run situations, were my go-to flies on the Klamath and Trinity Rivers. Still, I wanted a fly with a little more slinky movement in the water. The Deep Purple Spey was working passably well in that regard, but I was also looking for a little more flash than I was getting from its wool body.
In my search for flashy purple material, I found a package of Spirit River’s Lite Brite II Purple Haze dubbing that looked like it would give me that little extra flash I desired, but upon checking with Spirit River and various suppliers, I learned that it was no longer available. Hoping to locate a good substitute, I asked a knowledgeable friend for suggestions. We talked it over and concluded that Lite Brite was a type of UV blend and that Hareline’s Custom Blend Dub Purple would be a good substitute. It also occurred to me that using an upright wing configuration, instead of the original’s more traditional down wing, could add some additional movement in the drift, so I added that into the mix.
As a final modification, I decided to use Alec Jackson’s Pseudo Spey style in order to make the fly a bit easier to tie and possibly achieve an even greater degree of enticing movement. The Pseudo Spey style employs the same soft, long-barbule hackle as is used for a traditional Spey fly, but instead of it being tied in at the rear of the hook and palmered forward to the head, it is tied in at the head and wrapped there in the standard fashion of a soft hackle fly. The resulting modified Speystyle fly, which I now call the Deep Purple Pseudo Spey, produced the appearance, action, and, more importantly, the steelie grabs I was looking for when fishing it on the swing with a floating line in soft runs and holding pools. In short, after three years of testing the fly on both the Klamath and Trinity Rivers, I found what I was looking for.”
Materials List
Hook: Alec Jackson Steelhead Iron (or your favorite steelhead hook), size 3, 5, or 7
Thread: Purple 8/0 Uni-Thread, 70 denier flat nylon, or Pearsall’s Gossamer Silk
Butt: Medium flat silver tinsel
Tail: Red body hackle from a golden pheasant
Ribbing: Medium flat silver tinsel for hook sizes 3 and 5, small flat silver tinsel for hook sizes 5 and 7 (the tinsel size choice is optional for hook size 5)
Body: Purple Hareline Custom Blend Dub
Throat Hackle: Ringneck pheasant rump feather
Wing: A pair of red body feathers from a golden pheasant
Collar: Purple saddle hackle
Head: Tying thread
Tying Instructions
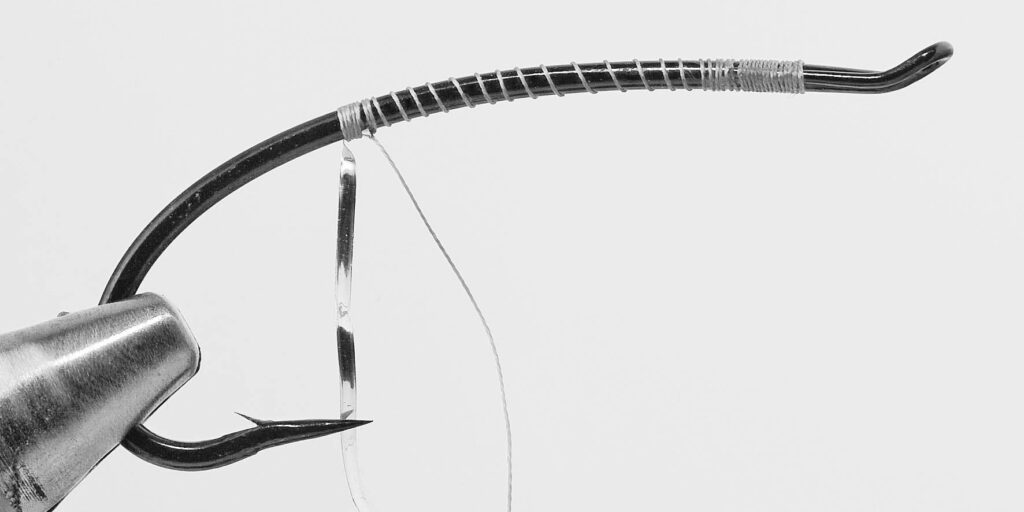
Step 1. The Alec Jackson hook has an up eye and an open wire loop that bends back along the hook shank. This loop is called a “return loop.” When tying a fly with this style hook, it is necessary to close the open end of the return loop with tight wraps of thread. Place the hook in the vise and start the thread halfway down the hook’s return loop. Wind the thread rearward in open turns to a point directly above the point of the hook. There is no need to cover the hook shank with thread, because the shank will be completely covered with dubbing. The thread and your bobbin should now be positioned directly above the hook point.
Step 2. Tie in the flat silver tinsel ribbing material on the bottom of the hook at the position above the hook point with five turns of thread. It is important that these turns be wrapped forward so that the thread does not extend rearward beyond the point of the hook.
Step 3. To form the butt of the fly, wind the silver tinsel rearward five turns, then back to the rib tie-in position above the hook point. Try to keep the wraps flat and not overlapped. You now can remove the five turns of thread that were used to tie in the tinsel initially, because the doubled rib will not unwind. Tie down the tinsel at the position above the hook point with three turns of thread. Don’t trim the tinsel yet, because it will be used to rib the fly after the dubbing process is completed.
Step 4. To form the tail, tie in a small clump of red body hackle from a golden pheasant on top of the hook, directly above the hook point. Be sure to keep all of the barbules on top of the hook. Three tight turns of thread should be sufficient for a secure tie-in. Leave the thread at the position above the hook point.
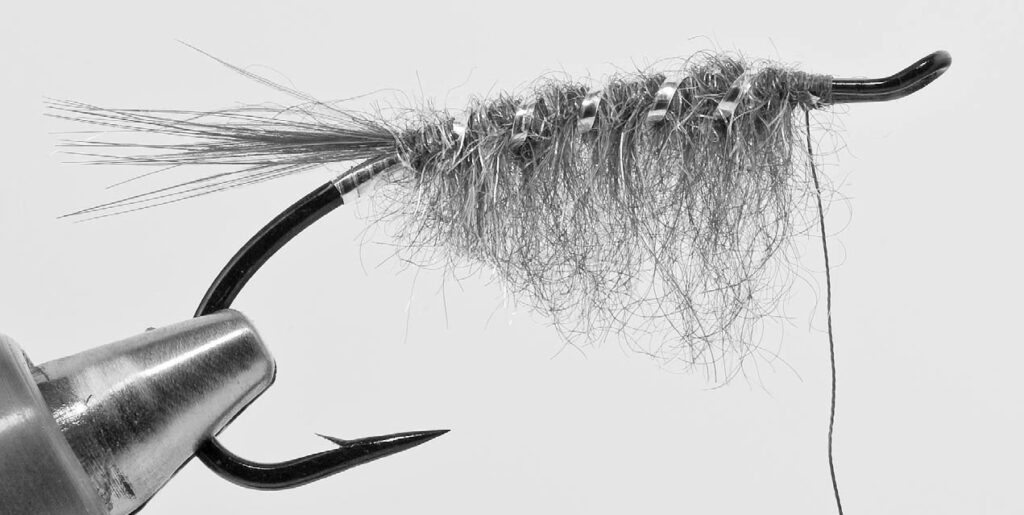
Step 5. Form a dubbing loop at that point and insert small, sparse clumps of the purple dubbing into the loop. It is important to use small amounts of dubbing, because the body must be thin. Advance the thread to the starting point, the middle of the return loop.
Step 6. Spin the dubbing loop counterclockwise to create a spiky noodle. Don’t spin it too tight, because the thread will compact the dubbing, and it will lose its essential spikiness. Make the first turn of dubbing behind the rib at its tie-in point, then wrap the dubbing loop forward in close turns, ending at the hanging thread. Tie down the dubbing loop there. Trim the excess dubbing loop and tie down any loose thread tips.
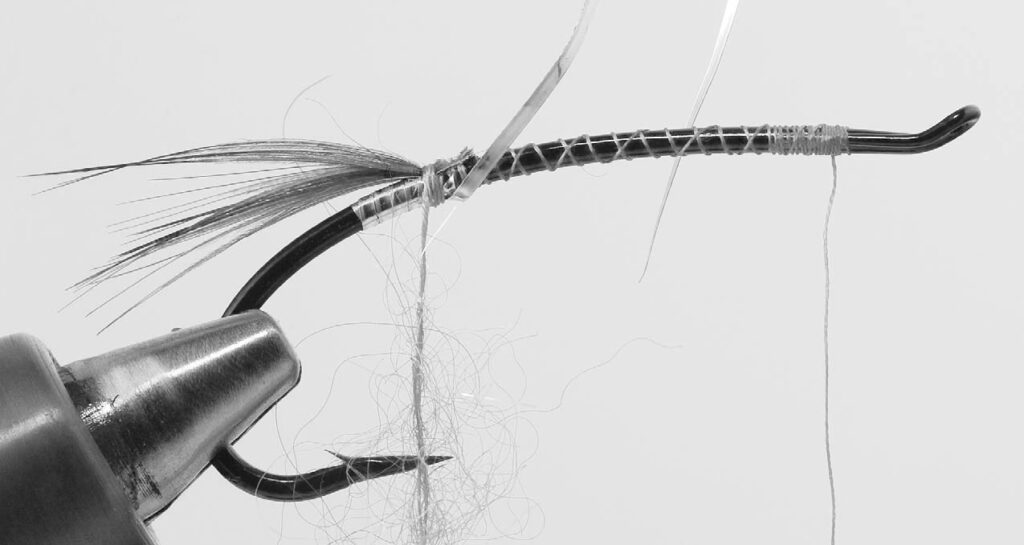
Step 7. Wrap the silver tinsel forward to the same point, using four to five turns. Tie the tinsel off there and trim the excess. Leave the thread at this point, because you need room behind the hook eye to tie in the throat, the wing, and the hackle.
Step 8. Using an old toothbrush or similar tool, brush the spiked-out fibers down. Using your bodkin or a small piece of Velcro, pick out any dubbing fibers trapped by the ribbing and brush down again. Trim the fibers to approximately one-quarter of an inch long, moving rearward, with a slight taper to the rear.
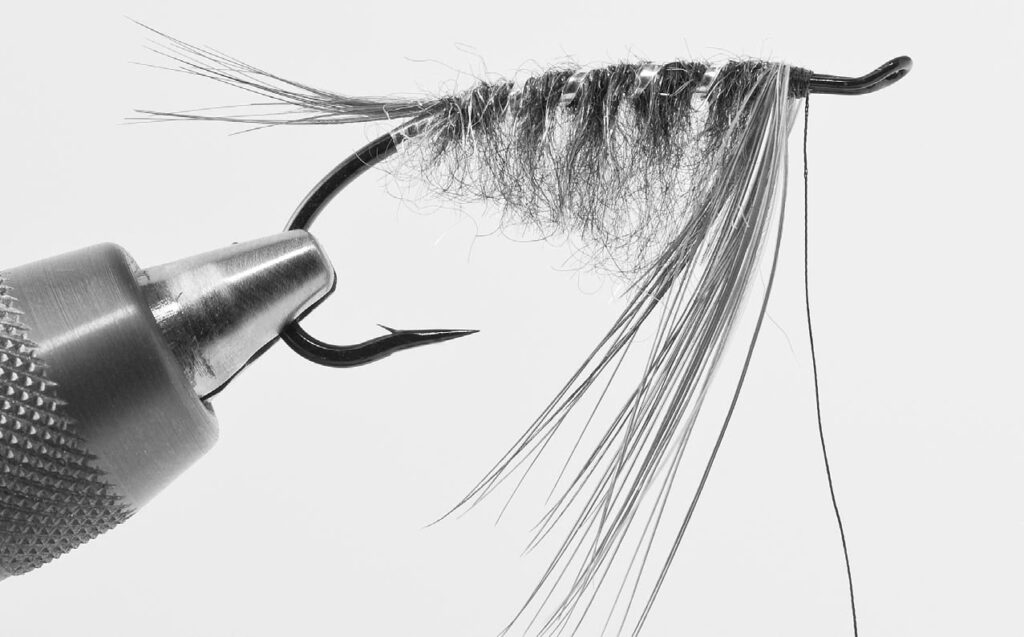
Step 9. Tie in the throat hackle by its tip at the point where the thread was previously left. Using your right index finger and thumb, sweep the hackle rearward as you wind the hackle with three close turns. Tie the hackle off with three turns of thread and trim the excess hackle. The thread should still be at the midpoint of the hook return.
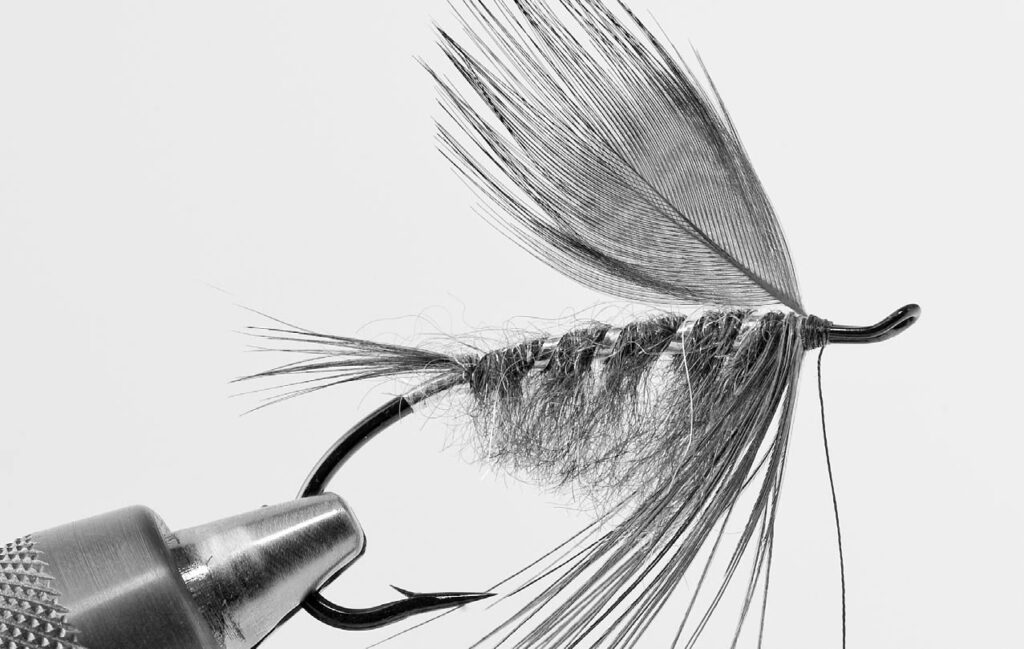
Step 10. Prepare the two wing feathers by removing the fluff from the base of the hackles.
Step 11. Tie in the wing feathers back to back — that is, with the convex sides facing each other — using three turns of thread. The wing should end up cocked in an upright position just in front of the throat hackle. Leave the thread at the wing tie-in point. You should still have plenty of room behind the eye for the next step and for a nicely proportioned head.
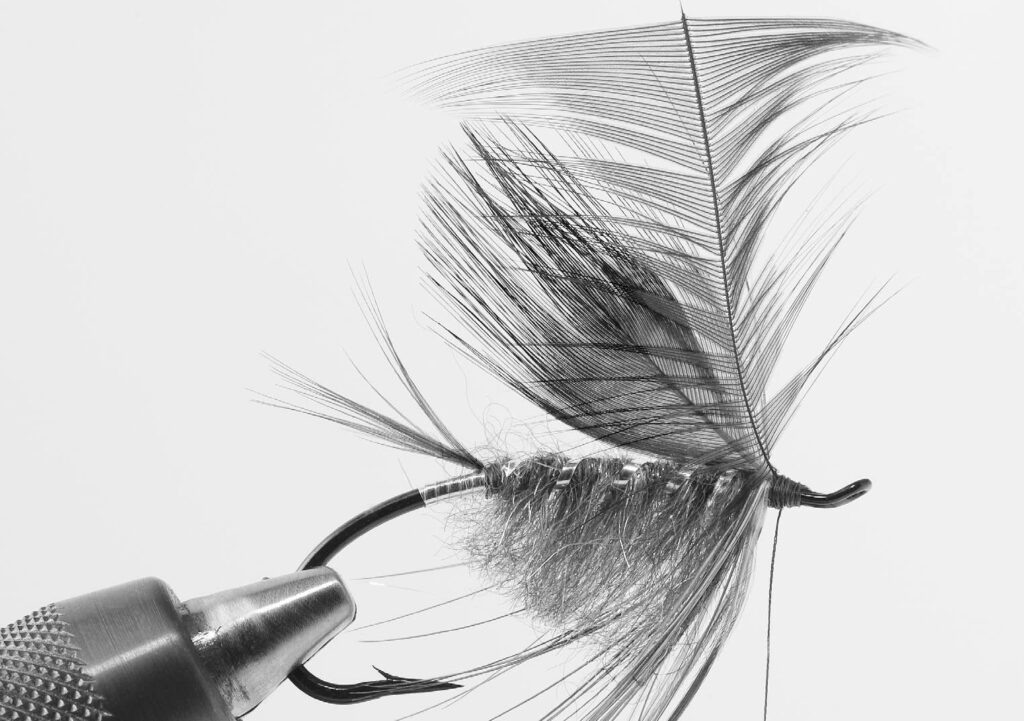
Step 12. Tie in the purple saddle hackle by its tip in front of the wing. Take three turns of the hackle, sweeping it rearward with each wrap. Tie off the hackle feather and trim the excess.
Step 13. Form a small, nicely tapered head with the tying thread and whip finish. Add a small drop of head cement to finish it off with a shiny head, taking care not to allow any of the cement to leach up into the hackle. That’s it, steelheaders. Tie up a few of Gene’s creature and go hunt down some metal. Now’s the time.


")