
More Than Just a Trend
Euro nymphing and Euro nymphs have become a staple in almost every angler’s toolkit, whether you’re chasing trophies or just out to enjoy your local water. You don’t have to be a competitive-level fly fisher to appreciate what these techniques and patterns bring to the table.
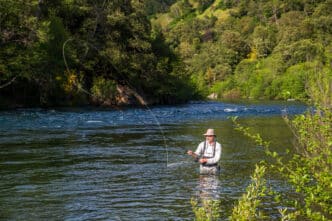
When I moved to Northern California 23 years ago, I found myself on the Upper Sacramento River and in the capable hands of the Ted Fay Fly Shop in Dunsmuir. That’s where I met Bob Grace and Joe Kimsey, who introduced me to the local style: high-sticking heavy bugs in pocket water—drifting them right into the mouths of healthy trout.
Not long after I got the hang of high-sticking, Euro nymphing got a bump in popularity. Guys like Andy Burke were innovating with fast-sinking flies, long rods, and leader setups meant to give anglers maximum contact with their flies.
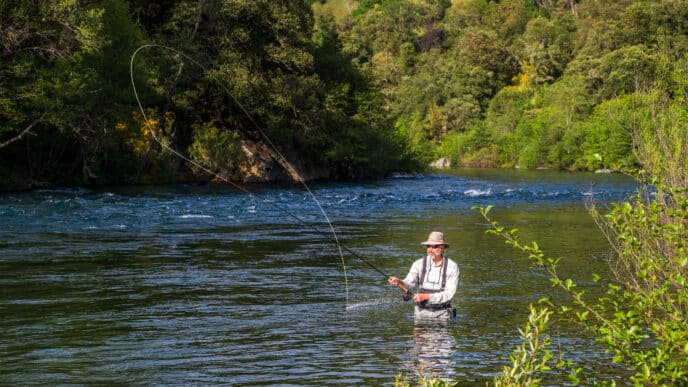
Today, the Euro setup has evolved even more. We now have 10 to 11-foot rods with specialized tapers, designed to deliver flies with pinpoint accuracy. Reels are now built to balance those rods and reduce arm fatigue. Lines have gotten thinner for less sag and more sensitivity—and that means better strike detection.
Fly fishing has always felt like a tribal pursuit to me, and Euro nymphing definitely has its own tribe. Whether you’re all in or just curious, it makes a ton of sense from a design standpoint. I like to think of fly fishing like golf—you’ve got different clubs (or flies and rigs) for different situations. Euro gear is just another tool, and in many cases, it’s the best one for the job.
DESIGNING EURO FLIES: QUICK, STREAMLINED, AND EFFECTIVE
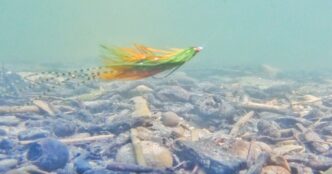
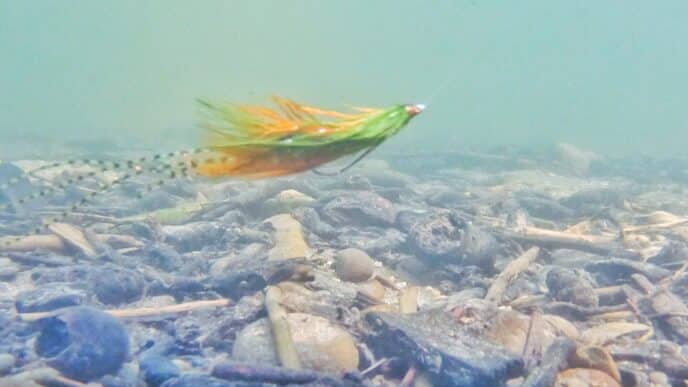
These flies are built to get down to the fish—fast. When I look at fly patterns for Euro nymphing, I consider weight, hook gap, and how well the fly slices through the water, especially in complex currents. Fish spend most of their time near the bottom, so getting your fly down is everything.
Take something simple like a Perdigon. When I tie these, I make multiple versions of the same pattern and hook size, but with different bead sizes. That way, if a fly is working in slower water, I can swap to a heavier version of the same fly for faster runs without changing my whole setup. I organize my boxes by pattern and bead weight—no calipers needed (though I won’t judge your nerd level if you do use them).
If this feels like too much, no worries—plenty of fly shops now sell these patterns in multiple bead sizes, ready to fish. Just like golfers carry different wedges, it helps to have multiple versions of a pattern to suit different scenarios.
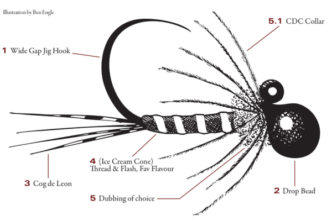
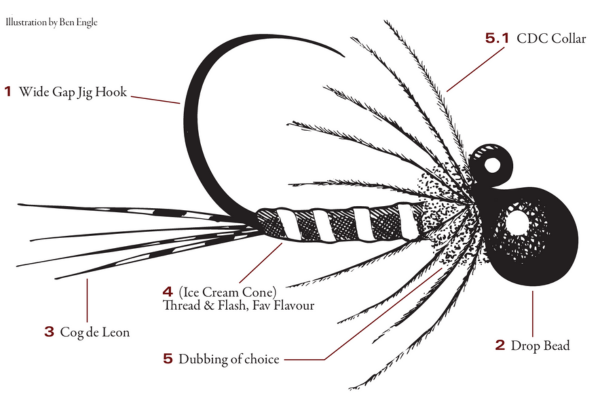
1. HOOKS: THE FOUNDATION
Euro hooks come in tons of shapes and wire gauges. Some are built like dry-fly hooks—thin wire, ideal for light tippet and softer rods. Others are beefed up to handle bigger fish and stronger currents. Two of my favorites:
- Fulling Mill FM5125 – 90° eye makes it great for holding larger beads
- Fulling Mill FM5045 – a solid all-arounder
These are versatile, reliable hooks that I use for most of my tying. Anecdotally (read: not scientific), I’ve noticed jig-style hooks seem to hold fish better—maybe it’s the angle?
That’s just from guiding my kids and paying attention to how the fish stay pinned.
2. BEADS: IT’S ALL ABOUT TUNGSTEN
There are four main bead styles, but only one material you should be using: Tungsten.
These flies are like muscle cars—they’re all about weight-to-speed ratio. You want mass, and you want it packed into a streamlined body. Here’s a quick breakdown:
- Standard round tungsten – not my go-to due to hook compatibility
- Slotted tungsten – great option, but the slot reduces weight slightly
- Tactical Drop / Instajig beads – my favorite. They shift the bead’s weight forward for better balance and ride. Super heavy in a small profile
- Jig Backs – more like a weight system than a bead. They add size to your fly but are unmatched for getting deep fast
3. TAILS: SUBTLE OR LOUD—YOUR CALL
Tails on Euro flies act like rudders. I keep it simple:
- Glo-Brite Floss for bright, flashy attractor patterns
- Coq de Leon for a natural look with
durability
Don’t overthink it. Fish don’t have hands—they’ll eat it or they won’t. A few fibers (four or five) are all you need.
4. BODIES; SLIM SINKS QUICKER
Body materials affect how fast your fly sinks. The thinner the body, the quicker it gets down. Options include:
- Natural quills (soak them first!)
- Thread (plain or flashy)
- Pseudo quills
- Fine wire
- Sparse dubbing (mostly for thorax)
I avoid bulky dubbing except on bigger patterns like stoneflies, where I offset the drag with a heavier bead.
5. THORAX; COLLARS: SMALL TWEAKS, BIG IMPACT
This is where you can get creative. I use CDC or micro dubbing loops to build collars—
either to mimic a thorax or just to add a hot spot. You can change the whole vibe of a fly with a different collar color, even if the rest stays the same. This is where the fun is. A little trial and error here leads to better flies and a better understanding of what works.
FINISH STRONG: UV RESINS
Finishing flies has gotten a big upgrade thanks to UV resins. These let you build or coat specific parts of your fly quickly and cleanly. I use Loon Outdoors’ Thin, Thick, and Flow, plus their colored resins for hot spots or accents.
Pro tip: Invest in a good UV light. Not all lights cure resin equally. The best ones output UV at the right wavelength to fully cure your resin—no tacky mess.
FINAL THOUGHTS: TRY IT OUT
Euro nymphing may seem like a trend, but it’s here to stay—and for good reason. Whether you view it as progression or regression probably depends on how you learned to fish.
The flies are quick to tie, use minimal materials, and just flat-out work. Think of them like trout ice cream cones—pick your flavor, mix it up, and have fun with it.

Meet Matt Callies
Born and raised in San Diego, Matt was chasing bass in golf course water hazards by the age of five. A move to Northern California in his twenties introduced him to fly fishing, which quickly took hold of both his imagination and lifestyle. What began as a way to save money—tying his own bass flies—soon became a full-blown obsession. After a stint living out of his truck, he reentered civilization to guide and work as a sales rep for some of the top brands in the fly-fishing industry. Today, he serves as Director of Product Development at Loon Outdoors and manages sales for eight companies across the Southwest. Supported by his adventurous wife, two fish-obsessed kids, and a pair of loyal labs, he’s always ready to explore new water.


")