
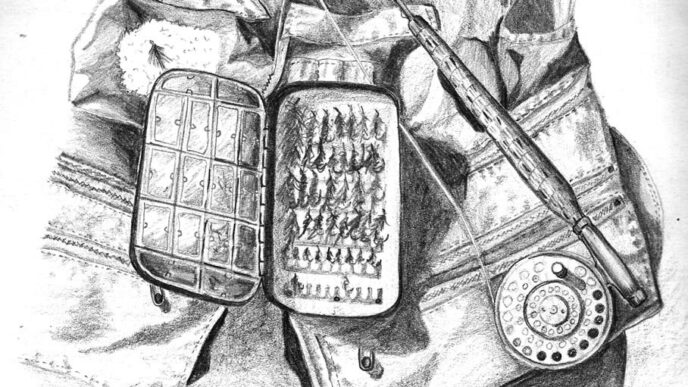
My love of the common caddisfly is no secret. Of all the bugs in the West, none provides me with more frequent and sometimes spectacular success in the waters I call home. No doubt this affinity for the caddis reflects a tendency to find myself in the hard-scrabble drainages favored by the insects themselves, the rough-and-tumble rivers that gave the region its character long before the trophy-tempered tailwaters that have grown, more and more, to define the trout fishing so many of us pursue today.
Like other fly fishers, early on, I had a penchant for tying the patterns used to imitate caddisflies. Maybe they were just easier. Let’s face it — you can tie a hell of a lot of passable caddis imitations before you learn how to compose a pretty pair of hackle-tip mayfly wings. And no matter how rough or uneven, those early efforts at caddis seemed nearly always to work, prompting the suspicion that rough and uneven is somehow the point — that the flies you tie should reflect the character of the bugs themselves, homely as dust motes bouncing carelessly upon the stream.
There was nothing refined or delicate or even particularly graceful about these early hair-wing caddises, just as there is nothing refined or subtle or even particularly enticing about the water where these flies work best — forgiving riffles that, by and large, mask the errors that haunt so many early casts. Hackled stem to stern, your traditional caddis pattern offers a crude approximation of the distinctive caddis profile while carrying off the difficult task of staying afloat through rough and broken current. The equation, in fact, is fairly exquisite: the bugs, the water, the flies, the fish, the fishing — all of it of a sort, all of it coming hand in hand.
But as with so many aspects of fly fishing, time revealed the limits of this simplistic approach to the caddis reckoning. Often the problem reached a crisis during the pinch of last light, with caddises swarming, fish smacking — but nothing, not a thing, eating my faithful deer or elk hair hackle-bodied fly. Worse, perhaps, were the big fish I failed to fool, single feeding trout I cast to believing in my tried-and-true Trichopteran tie — only to watch the fly float undisturbed one cast after the next, suddenly an eyesore on the water, no more an impression of a caddisfly than a blow-up doll looks — and acts — like the real McCoy.
There’s a point in everybody’s caddis career when you realize that your traditional caddis patterns just aren’t good enough — not in those demanding moments that can bring even accomplished anglers cursing to their knees. You need a Better Caddis. “Better,” of course, is a subjective claim, one capable of initiating — at least where flies are concerned — the severest of quibbling among members of the fraternity.
And, occasionally, fisticuffs. I love a good fight.
The very first thing you can do to create or tie a Better Caddis — especially ones used for selective trout — is get rid of the palmered hackle. Now I rarely employ more than a couple of turns of hackle, wound in at the collar, from a size 14 caddis on down to the smallest size I dare tie. I know these flies can be tough to see.
My advice: Get over it. Learning to fish a dry fly that settles low in the water, carried all but invisible in the film, is an important step for anglers motivated to move fish to the surface, where the visual delight of the take remains the defining gesture of the sport.
Fishing a sparsely dressed dry caddis requires only the skills you are already working on to make yourself a better fly fisher. You don’t need to see the fly — you just need to know where it is. The fly floats, no matter how low, because of air trapped in the wing — and because of the good cast you made that set the fly gently on the water. Of course, a delicately floating fly, buoyed as much by surface tension as by the materials from and manner in which it was tied, will immediately submerge if your drift creates any bit of drag. To keep track of the fly, you simply need to know where the end of your tippet is and know that your leader, unfolding, has extended to its full length in a straight line.
Here’s a trick I learned from a character I used to come across on a famous river, a fly tyer who would start fishing on summer evenings about the time the sun set, when the caddises finally started to move. This was tough, low-light fishing. If I got one good trout, I was stoked. This guy — ponytail, shorts, no vest or waders — always reported half a dozen or more hookups, although he was honest enough also to acknowledge that he rarely landed half of these big desert rainbows that ripped line off the screaming reel, often exposing backing as they rode the heavy current downstream. The goal was to put the fly directly on a feeding fish’s nose. You can do that only if you know exactly where your fly lands.
This guy always started with short casts. Once he found his fly on the water, he pulled off exactly two more feet of line, cast again, and again searched the water for evidence of his drifting bug — often no more than a wrinkle or dimple or some other aberration glimpsed in the failing light. In this way, the fellow worked his fly out to the where the fish were feeding — but rather than first throwing a full-length cast and trying to locate his fly in the vast expanses of the water before him, he had only to look, instead, within a small circle of water, so that he was always aware of where his fly was, what it was doing on the water, and what, if anything, rose to or around it.
Never be intimidated by surface flies you can’t see. Your fly is out there the same distance from the end of your fly line every time — as long as you make casts that straighten your leader in alignment with your line. If a fish moves to the fly, you’ll see all the evidence you need.
A better caddis is a fly I turn to, as well, whenever I find a single fish feeding in isolation on what I assume are the same caddises I see fluttering near me or on the water. This solitary fish is often set up tight to the bank, tucked up under brush or shrubs or trees while quietly rising to caddisflies that have fallen from the vegetation and now slide gently downstream. Needless to say, these are big fish. They get a long, careful look at the fly, which is why you can’t expect to fool them with something that sits on the water looking like the broken nub of a test-tube brush.
The complaint I hear most often about a Better Caddis, however, is that it doesn’t float well — especially after a fish has eaten it. That’s true. But so what? Casting to a single rising fish presents us with all of the challenges and rewards the sport has to offer. If you get it right even once, your fly has done everything it needs to do.
Better yet, however, I’ve found that a Better Caddis doesn’t necessarily send a trout scurrying for cover just because your cast goes awry — even if you land it too close to said fish’s noggin. With a bunch of trout up and feeding — especially at last light — aim for their noses. But a single trout feeding calmly in isolation demands a much more delicate shot, one that might very well call for a bend in your leader or even a snaky cast in order to give the fly the drift you need.
Attach a Better Caddis to a long, light leader, and you should rarely spook a single feeding fish. Be patient. Aim above and short of the fish and, again, make sure that leader extends to its full length, even if you do try to put a little hook in it to compensate for uneven currents. Never pick up the fly until it has drifted past or below the fish. Gauge how far short of the fish your best cast drifted, then pull that amount of line off your reel. Make the exact same cast as before, only now with that extra bit of line. Now your fly is in the fish’s wheelhouse. If it’s feeding on caddises, your Better Caddis will do the trick.
Patience also means, however, that if you give that feeding fish a good look at the fly and it refuses it, you need to retreat and reassess the situation. If your Better Caddis isn’t good enough, you need something even better: the Brambridge-Style Caddis, for example.
More often than not, to tie an even better caddis, you just need to go down the same path that brought you to your first, earlier improvements: that is, a pattern sparser still, with not only less hackle or no hackle at all, but less wing material, as well, so that you end up with a fly that rides even lower in the water while still remaining afloat in the film. Remember, the Brambridge-Style Caddis is still a dry fly. You fish it on the surface with a drag-free drift. Whether or not it gets a little wet isn’t the point. The point is to get that big fish to rise.
Of course, even the very best caddis won’t solve all of your problems. Once I rose a big redside three different times in two days on the Deschutes, getting it to eat my Better Caddis each time, only to have it dive into a tangle of submerged branches and break me off within moments of all three hookups. Pretty casts, pretty flies, but there was no way I was going to get that fish short of wading to the edge of the river and remodeling the big trout’s lie.
By the same token, there’s no such thing as a Best Caddis. Such a notion denies the spirit of the sport. There is no best. Some things just work better than others — until other things work better still.
But don’t be fooled. A Better Caddis is still only as good as the angler who fishes it. The better the angler, the better the fly. That’s a lesson many of us still have to learn.
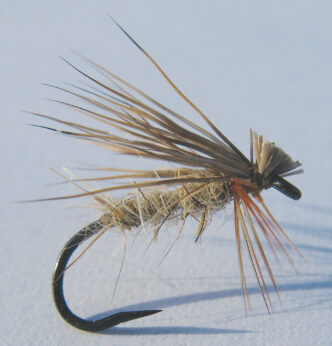
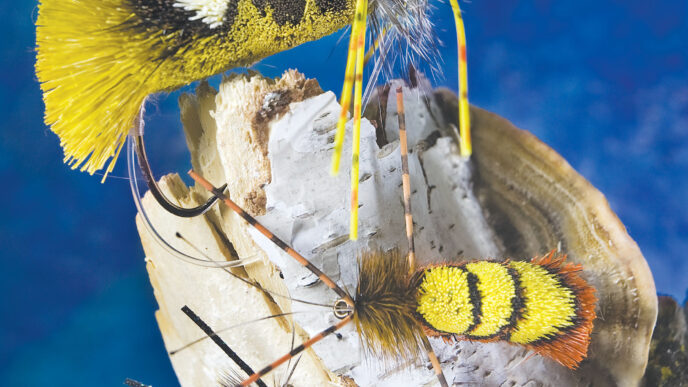
The Better Caddis
Hook: TMC 900BL, size 14 to 20
Thread: 8/0 Uni-Thread
Wing: Elk or deer hair selected for color to match natural
Body: Dubbing to match natural
Hackle: Brown, tied in before or after the wing
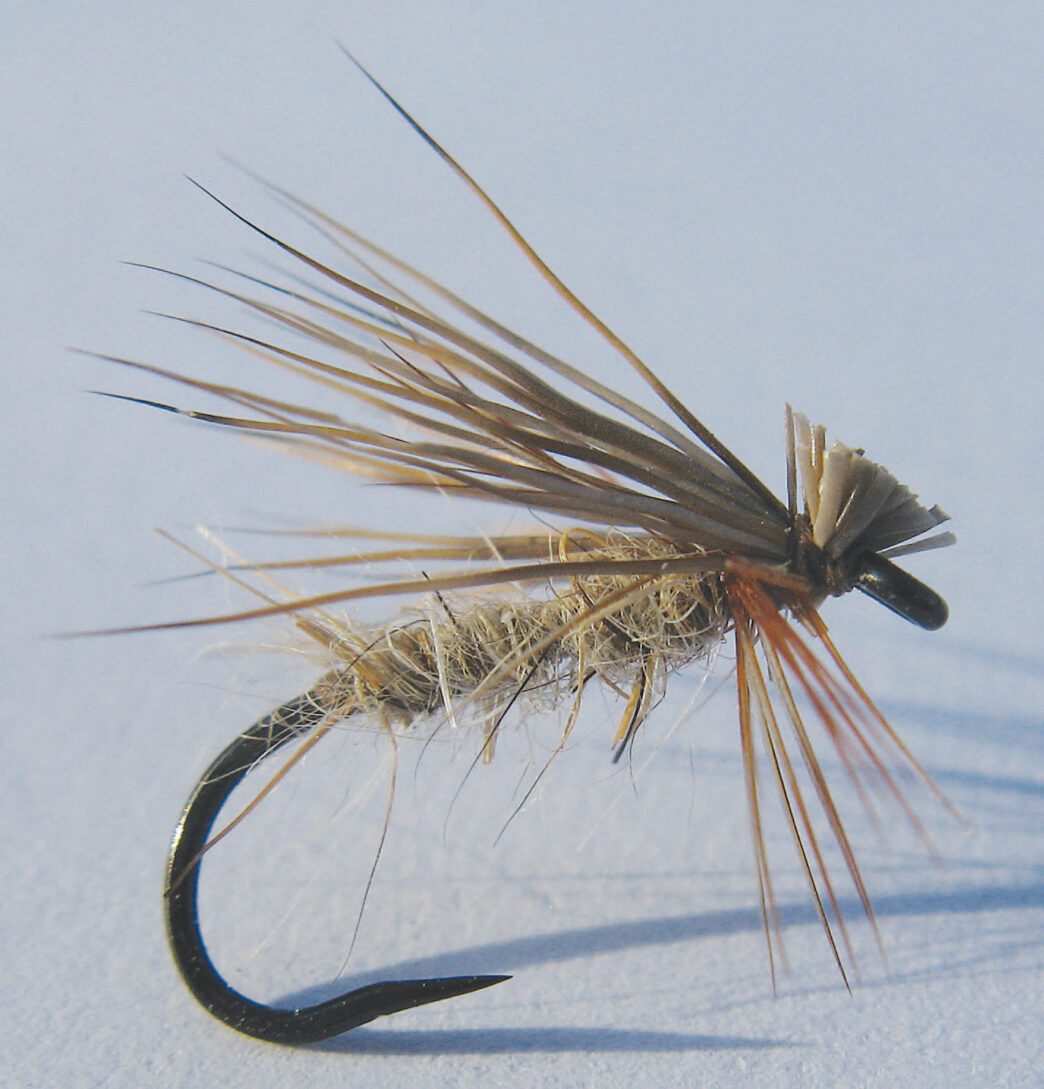
Brambridge-Style Caddis
Hook: TMC 900BL size 16 to 20
Thread: 8/0 UNI-Thread
Body: Dubbing to match natural.
Wing/Head: Elk or deer hair to match color of natural
Tying Notes
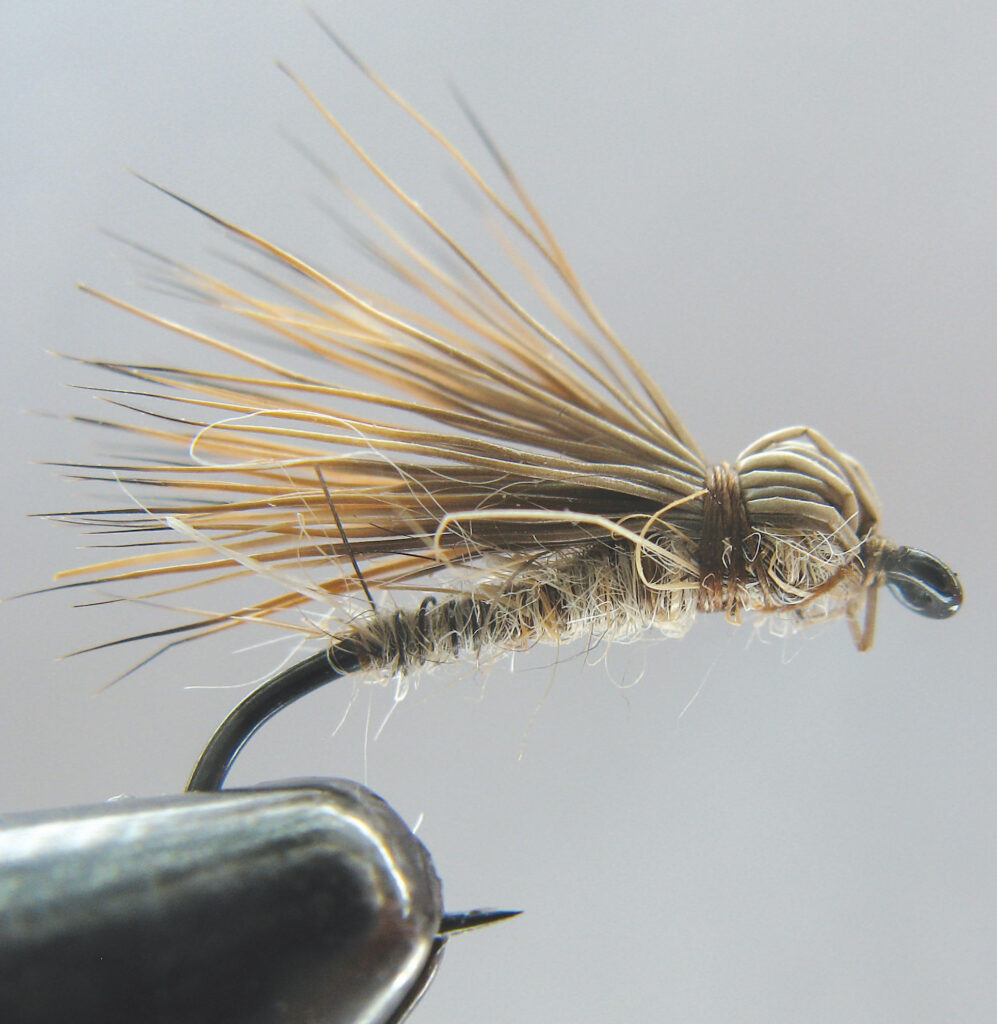
Step 1: Mount the hook in the vise and attach the thread.
Step 2: Tie in a tuft of stacked elk or deer hair, tips pointing over the eye. These should be long enough that when folded back, the tips reach to or a little beyond the hook bend.
Step 3: Trim the butts of the hair at an angle. Then tie down the butts with the thread to leave a tapered body. Wrap the thread back to a point above the barb.
Step 4: Add a small amount of dubbing to the thread. Wrap the dubbed thread up to the eye, then back about one-quarter the length of the hook shank. This will leave a pronounced area for the head.
Step 5: Fold the elk or deer tips back over the head and body and tie down directly behind the bulge of the head. Whip finish at the eye of the hook.


")