Simple Materials, Smart Techniques, and a Flashy Finish
If you’ve fished for predatory fish—whether in-shore in saltwater or deep in fast-moving rivers—you know how critical the correct baitfish pattern can be. You need something that swims like the real thing, withstands hard hits and sharp teeth, and attracts attention without being over the top.
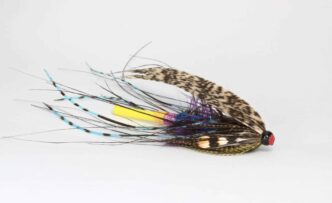
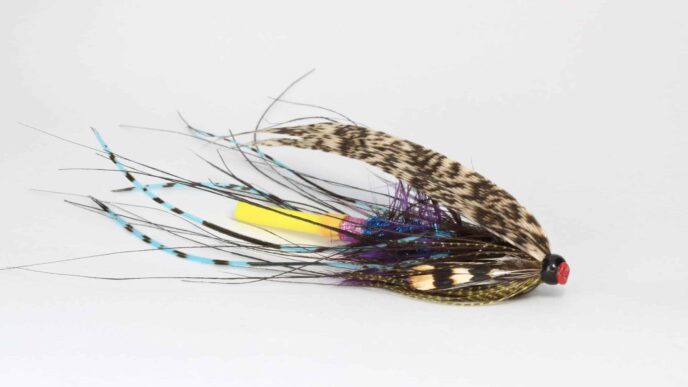
Enter the Adachi Clouser.
This fly is a refined version of the original Clouser Minnow, tailored through years of on-the-water experience by Steve Adachi, a Northern California-based tyer, angler, and innovator. It’s flash-heavy without being gaudy. It’s durable without looking bulky. And most importantly—it gets eats.
We’ve thrown this fly at everything from striped bass in the San Francisco Bay to tigerfish in the Zambezi River. It has fooled halibut on the flats in Alameda and coaxed rockfish from kelp forests from Monterey to the Sonoma Coast. It even holds up in freshwater against largemouth, smallies, and delta bucketmouths.
What makes this pattern so effective? It’s a combination of thoughtful tapering, clever flash placement, and a rock-solid profile that mimics the silhouette of real baitfish while maintaining durability through epoxy layering.
Let’s take a deep dive into how it’s built—and more importantly, why it works.
WHY THE ADACHI CLOUSER?
Let’s start with the name. If you’re familiar with Bob Clouser’s original pattern—a bucktail-and-dumbbell classic—you already know the bones of this design. But like many great flies, this one evolved through a lineage of thoughtful tweaks and field-proven refinements.
Captain Mike Costello, a legendary guide and fly tyer based in Northern California, was one of the first to adapt the Clouser Minnow to better suit the local forage and conditions of the San Francisco Bay and Delta systems. His version introduced important changes—especially in material selection and flash placement—that made the fly more effective in salt and brackish water for species like striped bass and halibut.
We took Mike’s iteration and continued refining it—adjusting the silhouette, layering flash more intentionally, and using epoxy in stages to lock in the taper and boost durability. What you get in the Adachi Clouser is a fly that’s part homage, part evolution. It’s a nod to both Bob Clouser’s original genius and Captain Costello’s smart modifications.
Where the classic Clouser excels in simplicity, the Adachi Clouser adds just the right amount of nuance: flash that flows, a tapered body that moves naturally, and layered epoxy coats for bombproof construction.
And unlike some modern streamers that rely on complex blends of synthetic materials, this pattern uses just a few—but uses them well. Think of it as minimalist design with maximum impact.

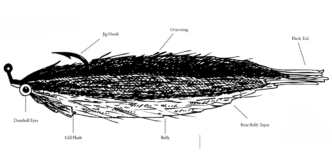
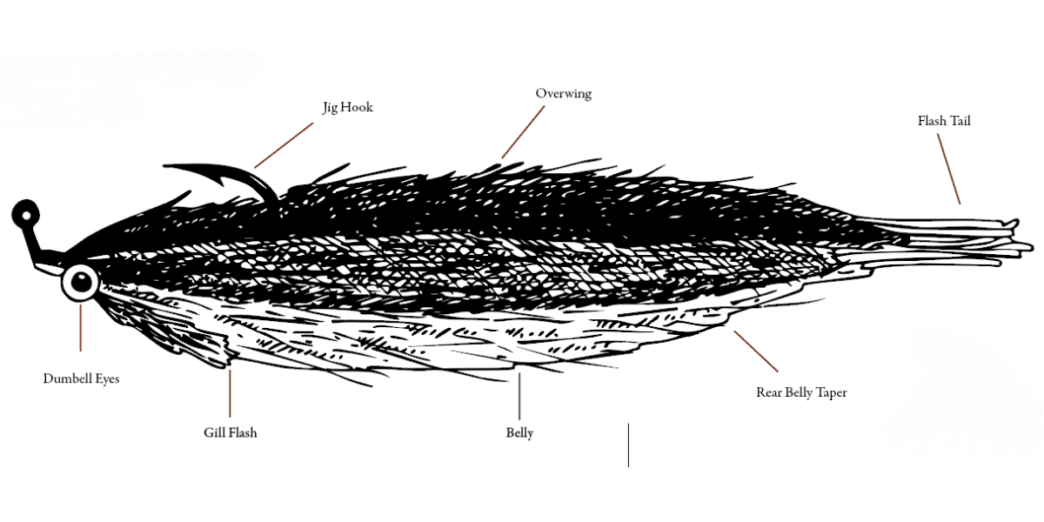
1. THE EYE: STABILITY STARTS HERE
Everything begins with the eyes. Not only are they crucial for getting the fly to ride hook-point up, but they also set the proportions and determine how the fly moves underwater.
Start by placing your dumbbell eyes slightly back from the hook eye, generally at the one-third mark between the eye and the hook bend. This position gives the fly a balanced keel and keeps it from rolling.
Use strong, 4-pound test monofilament (we prefer Sunline) and lay down three solid wraps in one direction, followed by three in the other. This figure-eight pattern locks in the eyes and helps seat them straight. From there, build up thread wraps to stabilize the structure, then wrap around the base of the eyes to further lock it down.
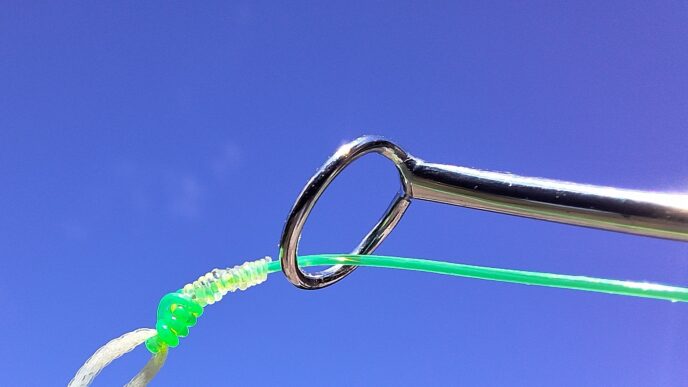
2. FLASH: JUST ENOUGH, NEVER TOO MUCH
Flash is the defining feature of this fly—and also where many tyers go wrong. Too much flash and your fly becomes a glitter bomb. Too little and it disappears in low light or dirty water. The Adachi Clouser finds the sweet spot.
We use Pearl Flashabou 6905 for most patterns—it’s versatile, high-contrast, and has that translucent shimmer that baitfish are known for. Cut a section and think of it as half your total flash. Fold it over when tying in to double it, which adds both durability and balance.
Here’s the pro move: Cut the ends square. A square-cut flash pulses and moves more consistently in the water. Tapered or staggered cuts might look sleeker on the vise, but underwater, square ends create a fuller silhouette that flutters on the drop. That’s when most predatory fish strike.
Tie it in directly behind the eyes, fold it back over itself, and bind it down with firm wraps. This creates a V-tail that adds action and flash without overwhelming the profile.
3. BUILDING THE BODY: THREAD + EPOXY
With the tail flash secured, wrap your thread forward to the hook eye and back again to build a thread underbody. This creates a smooth base for your epoxy and gives you more control over the final shape.
The first coat of epoxy locks in this thread layer and adds just enough stiffness to keep the flash aligned. We like Loon UV Flow for this stage. It’s thin enough to soak into the thread, but it cures fast and clean.
Let it dry thoroughly before moving on. Rushing this stage leads to cloudy finishes or shifting materials later.
4. THE BELLY: TAPERED FOR LIFE
Most baitfish are light-colored underneath. That pale belly creates contrast from below and helps fish locate your fly, especially in stained water or low-light conditions.
Start with a piece of white synthetic material. EP Fibers or Steve Farrar’s SF Blend work beautifully here. Cut it square, then taper it by hand—pinch the middle and pull strands out gently, twisting your fingers to create a gradual transition.
This section should extend slightly beyond the tail flash but remain shorter than the top wing. Aim for about a half-inch past the hook bend. Tie it in behind the eyes, wrap it forward, and fold the material back on itself. This double-layer technique not only creates a natural taper but also makes the fly far more durable.
Use sharp scissors to shape the belly, dragging them across the back of the fibers to form a clean, tapered profile. You’re aiming for something that looks alive in the water, not like a toothbrush.
5. GILL FLASH: JUST A HINT
This step is optional, but if you’re after realism, it’s worth the extra few seconds.
Take a small section of Enrico Puglisi (EP) brush in a red, orange, or pinkish hue. Tease out a clump with your fingers and tie it in across the top of the hook shank, right behind the eyes. As you tighten it down, it’ll flare slightly and form a V under the hook.
This subtle splash of color mimics gill plates, adds depth to the fly, and creates a strike trigger, especially on pause retrieves.
Don’t go overboard. It’s meant to be a flash, not a beard.
6. THE OVERWING: SHAPE + STRENGTH
Now it’s time to add the top wing—the section that completes the baitfish profile and locks the rest in place.
Use the same synthetic material as the belly, but in a darker color. Olive, gray, chartreuse, or tan, depending on your target species and local forage. Again, cut square and taper by hand until you’ve got a natural gradient.
Tie it in behind the eyes, fold it back, and secure it with a few snug wraps. Then fold it again for durability and trim to match—or slightly exceed—the belly length.
The final profile should be classic baitfish: broad shoulders, sleek taper, and nothing that’ll trap air or drag in the water.
7. FINAL EPOXY: LOCK IT IN
Once all your materials are in place, it’s time to seal the deal—literally. This is what gives the Adachi Clouser its durability and professional polish.
Apply a second coat of epoxy. Focus on the head and the body area between the eyes and the front of the fly. Rotate it slowly while curing to avoid drips or uneven buildup.
Not only does this protect your thread and lock in the flash, but it adds a subtle translucency that mimics real fish scales.
Finish your thread with a whip finish and secure it with a small dab of epoxy for extra strength. Let it cure completely before fishing—or storing it in your fly box.
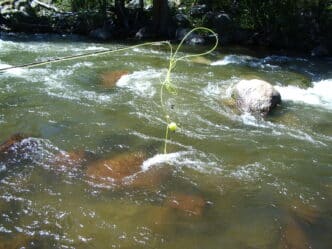
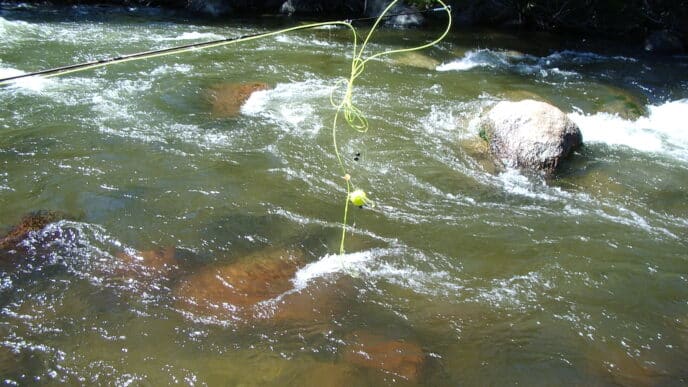
FISH IT LIKE YOU MEAN IT
This fly isn’t meant to sit in a shadow box. It’s intended to hunt.
We fish it on floating, intermediate, and full-sink lines—depending on the conditions. On the flats, a short strip-pause retrieve gets results. In rivers, swing it through current seams and strip as it drops. In the surf, give it sharp twitches and pauses to imitate an injured baitfish.
No matter where you’re fishing, the Adachi Clouser holds up, gets down, and moves like it means it.
FINAL THOUGHTS: MINIMALIST MUSCLE
The Adachi Clouser isn’t flashy for flash’s sake. It’s a minimalist baitfish that uses just enough sparkle, just enough movement, and just enough bulk to mimic the real thing, without overcomplicating the pattern.
It rewards good tying technique, not expensive materials. Every element—from the square-cut flash to the folded-overwing—serves a clear purpose.
So tie a few. Fish them hard. Lose some to rocks and big fish. And when you’re ready, tweak it: Add a lateral line, blend colors, or
go smaller or longer. That’s when it becomes your fly.
And if you’re lucky? It becomes the fly.