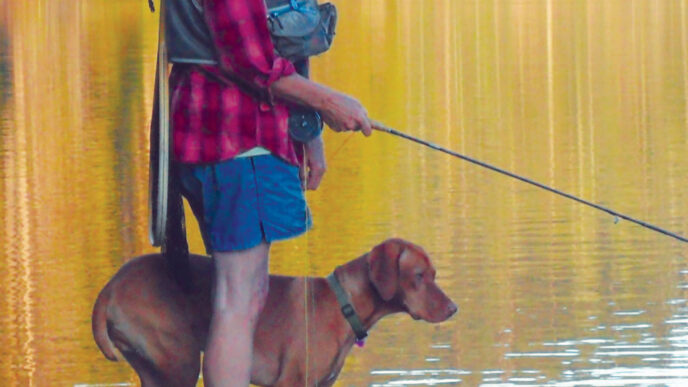
Judging by the huge boil, my fly had just been spurned by a very large trout. To make matters worse, this was not the first time it had been treated this way. Since sunup, large rainbows and browns had been beating up schools of smelt all over the lake. I should probably be clear what I mean when I say “large.” Very few of the fish were under three pounds, and many were easily double that weight. Aggressive swirls on the surface made it abundantly clear that these fish were feeding hard. This was the major leagues, and I was failing, again. I found myself repeating the classic line from Wayne’s World — “I am not worthy.”
Invisible Fish
During underwater attacks orchestrated by diving birds and predatory fish, smelt are often crippled, but not eaten. Unable to regulate their swim bladders, these doomed little fish float to the surface, where their dying spasms attract gulls, grebes, and trout. Incapable of swimming away, the injured smelt are an easy meal. My fly floated among the dying naturals and was the right length and shape. With some gentle pulls on the fly line, I could mimic the terminal twitches and summon trout from below. Unfortunately, I could not seal the deal. The fish would approach the fly and at the last moment turn away.
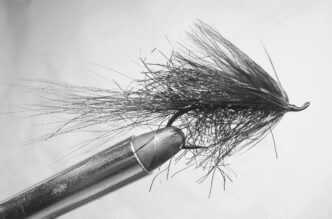
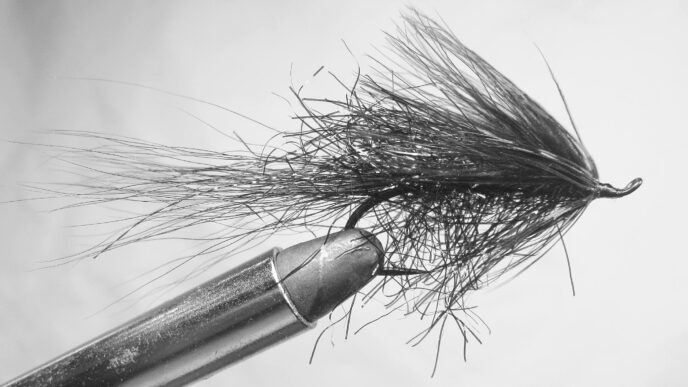
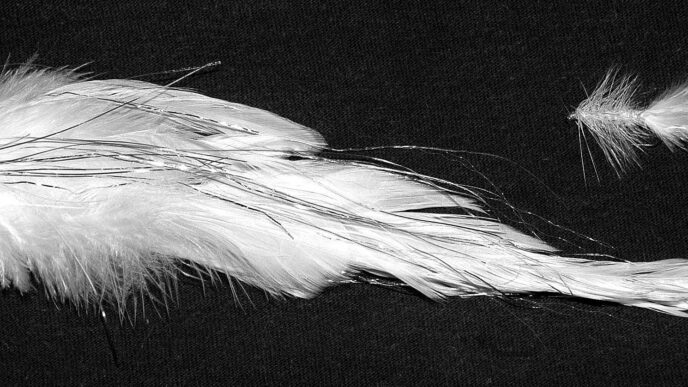
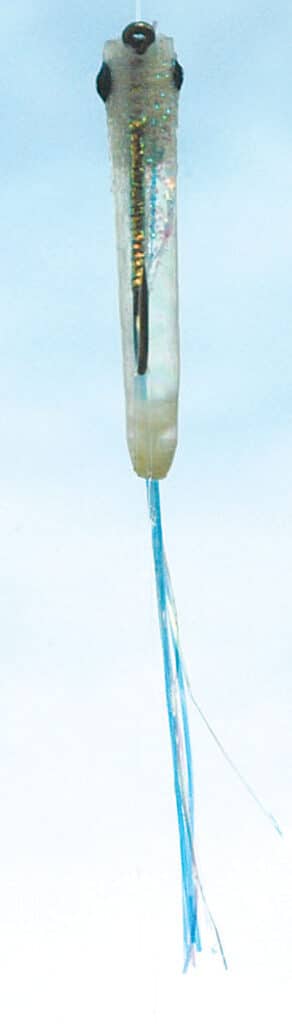
Clearly, there was something wrong with the fly. I grabbed a dying smelt and looked closely at it. It did not take long for me to realize that the one thing my flies did not emulate at all well was the translucence of the real McCoy. When held up to the sky (as the trout would actually see it), the real smelt resembled a shard of lightly frosted glass. Most of my floating smelt patterns were based on white foam. When viewed from below, they were completely opaque and looked radically different from the natural. It was obvious that I needed a floating fly that was almost invisible.
An Old Problem Revisited
I found myself recalling the winter of 1977. That year, I regularly fished three small lakes just outside London. These pretty waters held plenty of hungry pike and kept me from doing something self-destructive when the regular trout season closed. Each Saturday, I would board one of London Transport’s old Routemaster double-decker buses with the suicide rear platform. After handing the clippy a shilling, I clambered up the stairs to the upper deck. From this lofty perch, I could get a better view of the world. Behind me were seven million people and air heavy with leaded-gasoline fumes. Ahead of me were solitude, the smells of nature, and fish. On warmer days, the pike would readily attack metal spinners and spoons. But when the snow fell or a hard frost formed sheets of ice on the water, the pike simply refused anything that moved faster than a tortoise. I needed a lure that could be inched slowly back to shore, but not sink and snag on the bottom. My metal lures were useless. I found the solution in a dog-eared fishing encyclopedia I kept beside my bed. What I needed was a quill minnow.
For centuries, salmon and seatrout anglers had used these ultralight lures to mimic minnows and other small baitfish. They featured a feather-quill body mounted on light wire and adorned with a treble hook. I made a few quill minnows, and the slow-moving lure proved irresistible to several large pike. Thirty-odd years later and 5,400 miles away, I realized that the quill minnow was the solution to my California trout problem.
From Mayflies to Minnows
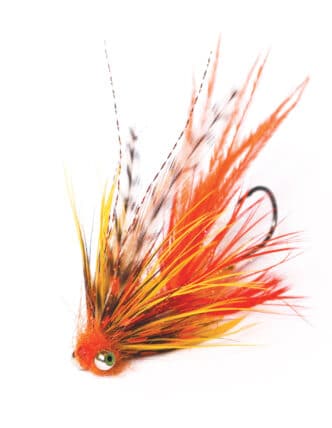
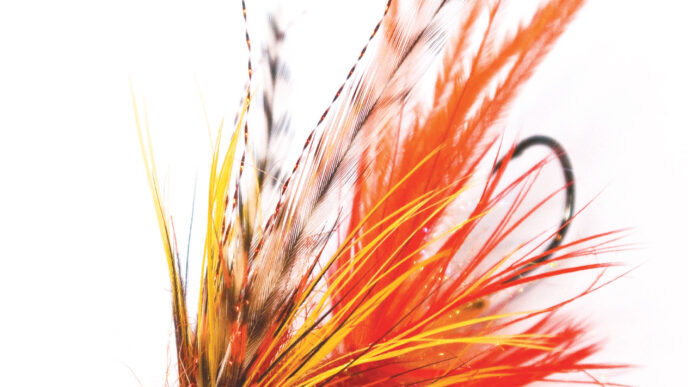
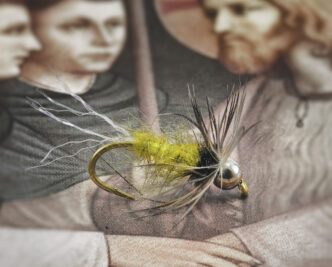
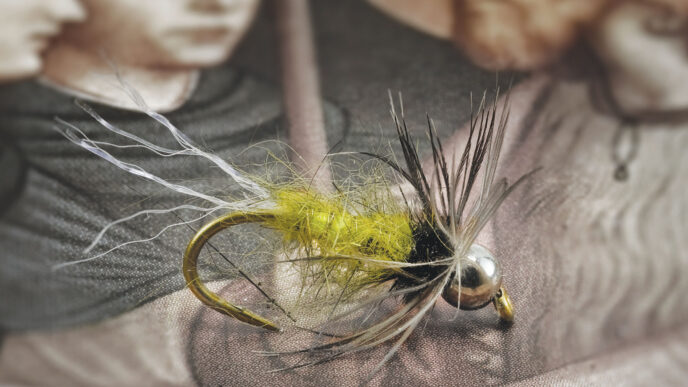
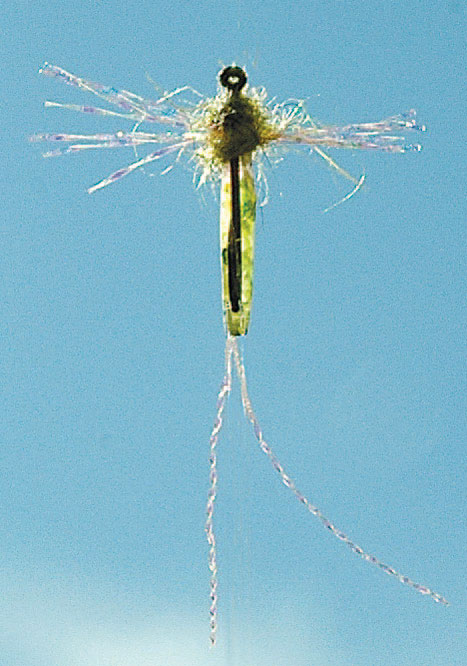
Tying flies with quills is actually quite easy. Once you have the basic technique figured out, you can use the concept for all kinds of floating flies. I started with smelt, but quickly realized the translucence, durability, and almost unsinkable nature of the quill lends itself to numerous other patterns. My freshwater fly boxes now sport delicate little tan Callibaetis imitations for the lakes and pretty Little Yellow Stoneflies, bright orange October Caddises, and chunky green grasshopper patterns for the rivers and streams. My saltwater boxes have a number of quill-based pencil poppers that can be cast a very long way on an 8-weight.
Procuring and Preparing Quills
Millions of years of evolution has given the feather an incredible combination of lightness and strength. Only recent advances in nanotechnology have produced lighter and stronger materials. If you don’t believe me, grab a feather from a goose or duck and try to tear it apart with your hands. While not indestructible, a fresh, well-prepared quill will stand up to pretty much anything you or the fish can throw at it.
And unlike many fly-tying materials, good-quality quills are relatively easy to come by and dirt cheap. You can find loose feathers anywhere that birds roost. Many of my quills come from shorebirds and waterfowl such as pelicans, gulls, geese, coots and grebes. The most productive area for feathers that I have found is a local river mouth where many shorebirds roost and a pair of peregrine falcons hunt. The feathery remains of the hunts are left to blow across the sand and usually settle into small hollows in the back beach dunes. I can collect dozens of feathers in a few minutes from this idyllic spot. I have a very vivid memory of one particular day when Ken Hanley and I bumped into each other near the river mouth. As we were casting and chatting, a flock of sanderlings (a very fast shorebird) flew right over our heads. We were surprised by this odd behavior and were just mouthing the expression “What the . . .” when a peregrine came screaming by in hot pursuit. The raptor had locked onto one unfortunate little bird, and the chase was on. Both birds climbed up to about 200 feet at an incredible clip. I can see why they name fighter planes after birds of prey. It was Top Gun in miniature. Eventually, the sanderling leveled off, while the peregrine continued its ascent. It looked like the sanderling was OK, but then the peregrine gracefully arced over, folded back its wings and went into a stoop. They say that a stooping peregrine can reach 200 miles per hour. I believe it. This guy made Indy cars look positively pedestrian. The falcon closed in on the small sanderling so fast that I was sure it was lights out for the poor little fellow. Then, a split second before talons were set to lock into its back and administer the coup de grâce, the little bird juked its wings and the falcon went screaming past. This incredible stunt was repeated three times. Every time, the sanderling waited until the very last moment to take evasive action. Eventually, the peregrine gave up, and the sanderling flew away to rejoin its flock. Ken and I just looked at each other in utter amazement. Very few birds can outfly a peregrine.
Like many materials scavenged from nature, you need to clean and sterilize the quills you find to eliminate bacteria and fungi. If you don’t do this, they will eventually start to decay and smell. The first thing you need to do is remove the membranous material inside the quill. If you don’t remove this stuff, bacteria will rot the thing from the inside. For larger quills, I use a piece of wire with a small hook formed on the end. I insert this into the quill, then back it out while rotating it like a fork in spaghetti. The membrane will get caught on the hook and can be easily dragged out. For smaller quills, a fine needle does a serviceable job.
Once you have gutted the quills, it’s time to clean them. Don’t go overboard. Simply fill a bucket with warm water and squirt in some unscented detergent. Soak the quills for about 10 minutes, giving them a stir every few minutes to ensure that soapy water gets into all the nooks and crannies. Following the detergent soak, rinse the quills with fresh water.
The next step is to sterilize them. I use hydrogen peroxide (a 3 percent solution, available at any drugstore), which won’t damage the quills like conventional chlorine bleach. Isopropyl alcohol works, as well. Using the same bucket as before, immerse the quills in the hydrogen peroxide for 10 minutes. The final step is to dry the sterilized quills completely on a sheet of newspaper or paper towels. This usually takes a few hours in a warm, dry spot.
Tying a Quill-Bodied Fly
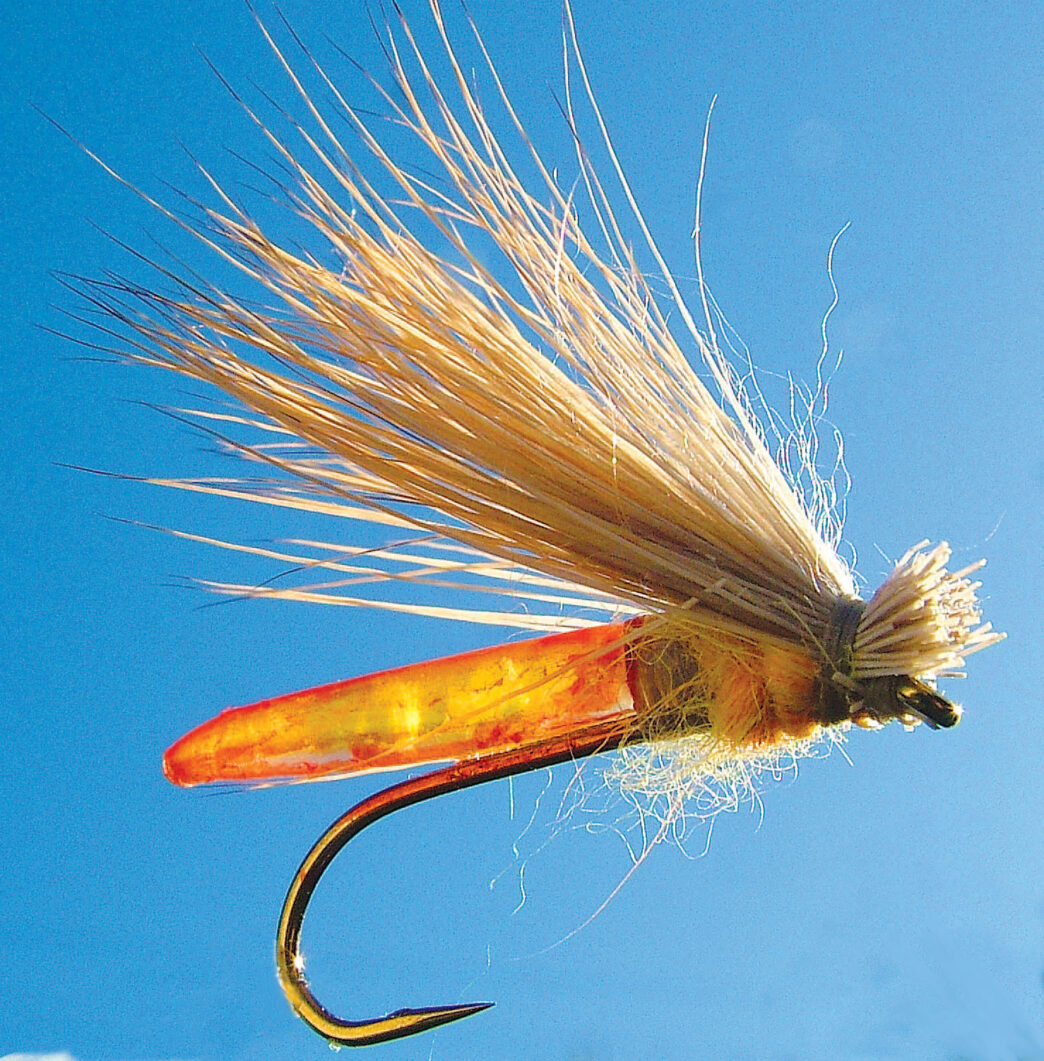
This is so simple, it almost seems like cheating. Lay down a layer of thread from the eye to about halfway down the shank. Hold the quill on top of the thread so that the blunt end of the quill ends a short distance from the eye. The exact distance from the eye depends on what you are tying. For a baitfish pattern, you can tie in the quill close to the eye. Just leave enough room to whip finish the thread between the eye and quill. For insect patterns, leave enough room between the eye and quill to tie in a thorax and wings.
When you have the quill located in the right spot, wrap your thread back toward the eye. When you get close to the end of the quill, apply a couple of Half Hitches to hold the thread in place. Don’t cinch them down hard. Just apply enough tension to lock the thread. You may find that the quill has slipped a bit during the tying process, so take a few seconds to true things up. Once you are satisfied everything is right, apply superglue to the hook shank and thread. This will lock the quill onto the hook.
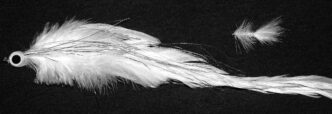
I like some of my quill-bodied flies to have tails. For mayfly patterns, I use fine diameter Midge Krystal Flash. For baitfish patterns, I use thicker Flashabou. I insert the flash material into the quill using a needle. The diameter and length of the quill determine the choice of needle. If in doubt, use the finest needle you can. Insert the flash material through the needle’s eye and insert the needle into the quill from the fat, open end to the pointed end. Once the flash material has exited the pointy end of the quill and you’ve trimmed it to length, add a drop or two of superglue where it exits. This will lock it in place and seal the hole. If you are tying a quill that is thicker than a toothpick, you need to seal the open front end. Otherwise, the fly will eventually become waterlogged and lose some or all of its floatation. Waterproof glue, fabric paint, or even epoxy all work. For baitfish patterns on large quills, I insert a small piece of foam and apply superglue.
Coloring Quills
Quills readily accept dyes and pigments. I have had great success with Sharpie markers and RIT dye. Waterproof fabric markers found in any craft store will also work. You can color quills before tying them onto a hook, but be aware that superglue contains a weak acid (used to slow down the curing process) that may alter the color of some pigments. If in doubt, affix the quill to the hook first and allow the superglue to cure fully before applying any color. Most permanent markers use a simple solvent (typically alcohol) to hold a pigment in solution and a polymer to help the pigment stick to a surface when the alcohol evaporates. Unlike paper, quills do not readily absorb the pigment and resin. When you apply a marker to the quill, you are actually laying down a thin film of resin and pigment. You won’t get the full depth of color from the marker with just one or two strokes of the pen. This is actually very helpful, since you can adjust the depth or intensity of color simply by using more or fewer strokes of the pen. For example, I have found that a yellow Sharpie will make a nice Pale Morning Dun color with just two or three gentle strokes of the pen. For the bright yellow of a grasshopper belly, you may need as many as six strokes. If you don’t have a marker pen that is exactly the right color to match the natural and this sort of thing keeps you up at night, try experimenting with two or more pens. For example, a few strokes of yellow followed with a few strokes of chartreuse creates a really vibrant grasshopper green.
For folks who believe in tying perfect imitations of the natural insect, coloring with Chartpak pens is probably the best solution. With 130 colors to choose from, you probably shouldn’t have much trouble matching any of the 150,000 species of insect on the planet. Over time, the quill may lose some of its original color. Fear not — just freshen it up with a few strokes of the pen, and you are back in business.
If you want your flies to have 100 percent guaranteed permanent colors, try RIT dye. There are only 26 colors, so you may not be able to find an exact match for the pattern you want, but you can probably get close enough. The process is really simple. Fill a glass jar with water, add some dye, and microwave until hot. Carefully take the jar out to the garage or any area where it will not matter if you have an accident. RIT dye will color everything it touches, and the stain can be almost impossible to remove. Throw the quills into the jar and stir them around until they have reached the right depth of color. Depending on how hot the water is and the amount of dye you use, this can take a few seconds or as much as a minute. When you are satisfied with the color depth, fish the quills out of the dye and flush them with cold water.
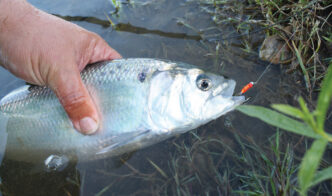
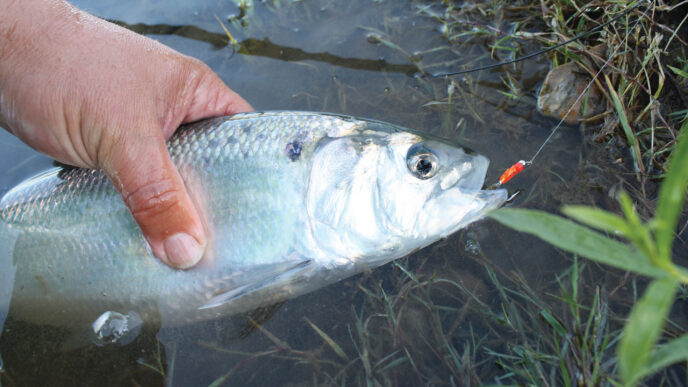
Another option for coloring larger quills is latex fabric paint. I am a big fan of Scribbles paints, which are available at many craft stores. There are dozens of colors from which to choose. I really like the clear glitter gels. The paint dries clear with flecks of glitter that reflect light like damaged scales on an injured fish — perfect for floating smelt patterns, which takes us back to that California lake where I was getting humiliated. The following day, I returned with some freshly tied quill-bodied smelt patterns. It did not take too long to locate a frenzy of diving birds and swirling fish. Casting into the action, I found it was tough keeping the gulls off the new fly. Clearly, it looked good from above, but what about from below? The answer did not take long. A seriously large brown hit the fly and quickly got me into the backing. It was 1977 all over again.