

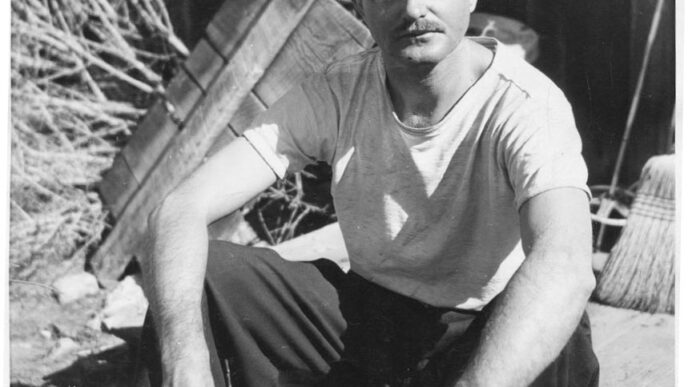
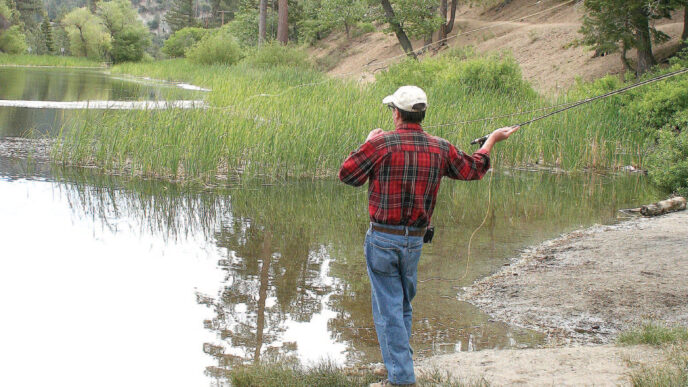
It seems like an eon ago that I belonged to the Salinas Valley Fly Fishers. Actually, I joined that august club in the early 1970s, since I lived in the Salinas Valley at the time. Jay Murakoshi joined the club in the late 1970s, as I recall, and that’s where we met and became friends. We fished together at various locations, but some of my best memories are of the early mornings and late evenings at the lakes on the Hunter-Liggett Military Reservation, gunning for bass and panfish. I recall one morning when my young son, Dominic, and I were fishing a HunterLiggett lake called El Piojo; I was in my float tube, and Dominic was prowling the shore. Jay joined us at around noon, and we enjoyed lunch together. The rest of the day was spent chasing bass and bluegills. In the evening, after recounting the day’s fishing, Jay and I ruefully had to admit that Dominic had cleaned our respective clocks using just one pattern — a green rubber spider with white rubber legs. I’m not sure why I remember that — I just do. I left the Salinas Valley in 1979 to take a job in the Sacramento area, but continued to keep in touch with Jay, principally via the fly-fishing shows.
Jay’s reputation as an exceptional fly designer and tyer took off in the 1980s. I recall my friend Danny Byford, who then ran the fly-tying theater at the International Sportsmen’s Expositions, asking me about Jay and whether he would be a good addition to the theater tying group. My unhesitating response was “Yes, certainly.” Jay has been associated with the fly-fishing industry for many years in a number of capacities, including commercial fly tying. He has tied flies for such notables as Trey Combs and Lefty Kreh and for most of the Northern California fly shops. His patterns have been featured in many periodicals, including this magazine, Fly Fishing in Salt Water, Western Outdoors, and Southwest Fly Fishing. He is the West Coast contributing editor for Fly Fishing in Salt Water. As a speaker, Jay has appeared at many of the International Sportsmen’s Expositions, The Fly Fishing Show, the Renzetti Fly Fishing Fair, and other events. He also runs a successful travel business, taking clients to Baja, Honduras, and Australia. Check out his website at www.fliesunlimited.com. Here are Jay’s remarks on the Hula Girl.
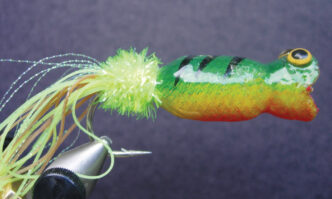
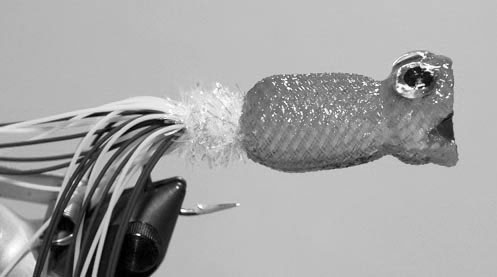
“No, the Hula Girl is not one of those bobblehead dolls that sometimes adorn dashboards. In its present form, after many years of tinkering, tweaking, constructing, and reconstructing, it is a highly productive, multispecies bass popper. The initial idea for the fly came to me while pawing through an old tackle box that had belonged to my dad. My attention was drawn to a fiery tiger-colored lure called a Hula Popper. Curious as to what the big lure would do when retrieved, I worked it across the water in my swimming pool and watched it dive and dart from side to side, creating a ‘deep plopping’ sound. The seductive motion having stirred my creative juices, and I knew I had to create a fly to imitate the Hula Popper. I called my first design the Hula Popper Fly, but was soon informed that I could not market the fly using the term ‘Hula Popper’ for intellectual-property reasons. After some thought, I settled on the name ‘Hula Girl.’
“Part of the trial-and-error process was finding a material that is buoyant, yet sufficiently pliable to allow me to create the Hula Popper’s bubble-shaped body. Balsawood proved to require too much work, since each individual body had to be carved, shaped, and sanded. Next, I experimented with a foam body, but found that keeping the proper shape during the tying process was challenging. The answer to my dilemma came while visiting a local sporting-goods shop when I wandered into their shotgun-shell reloading section. I noticed a bag of plastic ‘wads’ used in the reloading process, examined them, and voilà, there was my answer to the body for the Hula Girl. I bought a bag of 12-gauge wads, but they proved to be far too big, and the 410-gauge wads were clearly too small. A shell-reloading friend suggested that I try 20-gauge wads and gave me a few. They were the perfect size.
“After cutting and reshaping the wad, boring a center hole for the hook, and testing the design, though, I was still not satisfied and began working on another iteration that retained part of the 20-gauge wad material and added a short piece of 5/8-inch round foam called ‘backer rod,’ a building-construction material (see sidebar), attached behind the wad material and fastened to the hook with epoxy. I also inserted a rattle into the foam. I then encased the entire body in extralarge EZ Body tubing and shaped it using thread wraps at the appropriate places. Using acrylic paint on completed bodies, the popper can be made to resemble various species of baitfish or frogs.
“After fishing this fly for the past two years, I have found it to be very productive by using different retrieves for various species of fish. For example, striped bass seem to prefer a rapid retrieve, while largemouth bass seem to like a slower, less abrupt retrieve. Last year, the Hula Girl took a trip south of the border for trials on saltwater species. Amazingly, on my first cast with the Hula Popper, a yellowfin tuna smashed the fly on the first strip. After the initial run, the leader broke, and fish and fly were gone. The rest is history: I’ve caught roosterfish, jack cravalles, dorados, and sierra mackerel with the Hula Girl. Still, it’s definitely not a fly for beginning casters. Even as an experienced caster, I have a tough time generating enough line speed to keep the fly aerialized and away from my head. To cast this bug, I use a very stout rod paired with an integrated shooting taper line that has a short 30-foot head. I’ve been hit a few times, and it does feel like a 20-gauge shotgun blast on impact.”
Materials for Jay’s Hula Girl
Hook: Saltwater popper hook, size 2/0
Thread: Size A white flat nylon
Body and head: 5/8-inch round foam, 20 gauge wad, 5-millimeter glass rattle, extralarge EZ Body tubing
Tail: Rubber leg material and large Crystal (“Cactus”) Chenille
Eyes: 4-millimeter 3-D eyes
Body sealer and paint: Softex or similar material, then acrylic lacquer applied by hand or by airbrush (my preferred method)
Body finish: Thin Clear-Cure Goop, then a coat of Sally Hansen’s Hard as Nails or similar hard, shiny finish cement.
Tying Instructions
Step 1. Wrap a base of thread on the hook shank at the eye of the hook. Whip finish and trim the thread. This step will provide a good base for bonding the wadding material and the foam backer rod to the shank. Apply a thin coat of epoxy or a similar product such as Clear-Cure Goop (available at most hardware stores).
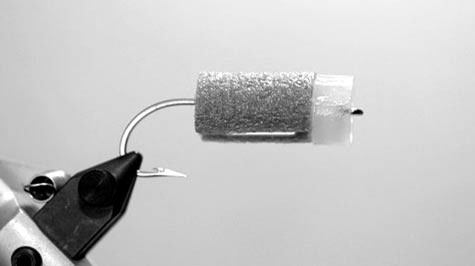
Step 2. Drill a hole at the center of the wad material, apply a thin coat of epoxy to the front part of the shank, and slide the wadding over the hook eye and onto the shank. It should rest against the hook eye.
Step 3. Cut a piece of 5/8-inch round foam equal to approximately three-quarters of the hook shank’s length and cut a shallow V in the middle of the piece along its entire length. This is where the body will be attached to the hook and where the 5-millimeter rattle will be placed.
Step 4. With the V centered on the hook shank with the wide part of the V facing down, secure the foam to the hook shank with epoxy. Quickly apply a small amount of epoxy to the back side of the wadding and push the backer rod against the wadding. Let the body dry completely before undertaking the next steps.
Step 5. Turn the hook over so that the wide part of the V groove faces upward and place a small amount of epoxy in the groove. Place the rattle in the groove, leaving the fly upside down until the epoxy is dry.
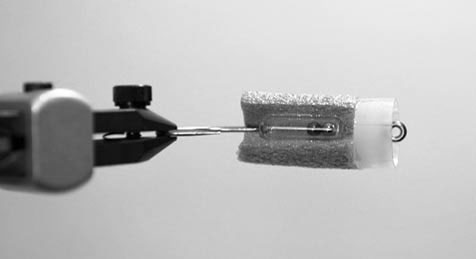
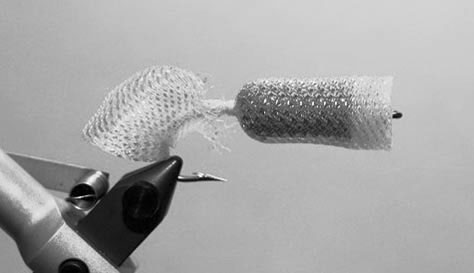
Step 6. Cut a six-inch piece of EZ Body tubing. Remove any stray strands of thread left over after cutting. Turn about one-half inch of the tubing outside-in and slide the reversed part of the tubing over the wadding head, where it will grab and hold. Now roll the rest of the tubing rearward until it is completely inside-out. Trim the front end of the tubing so that it is flush with the front of the wadding.
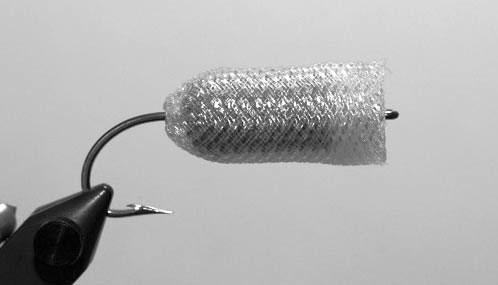
Step 7. Mount the thread at the end of the foam backer rod and tie off the tubing there. Whip finish and trim the thread. Pull the tubing back over the entire body, reversing it again. As a result, there will be two layers of the EZ Body material. Gently pull it tight to the front of the wadding and apply a few drops of superglue to the head to hold the tubing in place. Once it is dry and securely in place, trim off the excess close to the wadding head.
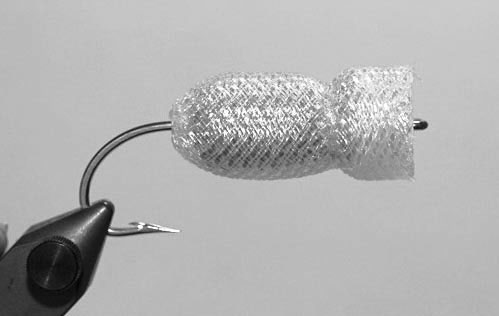
Step 8. This next step will create a “bubble” effect on the body to imitate the shape of the Hula Popper lure. Using a piece of small-diameter monofilament, make a few wraps around the body just behind the wadding head. Slowly tighten the monofilament until it produces an indentation in the backer rod. Place a few drops of superglue on the monofilament while holding it in place. Allow it to dry to hold the “bubble” shape in place.
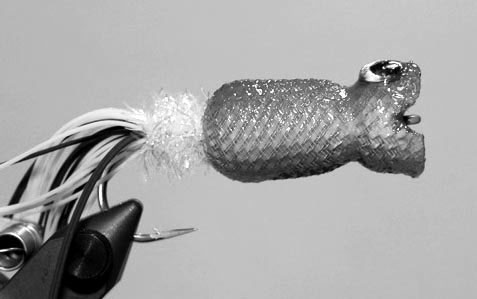
Step 9. To seal the body and provide a good base for painting, apply a thin coat of Softex or a similar product. Once the body is dry, apply the acrylic paints of choice, using either a brush or an airbrush unit.
Step 10. Finish the body by covering the painted body with a thin coat of Clear-Cure Goop; once that is dry, apply a coat of Sally Hansen’s Hard as Nails or similar product. Once this coat is dry, apply the 3D eyes.
Step 11. Restart the thread behind the body and tie in a piece of Cactus Chenille or similar product in your choice of color. At the same location, tie in pieces of rubberleg material in a complimentary color.
Step 12. Wrap the chenille over the butts of the rubberleg material, tie off the chenille, and whip finish.
Step 13. As an optional final step that will create a head that pushes more water and makes more noise, slit the head slightly on the horizontal plane and gently bend back the top and bottom of the head.
This bug should be a staple in your bass fly arsenal. If you feel creative, try making one that resembles a mouse and fish it at dark around reeds and over good bass structure.
What is “Backer Rod?”
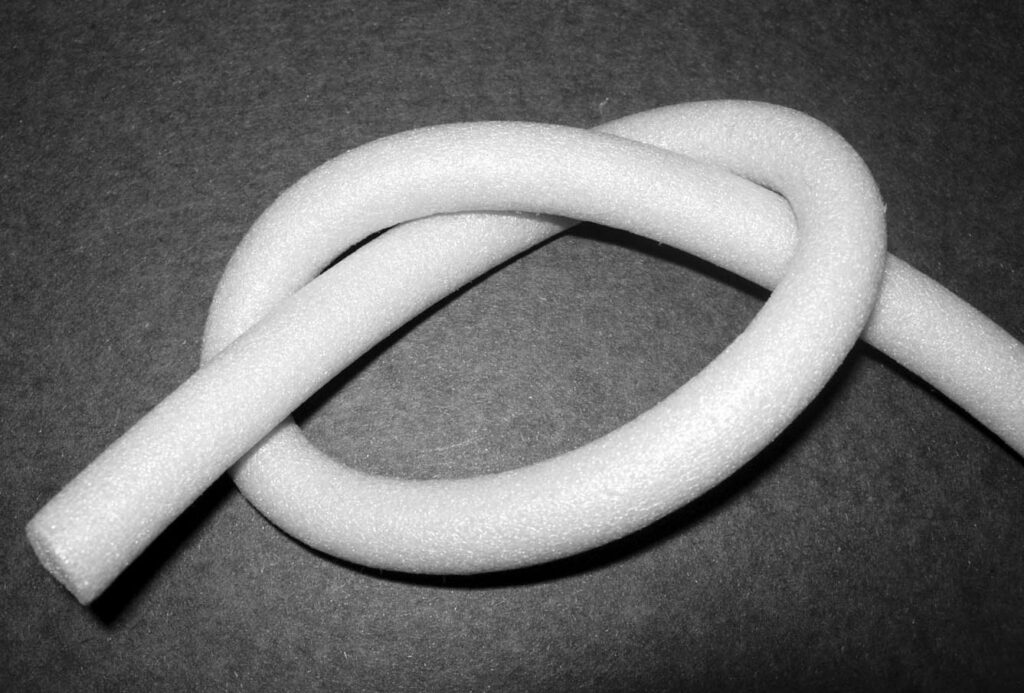
“Backer rod” is a round, open-cell or closed-cell foam rod used to fill joints between building materials. It fills most of the void in a joint so caulking or chinking material can be applied to finish filling the void and create an air-tight and water-tight seal. It comes in various lengths and widths and can be found at most home improvement or hardware stores. When creating bass poppers, the closed-cell variety is the one to use, because it repels moisture. It is light and easy to cut into whatever length is required.
Bill Carnazzo


")