Steve Potter has for many years been a fixture at fly-tying venues in Oregon, Idaho, Montana, and California. He has been featured at The International Sportsmen’s Exposition shows at San Mateo, Pleasanton, and Sacramento; at The Fly Fishing Show at San Rafael and Pleasanton, where he has been highlighted as one of the show’s select “featured tyers”; and at events sponsored by the Federation of Fly Fishers in California, Oregon, and Idaho. In 2009, Steve won the coveted Ned Long Fly Tyer of the Year Award presented by the Northern California Council of the Federation of Fly Fishers. Steve and I have tied together at many shows in the past few years, most recently at the East Idaho show at Idaho Falls.
I first became acquainted with Steve at one of those venues when I sat down to watch him work his magic on a spundeer-hair mouse. Before then, I had watched a number of highly skilled hairbug crafters, including the venerable Chris Helm. Still, I was fascinated by how facile Steve’s hands were as he added, stacked, spun, and packed layer upon layer of deer hair, and I sat amazed at the volume of hair he was able to force onto a hook shank. But as they say, the best was yet to come: Out of the huge ball of unruly hair, Steve wielded scissors and blade to sculpt a fat mouse that some would call cute. I would call it dangerous — to bass and trout, that is. And now the very best part — with a genuine smile on his face, Steve handed the finished masterpiece to me, quipping that I should go fish it. Fat chance! That puppy sits in a hallowed spot above my tying bench, and it isn’t about to experience water or the jaws of a hungry fish.
Steve’s fly-tying odyssey began in 1987, when he received a fly-tying kit from Santa. Enjoying himself immensely the whole time, Steve paid his dues by practicing for hours on end, tying many different types of flies for trout, bass, and other species. By studying tyers such as Billy Munn, Jimmy Nix, and Chris Helm, Steve honed his skills steadily. In time, he developed expertise in spinning hair and, as it turns out, he was a natural at it. The crowds around his tying station at the shows certainly attest to his talent.
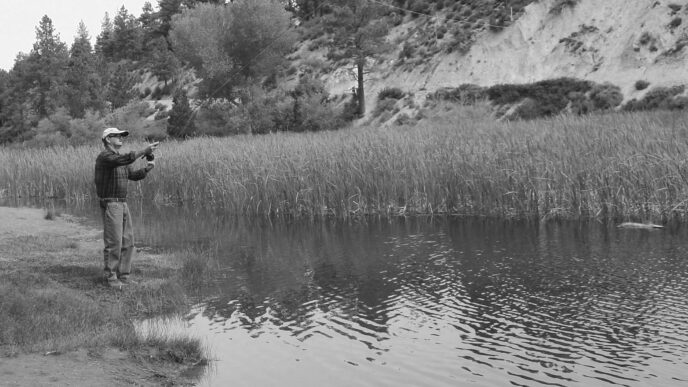
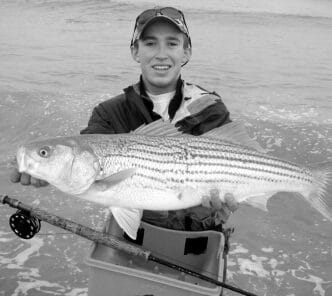
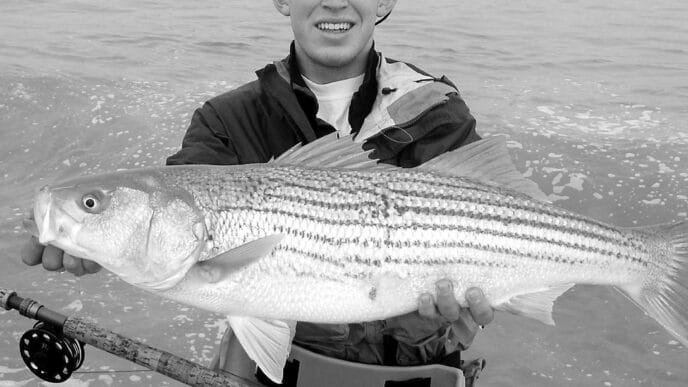
When not at his bench cranking out hair bugs, Steve fishes the Sierra for trout and the Delta for largemouth bass and stripers. In 2008, he and his team partner, Chuck Sterni, won first place at the first California Delta Bass-n-Fly Challenge. Clearly, Steve has earned his stripes as an engaging and creative fly tyer and as a competent fly angler.
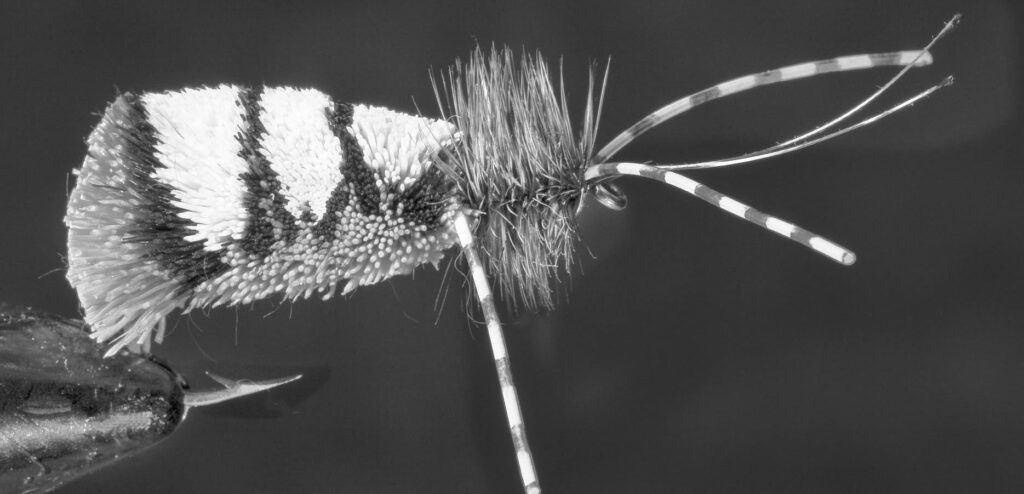
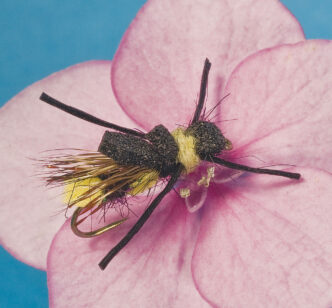
From among his many hair bug patterns, Steve has chosen his Cicada imitation for this article. Why the Cicada, since it’s not entirely clear that those buggers represent a significant source of food for fish in California? In short, Steve’s Cicada is in reality a generic “big fish fly” that can represent many terrestrials that by happenstance find themselves afloat, bound for a watery death. So let’s hear what Steve has to say about how his Cicada pattern came to be, how to tie it, and some advice on how to fish it.
“I call this fly the ‘Cicada.’ A friend coined the name during his trip to the Green River in Utah to fish the cicada hatch, because the fly performed quite admirably for him as an imitation of its namesake. I also call it the ‘Indicator Fly,’ because if I’m fishing for trout, I often suspend a subsurface fly beneath it hopperdropper style.
“The Cicada is based on the Goddard Caddis, a well-known spun-hair pattern tied to represent an adult caddisfly. The origin of the Goddard Caddis, as we know it on this side of the Atlantic, is an interesting story. In England, where it was created by John Goddard, it’s called the G & H Sedge. Andy Puyans, one of my favorite tyers and always a pleasure to be around, was (among many other talents) a great storyteller. I first heard the story that follows at the East Idaho Fly Tying and Fly Fishing Expo while sitting with Andy, Henry Hoffman, and Sylvester Nemes at a banquet table sharing a bottle of Macallan. Being a bit of a skeptic, I later consulted John Goddard’s book The Trout Fly Patterns of John Goddard and John Roberts’s Illustrated Dictionary of Trout Flies to authenticate Andy’s story and refresh my memory.
“The way Andy told the tale, he took a fishing trip to England to fish the River Test with John Goddard. On the appointed day, John and Andy fished a sedge (caddis) hatch, during which Andy used his favorite caddis imitations without much success, and John offered Andy his newly designed sedge pattern, the G & H Sedge. The fly worked, and both anglers began hooking large fish. Duly impressed with Goddard’s design, Andy later modified the body and christened it the Goddard Caddis. “Goddard’s original design sported a dubbed orange seal body and a top made of natural deer hair cut and trimmed to the shape of an adult caddis. Andy modified the design by spinning deer hair on the hook shank for the body and wing, then shaping the unruly ball of hair into a caddis silhouette. Andy marketed the fly as the Goddard Caddis, and the high-floating bug quickly became a highly popular caddis pattern.
“I’ve used the Goddard Caddis on the forks of the Stanislaus River and elsewhere with great results. Still, experience on the water led me to develop a series of modifications. One set of modifications addresses the problem of the difficulty of seeing the fly in rough water and in the profound shadows of deep canyons. Being a deerhair geek, I started stacking lighter-colored deer hair on the top of the fly to improve its visibility. I have used various color combinations, mostly attuned to a particular hatch or other set of circumstances. For example, I use burnt orange hair to represent the adult October Caddis. I have tied the Cicada with a black bottom and a white top for late nights with a full moon, with good results. A small version with an olive bottom and a black-and-white top works great on spring days when there are no hatches on streams such as the Fall
River. A larger version tied with a yellow bottom and white top has worked well on the East Walker River in the fall as a hopper pattern.
“Another specific modification I’ve chosen is to add rubber legs. At the East Idaho show a few years back, I noticed that many of the tyers were adding rubber legs to their patterns. I had never fished my favorite local rivers with rubber-legged flies, but my experience using them on the Snake and Green Rivers convinced me to try them at home. After tying a few, I used them near Camp 9 Road on the Stanislaus and had a stellar day. They have also worked on the Stanislaus between the covered bridge and Orange Blossom Road.
“Hook size depends mostly on the species of fish I’m targeting. I use a bass stinger hook, size 3/0, for Delta black bass and hooks down to size 16 for a caddis hatch for trout on a slow-flowing creek such as the Fall River. On average, a size 12 or 14 version works well for trout on typical pocket-water streams and in riffles and runs, especially when caddisflies are active. The Cicada can be trimmed onstream to match a specific hatch or smaller natural. With slight shape modifications, it serves well as a beetle pattern.
“As I mentioned, the pattern also functions well as an indicator fly in a dry dropper type of rig. With a nymph such as a Prince or Copper John suspended beneath the Cicada, I’ve had good results on most of the Central Valley rivers. The dropper can be tied directly to the bend of the Cicada fly’s hook; alternatively, I sometimes tie in a short monofilament loop at the rear of the hook before I begin tying the fly. The loop serves as the attachment point for the dropper, rather than the bend of the hook. Either method works fine. The Cicada is buoyant enough to support one or two flies and a split shot or flies tied with tungsten beads. The version described below is designed for trout fishing.”
Materials List
Hook: Any streamer or 3X-long trout hook, sizes 6 to 16. (For bass, use a stinger hook.)
Thread: White flat waxed nylon in a size suitable for hair work; use regular 8/0 black for hackle and legs
Body: Stacked deer or cow elk hair (colors listed in the tying steps)
Antennae: Hackle stems
Legs: Medium tan or gray Turantulegs
Hackle: Dry-fly-grade grizzly saddle hackle
Tying Steps
Step 1: Start the thread on the hook shank at a point above the barb between the barb and the point of the hook after bending the barb down.
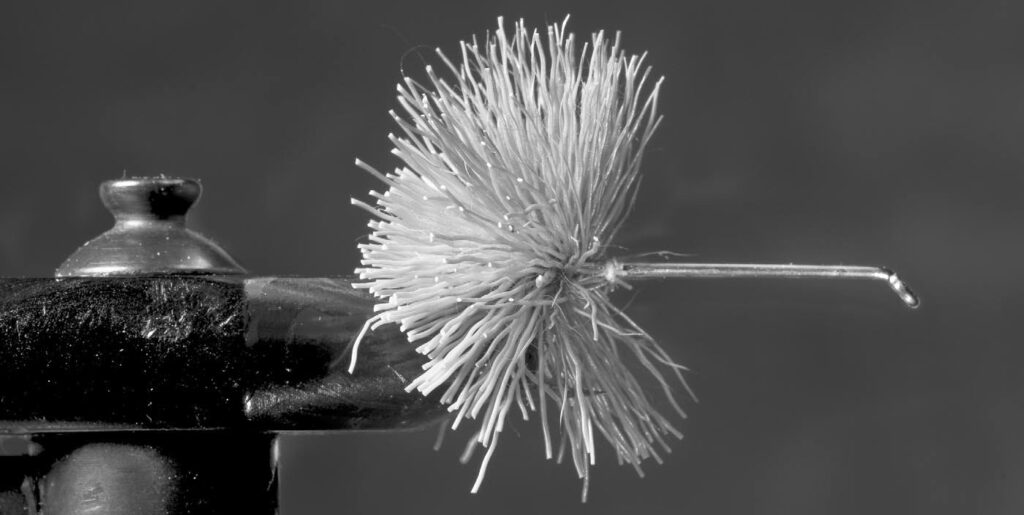
Step 2: Cut a pencil-sized clump of orange hair from its skin and clean out the underfur. Lay the hair on top of the hook parallel to the shank and push it downward. While holding it tightly to avoid having the hair spin, take three wraps around the middle of the hair and pull straight downward to lock the hair in place. If done properly, this procedure will flare the hair around the hook without causing it to spin. Push the hair back, carefully advance the thread to the front of the hair, apply a Half Hitch, and pack the hair tightly rearward with your right hand (if you’re right-handed) while holding it tightly at the rear with your left thumb and forefinger. Use a hair-packing tool and be careful not to slip and impale your fingers on the hook point. Add a drop of glue at the Half Hitch.
Step 3: Cut another pencil-sized clump of orange hair from the skin, clean it, and lay it on top of the hook parallel to the shank. Take two or three loose wraps around the middle of the hair and shorten the thread so that the bobbin tip is next to the shank. Using the thread, roll the hair to the bottom of the shank and hold it firmly there. Take two tight wraps to lock it in place to form the bottom of the fly. Don’t advance the thread—it should still be in the middle of this bunch of hair in preparation for the next step.
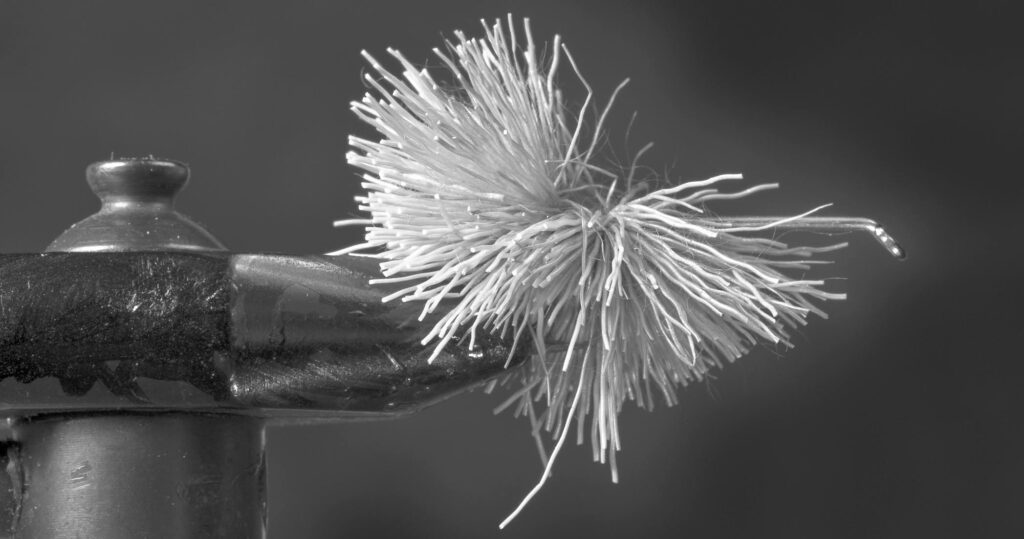
Step 4: Cut and clean a half-pencilsized clump of black hair. Lay it on top of the hook parallel to the shank. Take two loose wraps around the hair while holding it tightly with your left thumb on top and left forefinger on the bottom. Pull straight downward with the bobbin, then make one locking wrap. Don’t advance the thread.
Step 5: Cut and clean a half-pencilsized clump of light yellow or white hair. Lay it on top of the hook parallel to the shank on top of the black hair. Take two loose wraps around the hair while holding it tightly in place as in the previous step. Pull straight downward with the bobbin, then make one locking wrap. Now pull the flared hair back and advance the thread carefully in front of it, apply a Half Hitch there, pack the hair tightly as in Step 2, and place a drop of glue at the Half Hitch spot.
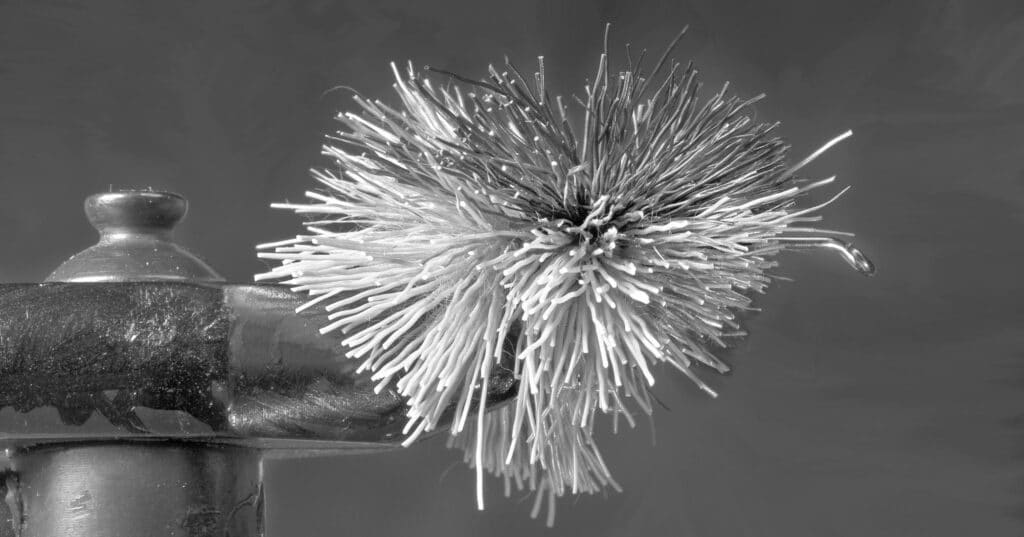
Step 6: Repeat Steps 3, 4, and 5 until only the front quarter of the hook remains uncovered. When the final stacked series is finished, whip finish in front of it and apply a drop of glue.
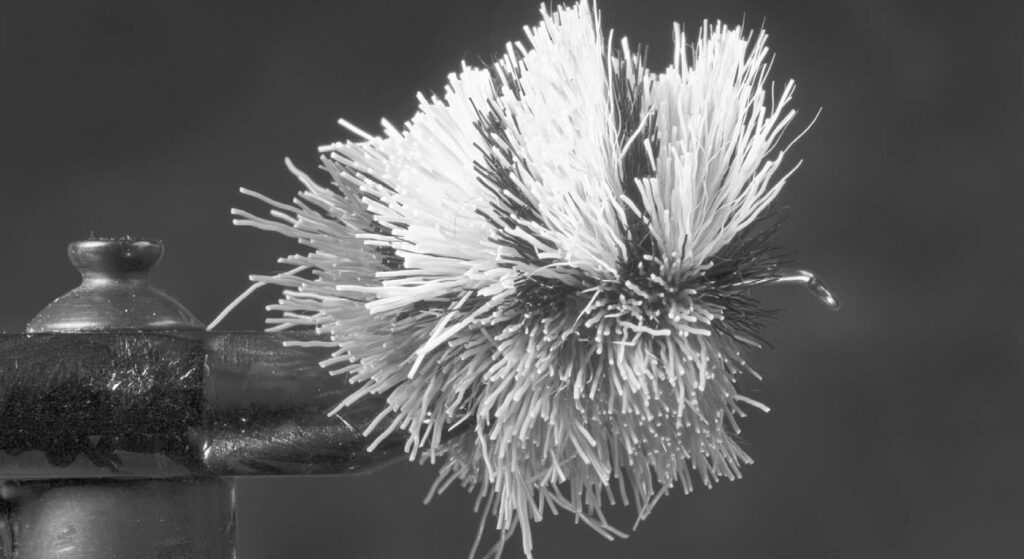
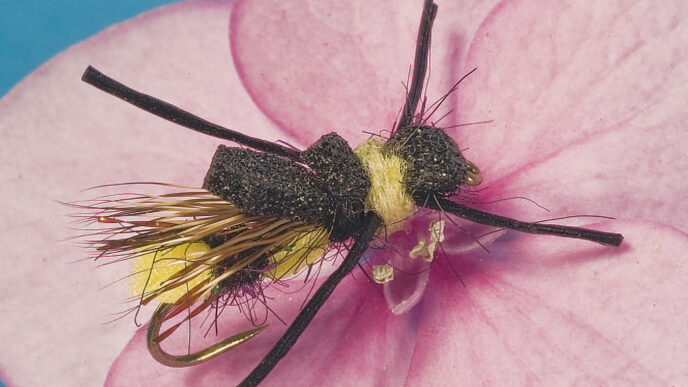
Step 7: To begin the trimming process for a large Cicada, rotate the vise to expose the bottom of the fly. With a sharp pair of long-nosed scissors, cut the hair on the bottom of the fly flat. Don’t cut too close to the shank; leave about an eighth of an inch of hair. (Consider cutting the thread first to make trimming easier.) Rotate the vise so that the fly is right-side up and scissor-trim the body round and fat, as pictured. Use a double-edged razor blade to finish the trim, carefully bending the razor blade between your thumb and forefinger so that it has a circular shape. Be careful to not remove too much material with each pass of the blade. The trim shown is for the large Cicada; if you are tying a hopper or smaller trout pattern, use a properly sized hook and trim the body to a more slender configuration.
Step 8: Attach the thread in front of the hair and cover the front quarter of the hook. For antennae, use two stripped hackle stems and tie them to the shank in front of the hair so that each forms a concave shape as shown. Apply a drop of glue to the tie-in point. Trim the antennae so that they are approximately the same length as the body.
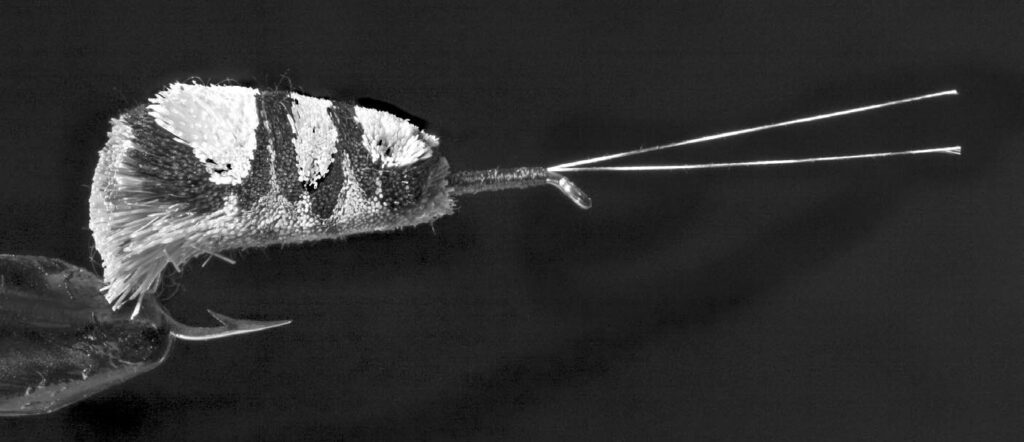
Step 9: Tie in two full strands of Turantulegs on top of the hook and arrange them as pictured — one set angling to the rear and one set pointing out over the hook eye. Trim the legs so that they stick out about three-quarters of an inch on each side of the fly.
Step 10: Tie in a grizzly saddle hackle next to the rear pair of legs and advance the thread to the rear of the front pair of legs. Wrap the saddle hackle forward in tight turns, ending at the front pair of legs. Tie down the hackle, trim it, form a small thread head, and whip finish the fly. Trim the thread and apply head cement. This completes the Cicada.