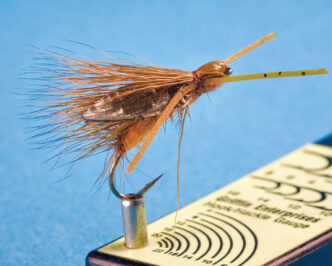

Once in a while in this column, I feature one of my own fly designs. For this issue, I have chosen a large dry fly that I call “Bill’s Big Fish Fly,” because it is generic enough in its design to mimic a number of large aquatic insects simply by tweaking color and/or materials and because it has been so successful in living up to its name. Big fish love it, and small fish can’t eat it. I think you’ll like it, too, but first, allow me to digress briefly into the world of fly design.
What goes into designing a fly pattern such as the Big Fish Fly? I’m asked that question from time to time, so it’s worth a discussion here — keeping in mind that the ideas expressed are my views and that others may approach the task differently.
First of all, in undertaking the task of designing an effective pattern, my mindset is simple and straightforward. Fly patterns need to earn their niche in my fly box. Dave Hughes expresses this same concept in Trout from Small Streams, one of my favorite books. Accordingly, any fly pattern that I have designed will have undergone trial-and-error design work, followed by a protracted performance-based period of “lab work” in the only laboratory that counts: the watery proving ground that harbors our quarry, the wily trout.
In designing a fly pattern, I use an unscientific, step-based process — a loosely applied routine that always commences with some form of motivation, usually an insight stimulated by observed insect and/or trout behavior. In other words, there is an initiating “Aha!” occurrence that sparks the “What if?” thought process that in turn suggests design ideas for mimicking the observed characteristic.
Once a general fly design thus crystallizes in my mind, my thoughts turn to the details: the materials I will need to employ (including hook style); the fly’s form, profile, and size(s); and mapping out the flow and progression of tying steps, that is, what goes on the hook in what order.
After considering these issues and before clamping a hook into my vise, I prepare a rough sketch of the pattern, refining it in iterations until I am satisfied that the design is actually feasible. During this phase, the design may change significantly as it becomes more concrete. Once my final sketch is complete, I create a draft list of the sequential tying steps required and begin tying a prototype of the fly. As I complete each step at the vise, I edit the draft tying steps as needed with the goal of producing directions that are simple, straightforward, and practical. Often I will make changes to the basic design, the materials, or the tying instructions once the prototype takes shape or after tying a dozen or so of the new bug as refinements come to mind.
Then I hit the water for the second phase of the process. Will this thing actually work? Sometimes no matter how good a fly looks to the tyer, it fails in the crucible of practicality. Trout won’t eat it, period, or all it produces are those slap-happy refusals, in the case of a dry fly. It pays, however, to try it in different environments before trashing it: small streams, larger streams, pocket water, meadow streams, even stillwater situations. It also pays to go back to the drawing board and tweak the design or change materials, colors, sizes, or other characteristics, adding here or subtracting there — then hit the “retry” button.
On the other hand, if the new bug does enjoy some success in one context, don’t assume it will work in other settings. For example, I’ve tested patterns that seem irresistible to canyon-stream trout, but when drifted on a larger stream such as the upper Sacramento River will fail miserably. Not surprisingly, the opposite also occurs, and it’s time to scratch the head and wonder what’s going on. Sometimes tweaks to size or profile will help in this situation, but if not, I consider the fly to be a niche pattern and move on.
No matter what happens, I find the on-the-water testing phase of the design process to be fascinating and challenging, often posing to myself the question of whether it’s the fly or me that’s causing success or failure. I’ve come to believe that the answer is a matter of faith and confidence — in other words, if the fly produces good results in a reasonably consistent manner in various environments over an extended period of time, I’ll knot it to the leader with that expectant, confident attitude that is one of the keys to success in our sport. And that is when the fly pattern has earned a permanent place in one of my fly boxes.
The big fish fly is a pattern that has indeed passed rigorous testing on many and varied waters and that will always be found in my box of go-to flies. It has accounted for large trout during Hexagenia mayfly hatches, large specimens of upper American River Canyon trout that perhaps mistake it for a sizeable terrestrial, eager upper Sacramento and McCloud rainbows and browns during spring stonefly hatches, Truckee River trout in the fall during the magical October Caddis hatch, and most lately on the Henrys Fork of the Snake River in Idaho with my son Dominic at the oars of his drift boat on a reach near where he lives in Idaho Falls with his family.
Turnabout being fair play, there’s something awfully nice about being rowed about by one’s son on a brilliant big-sky day drifting a sparkling, deep-green river with nothing but a proven fly between me and huge trout. Sometimes our frazzled world just seems to fall into a semblance of order and beauty, what’s really important sorts itself out right before our eyes and quietly within our souls, and the rest is simply carried downstream and away by the shifting, passing currents.
I included the Big Fish Fly as one of a number of patterns in a California Fly Fisher article on what works during the October Caddis hatch (in the September/October 2009 issue), but decided to feature it here because it has undergone changes over time and continues to draw hits in an exceptional manner. Its main attributes can be summarized as follows: Tied correctly, the fly floats high by virtue of the materials used; it is highly visible on the water in any type of light; it has an attractive profile that resembles a number of large “adult” trout delicacies; it has moving parts that seem to be enticing strike triggers; and it can serve as the surface fly in a hopper-dropper setup, since it can support a couple of flies and a split shot.
The inspiration — or “Aha!” moment — that drove me to design this fly arose out of a frustrating episode that occurred about ten years ago while I was fishing a medium-sized stream during the Golden Stonefly spring emergence on a warm, breezy evening. The stoneflies were performing their comical flutter-flutter splash egg-laying dance in their normal clumsy-looking routine. The ones that entrapped themselves in the surface tension were greedily gobbled up by trout that were keyed exclusively on this food source. After observing the take patterns and rise forms, I tied a Stimulator of appropriate size and hue to my 4X tippet and sent it drifting drag-free down the bubble line 30 feet away. One foot into the drift, a large trout rose confidently to the fly and then simply and haughtily tail-slapped it away, drowning it in the process. And so it went for the next half hour: powder the fly, get a good drift, see the rise, watch the refusal, scratch the head, move a little, go again. Changing size and color made no difference, so I decided to grab my scissors and administer a little punishment to the fly by clipping all of the hackle from the bottom, trimming out some of the deer hair wing, removing the deer hair tail, and flattening out the remains of the wing with my thumbnail so the remnants splayed out broadly like a fan over the top of the fly. Examining the butchered specimen skeptically, and resigned to the probability of more refusals, I popped it into the drift at the head of a broad tailout in the day’s dying light. Just before the fly dropped over the lip into the next pool, a large trout latched onto it, leaped once, pulled line from my reel, and came unbuttoned. Encouraged, I dried the fly, administered a copious amount of powder to it, flattened the wing with my thumb, and whisked it forth again into a different lane. Dang, another long-line release.
This scenario repeated itself several more times, but finally, with virtually no light left, I managed to land a decent-sized fish on the mangled Stimulator. As I was removing the barbless fly from the fish, the light from my headlamp revealed that it was impaled in the outermost edge of the trout’s upper lip. As the revived fish swam away, I examined the fly, and the “Aha!” light bulb went on: I had managed to alter the fly’s profile to make it appeal to trout, but there was nothing I could do about the apparently poor choice of hook style on which the fly was built. The extralong curved shank was fine, but the hook’s gape was far too narrow for this type of fly, resulting in fewer hookups on otherwise solid takes. And so the fly tyer–predator psyche wheels began to turn, setting in motion the design process mentioned above.
At home, I looked up the traditional Stimulator pattern and discovered that Tiemco’s 200R hook was specified in the materials list wherever the pattern was described. Indeed, after cross-checking the description with my mangled storebought specimen, it sported that very hook style. There is nothing inherently wrong with the 200R, but it seems me that a larger-gape hook would have been better, given the Stimulator’s elongated shape and the materials used in its construction. Rather than trying to modify the Stimulator to suit my own sense of design, I dragged out a Trout magazine article by Al Beatty that I had recalled saving where he discussed a fly he called the “Hackle Top Hopper.” I liked the overall appearance enough to use it as the basis for a new design, but for my purposes, it needed significant modifications, many of which became apparent after trying to feed Al’s pattern to trout.
After building and tweaking a prototype, and after a dozen of the new design had fallen from my vise’s jaws, I headed off on a long-planned month-long trip to Oregon to fish a handful of rivers with some friends. Encamped one evening beside the beautiful Wallowa River, we fished an interesting nearby reach. We observed very little surface activity until late afternoon, when large Golden Stonefly adults began to show up. I remembered the new, as yet nameless fly, looked it over, knotted it on, and launched it to the middle of the river via a long cast, mending to keep the fly’s drift looking natural. After several casts and a few powder dustings, the fly disappeared in a large boil in front of a big midstream rock, and I was locked onto a hefty trout that led me on a stumbling downstream chase before allowing me to land it. Looking up at one of my companions, I muttered “Big fish fly.” “Good name,” he replied. And so Bill’s Big Fish Fly was christened. Since then, there have been far fewer refusals and long-line releases. The version featured here is the latest in a series of iterations.
Materials List
This set of materials is for the orange version that trout mistake for a Golden Stonefly or October Caddis adult. I sometimes use amber foam instead of orange for a Golden Stonefly, an orange body and black wing for a Pteronarcys imitation, all black materials to imitate a cricket, yellow and olive to imitate a grasshopper, a yellow-olive body and black wing to imitate a Skwala Stonefly, or a smaller hook, olive foam, and dark olive wing to imitate a Green Drake adult mayfly.
Hook: Tiemco 2312 or Daiichi 1260, size 6 to 12
Thread: Orange 8/0
Hackle post: 4X tippet material
Hackle: Furnace, ginger, or brown dry fly-quality saddle hackle
Abdomen: 2-millimeter orange closed cell foam
Underwing: Light dun Medallion Sheeting, doubled and shaped with a wing burner
Wing: Burnt-orange deer hair
Thorax: Creamy-orange Paxton’s Buggy Nymph dubbing
Legs: Pumpkin-colored Sili Legs
Tying Instructions
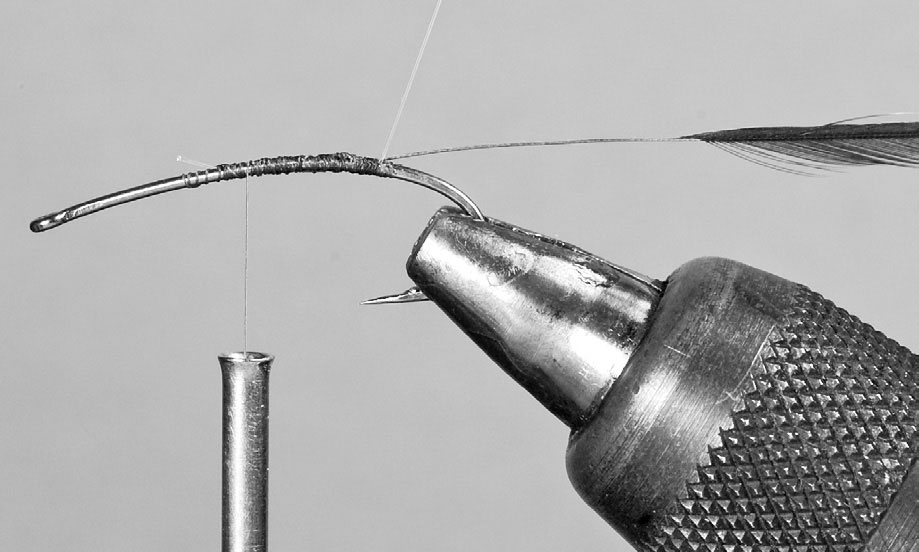
Step 1: Debarb the hook, place it in the vise, and cover the shank with thread and flexible head cement.
Step 2: Just above the back of the barb, tie in a 12-inch piece of 4X monofilament on top of the hook shank. This will become the hackle post. We will wind the hackle around the monofilament. If you have a gallows tool with your vise, use it to hold the monofilament under tension in a vertical position. If you don’t have a gallows tool, attach the monofilament to your light or figure out some other makeshift way to hold it vertically under tension. Prepare a saddle hackle by stripping all of the barbules from the bottom three-quarters of an inch of the stem. Tie in the end of the bare stem at the junction of the monofilament and the hook.
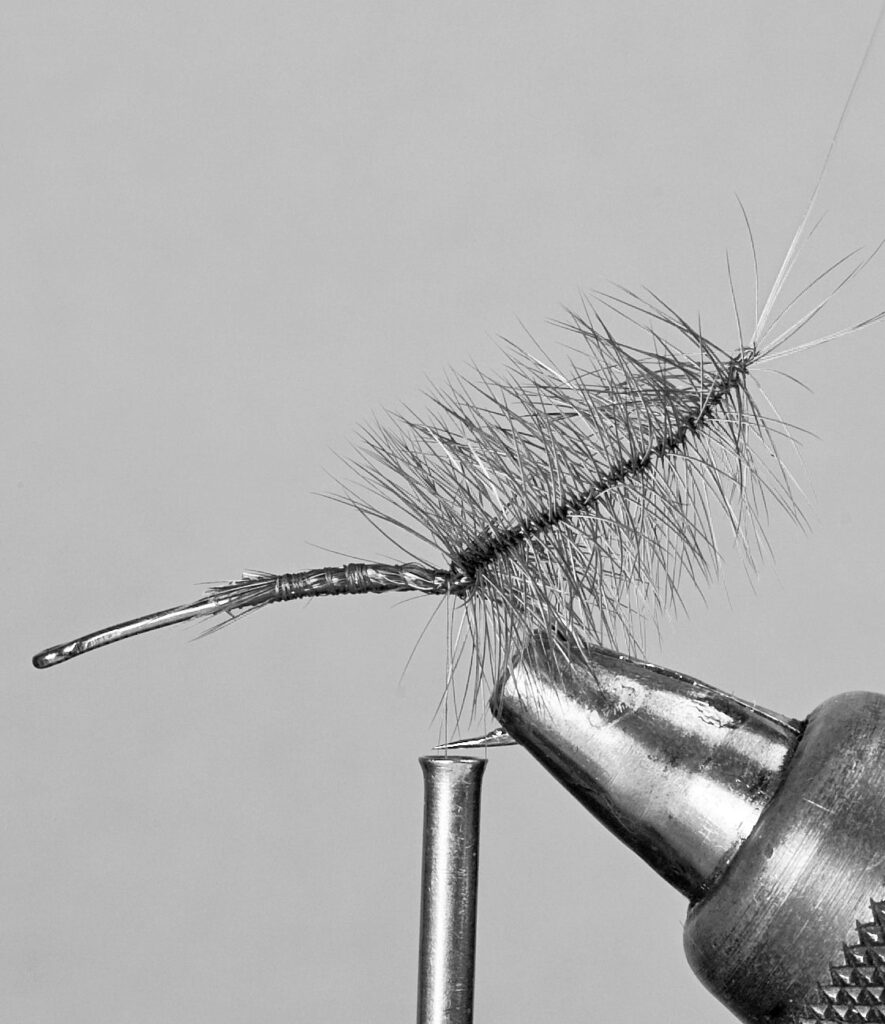
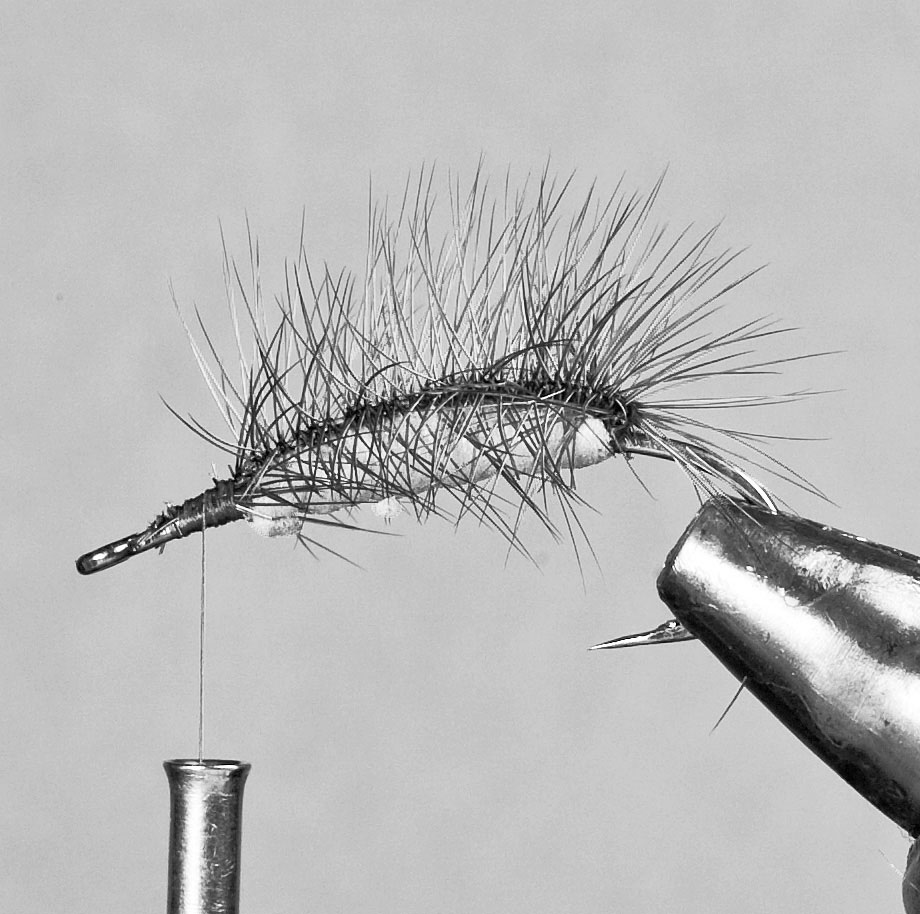
Step 3: Wind the bare stem counterclockwise upward around the monofilament in widely spaced turns (about 5 turns). When you reach the one-inch point, begin winding downward, this time in very close turns. If done correctly, this method will allow you to achieve a total of 30 to 40 turns of hackle around the monofilament. This helps to provide flotation.
Step 4: When you have reached the shank with the turns of saddle hackle, you will need to tie it off in front of the nowhackled monofilament post. In doing this, it helps to let your hackle pliers hang over the shank, then release the tension on the monofilament. Pull the hackled mono backward and out of the way, grab the hackle pliers, and tie the hackle tip down along the top of the shank. Trim any excess hackle tip and move the thread rearward to the base of the monofilament post.
Step 5: Cut a one-eighth-inch strip of orange 2-millimeter foam, making a point at one end. Tie the pointed end in just ahead of the hackle post and move your thread forward to the front one-third point on the shank.
Step 6: Wrap the foam strip forward in close, interlocked turns. Don’t stretch the foam as you wrap it, because doing so destroys its floatation qualities. Tie the foam off at the front one-third point and trim any excess. This leaves the front third of the hook for the rest of the steps.
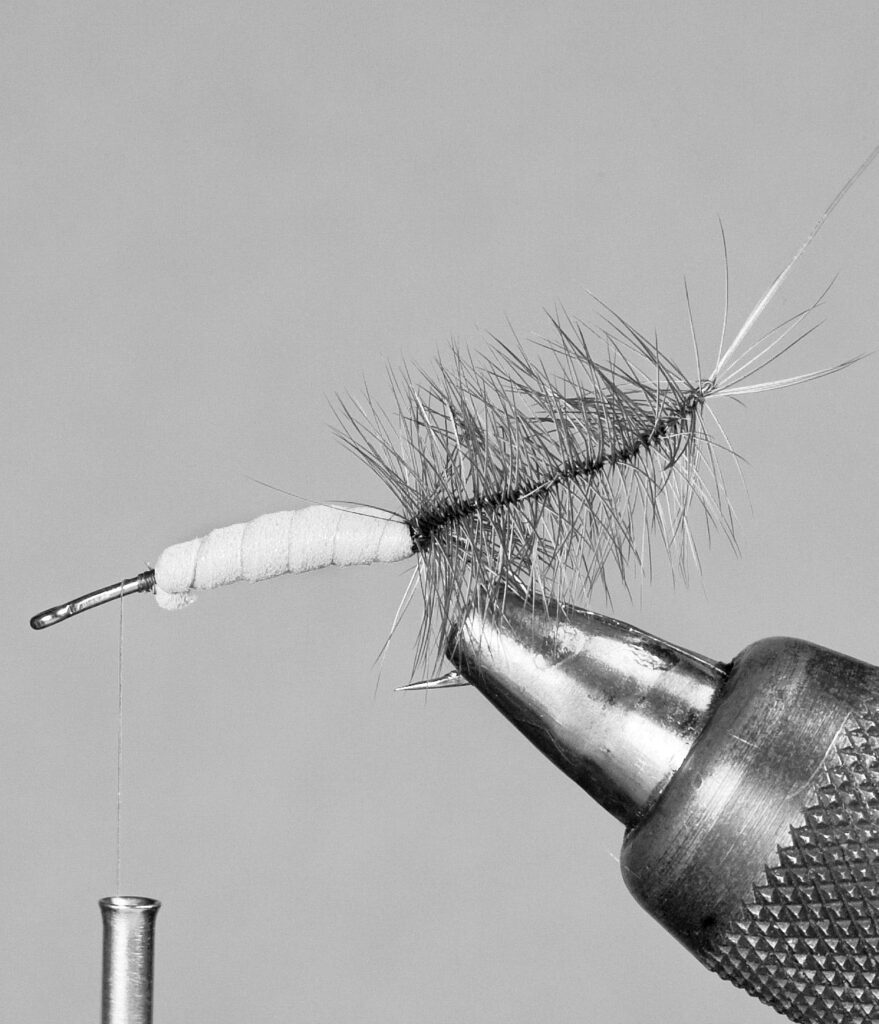
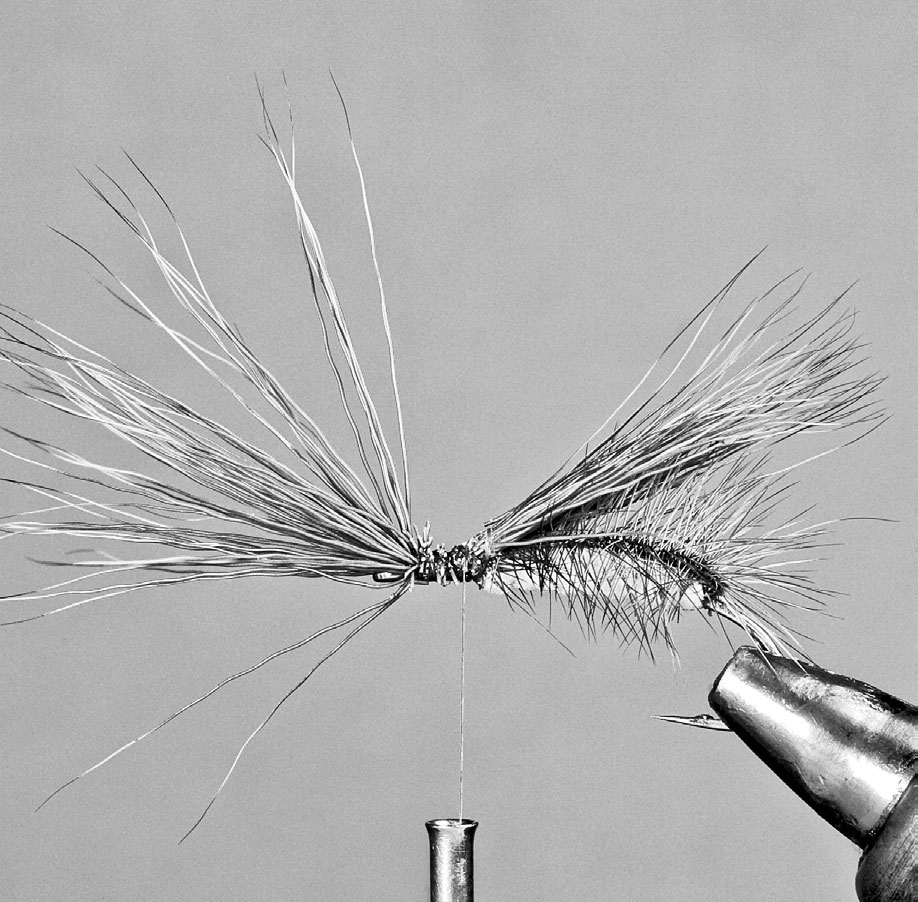
Step 7: Apply some flexible head cement or superglue to the top of the foam body and then bring the hackle post forward over the body. Pull it tightly forward, making sure it is directly on top of the body. Tie it off at the front one-third point. The desired result is to have no hackle barbs projecting below the shank.
Step 8: Cut and stack a small bunch of burnt-orange deer hair and measure it to shank length. Trim the excess butts evenly and tie the bunch in tightly at the front of the foam body, tips facing to the rear. Wrap the butts down, make sure that the hair is all on top of the shank, and place a small drop of glue at the tie-in point. Move the thread to the hook eye.
Step 9: Cut and stack another, slightly larger bunch of deer hair. Measure it so it equals approximately 1.5 times the length of the shank. Trim the butts even and tie this bunch in directly behind the hook eye with the tips pointing forward. Keep the hair directly on top of the hook. Wrap the thread rearward, covering up all of the butts. Place a drop of glue on the tied-down butts.
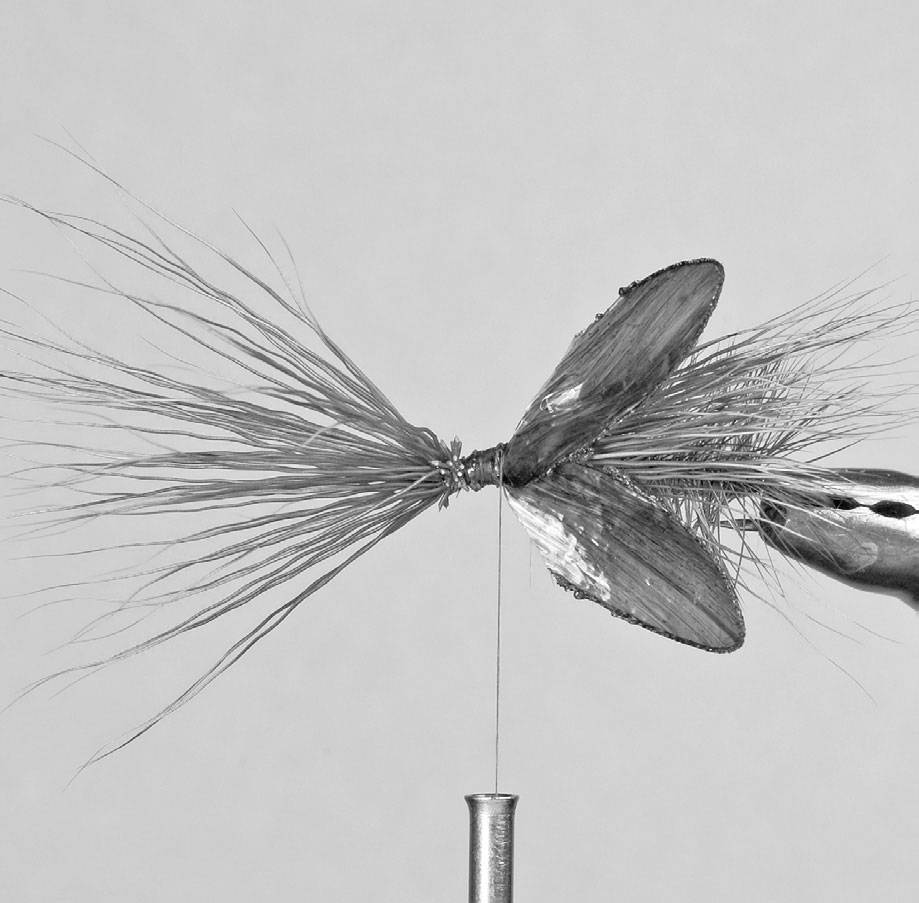
Step 10: Cut a piece of Medallion Sheeting one quarter of an inch wide and an inch and a half long. Double it over so that it becomes one-quarter of an inch wide and three-quarters of an inch long. Place it into a wing burner shaped like a stonefly wing and apply heat briefly to the burner; this will seal the edges. Repeat this step for the second wing. Cut the corners off of the bottom of the wings and tie them in on either side of the shank, tips facing rearward. Apply a drop of glue to the tie-in point and move the thread back to the hook eye area.
Step 11: Dub a thorax of creamy orange Buggy Nymph dubbing, leaving the thread at the one-third point. To achieve this, you’ll need to dub rearward from the hook eye to the one-third point.
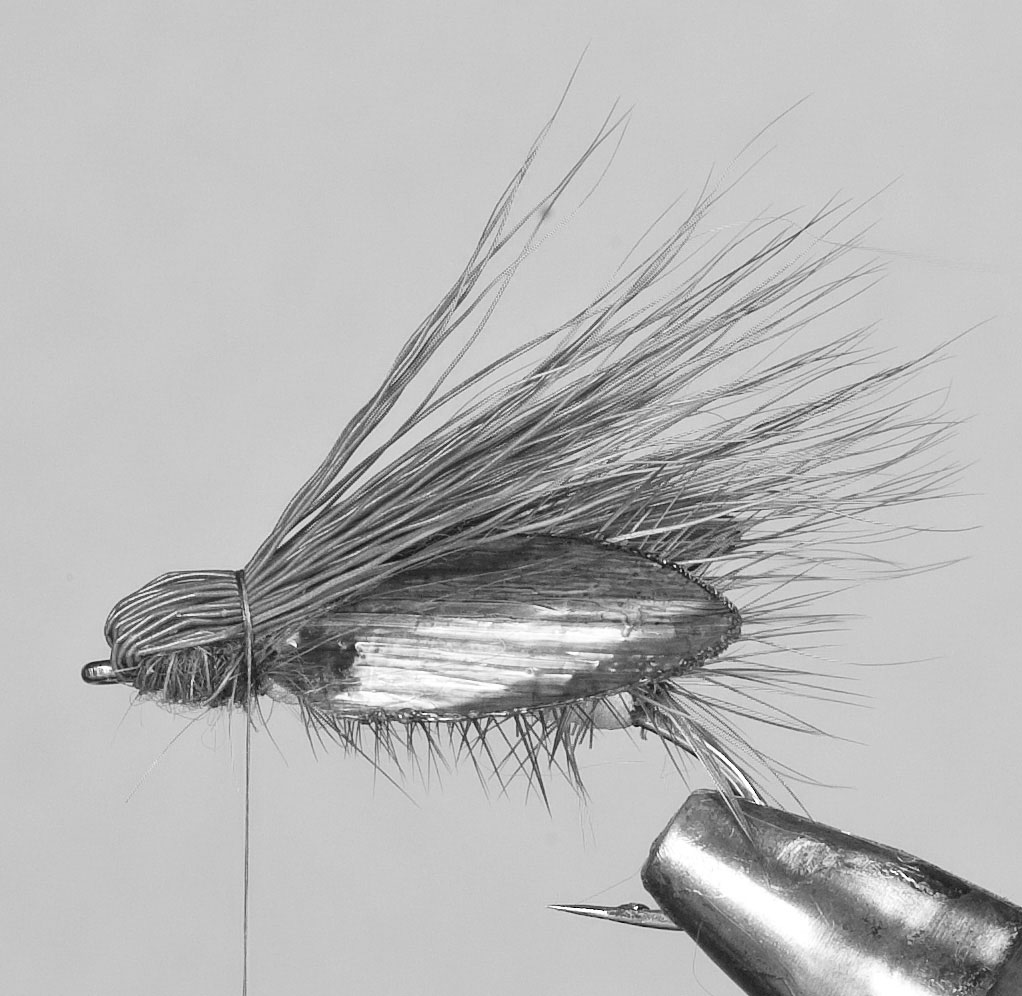
Step 12: Gather up the second (forward-facing) bunch of deer hair and pull it directly upward. Make sure you have all of the hair and smooth it out as much as possible. Holding it tightly, bring the bunch rearward over the thorax, forming a nice half bullet head. Make sure that there is no space left between the front of the half bullet head and the hook eye. If there is a space there, you have not properly tied in the front bunch of deer hair and will need to remove the dubbed thorax and correct this error.
Step 13: Continuing to hold the bunch of hair tightly, tie it down (tips now facing rearward) at the one-third point on the shank. As you do this, push the hair down at the tie-down point in order to make the hair splay outward. If necessary, adjust the position of the Medallion Sheeting underwings and place a tiny drop of glue at the hair tie-down point.
Step 14: Double a strand of pumpkin Sili Leg material. Place it on top of the fly, looped end forward, with the middle of the doubled-over strand at the wing tie-down point. Wrap three loose turns of thread over the leg material, then cut the doubled loop. Pull one of the two sections down onto the far side of the hook and the other onto the close side of the hook. Wrap the legs down tightly.
Step 15: Whip finish between the legs and trim the thread. Apply glossy head cement to the top of the bullet head.
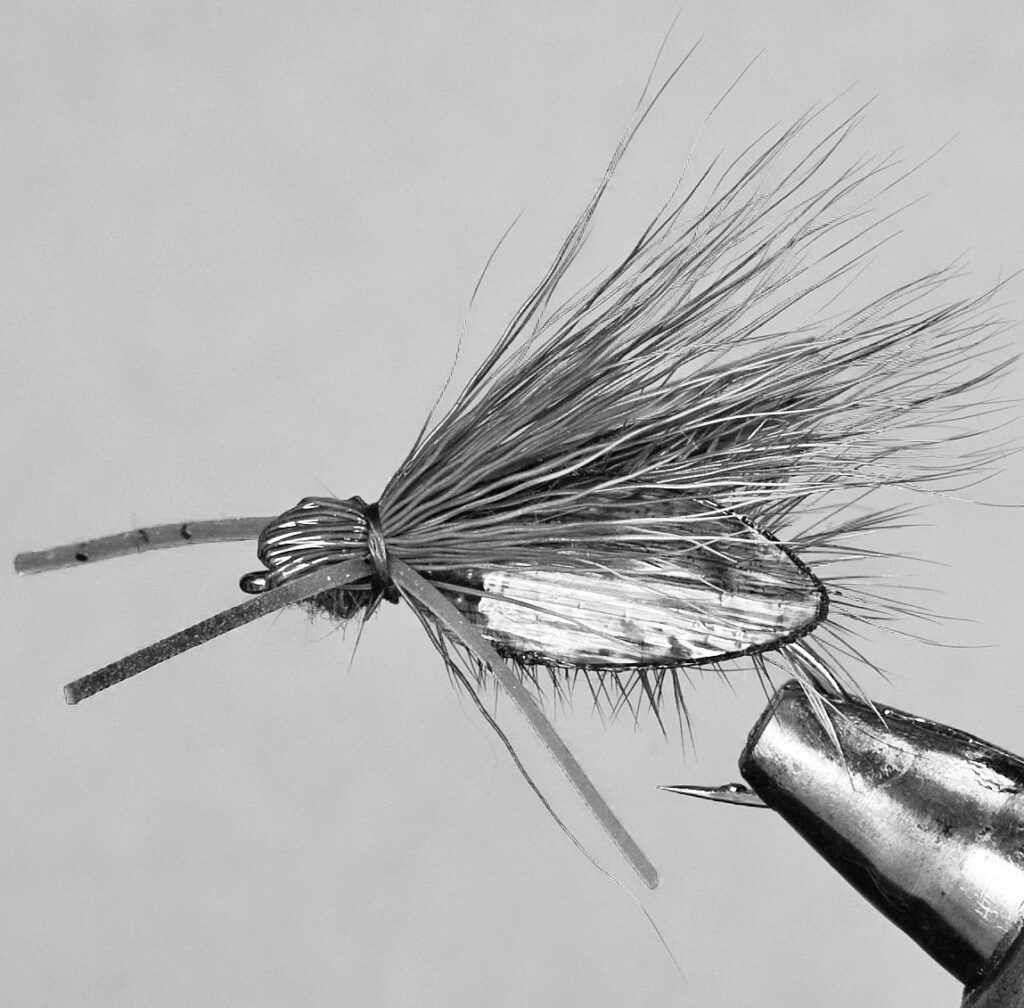
Before fishing the Big Fish Fly, apply silicone paste to the entire fly, using a very sparse amount. Then immerse it in floatant powder and rub the powder in with your fingers. It floats like a cork after this treatment.