
Developing an interest in fly fishing often leads, sooner or later, to other interests. One of the first is fly tying. You initially get started in an effort to save a little money, telling yourself that with a minimum investment in a couple of tools and a few materials, you can tie your own flies and be better off. A few thousand dollars later, you have a dedicated room just for your fly-tying and so many materials that you can recreate anything a fish might eat, no matter how unimportant.
At some point, you’ll also decide you want to turn some of your finely crafted, self-tied fishing flies into a work of art to hang on your wall. After all, a fly-tying room or den really needs some decoration, doesn’t it? If all you tie is tiny wet flies or classic salmon flies, you can find a number of outlets that sell ready-to-go display boxes and frames in which you can install your handiwork. A quick Google search for fly displays will give you a number of samples from which to choose. You can also find some good bargains on eBay and Amazon. Note, however, that nearly all of these offerings are intended for small flies of the sizes used for trout and salmon. And the prices for these custom-manufactured fly-display boxes and frames are near those of a quality fly reel or rod.
For those of us, however, who like to fish for big saltwater or warmwater species such as largemouth bass and striped bass, these alternatives won’t work. The sheer bulk of many bass bugs and poppers is such that the average flyframe setup is simply not deep enough to house the fly.
Of course, you can make your own frames to fit the flies you want to display. All it takes is a few wood-shop tools and the jigs needed to build picture frames, and you can whip out your own displays pretty much anytime you want. I had fooled around with the idea of creating a display of bass bugs for some time, but I had built a few homemade picture-frame-style fly-display boxes and wasn’t satisfied with the results. I do a bit of woodworking, but these labor-intensive projects languished in my garage. Even worse were my attempts to create the custom-beveled mattes with precise openings to frame the flies in individual compartments within the picture frame.
There are a number of different matte cutters out there, ranging from simple handheld push or pull cutters to large professional matte cutters with rigid frames, clamps, and sliding blades that could slice a beveled edge in a piece of steel plate. I couldn’t justify the price of the commercial cutters, and the hand-held models, while they do work, are not something from which you can get decent results until you’ve destroyed several pricey sheets of matte board. That kind of fly display was clearly beyond my talents — at least so far.
Then, as often happens, my problem was solved while I was doing something else entirely. My wife and I had stopped at a yard sale a few blocks from our house, and as I examined the books that were for sale, I spotted out of the corner of my eye an interesting-looking oak wall cabinet that was lying partly covered with a box of videotapes. Picking it up, I realized it might be just the thing I needed.

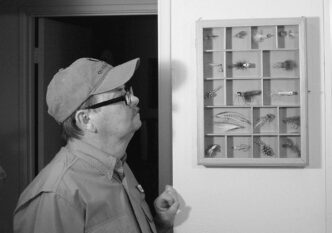
It would be called a “curio case,” a “collectables display case,” or a “shadow box,” if you want to look on the Internet for something similar. My find was 12 by 16 inches, with a total of 17 small compartments of various sizes — such cases come in various dimensions and with different numbers of compartments for holding small items for display. This one had a hinged glass front. Most importantly, it measured a decent one and a half inches in depth — more than enough to house even fairly large bass bugs. Even better, it cost me a mere two dollars. I paid the lady who was holding the yard sale and took my new display case home.
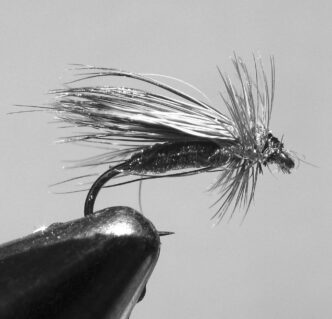
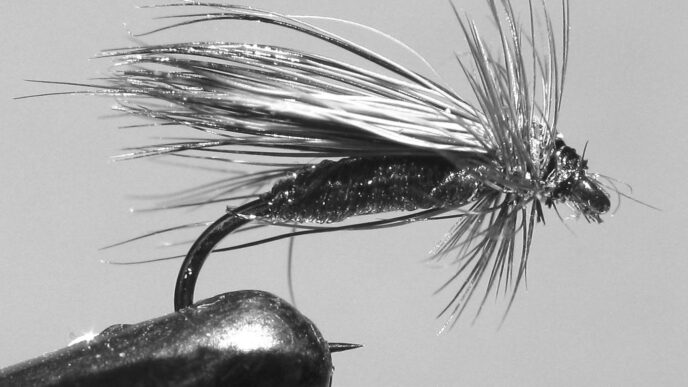
The display case lay on my fly-tying bench for several weeks. Then one day, while wrestling with a story idea, I absentmindedly picked up some bass bugs and began trying different bug sizes in the compartments to see how they would look. It wasn’t long before I had worked out an attractive display of bugs in the case. They ranged from a simple Woolly Worm (one of the first bass I ever caught on a fly was on a Woolly Worm that I had tied) to a complex and beautiful hair bug designed by Dave Whitlock.


Once I started laying flies in the compartments, I realized the depth was just about perfect for the task at hand. As a matter of fact, I was going to have to build some sort of support to hold each fly away from the back of the case to give them that suspended-in-air look that is typical of cased flies. I would also have to change the background color of the case so the flies would stand out a bit better. The simple wood-panel back was pretty plain and not quite the color I wanted.
I thought about trying to paint the back of the interior of the case, but the idea of having to mask off all those wood partitions wasn’t very appealing. Searching around in my collection of display materials, I happened upon part of a sheet of grey-blue matte board left over from an earlier attempt to create a fly display. (A word of advice: Stay with a unpatterned low-key or neutral color for backgrounds, otherwise you’ll overpower the colors in the fly.) The idea struck me that if I cut pieces of this matte board to size, they would make a great background for the flies. A sharp hobby knife, a ruler, an old paper cutter, and a woodworking surface gave me a full set of matte board inserts in just a few minutes.

The next question was how to mount the bass bugs where I wanted them. I had seen some fly displays made with tiny acrylic posts glued into the display, with the fly glued to the end of the post — nice, but better for trout-sized patterns. I’d also seen one tyer who used tubular plastic coffee-stirring sticks cut to length and a small loop of fine copper wire to hold the fly inserted through the hollow stick. That looked a bit too complicated.
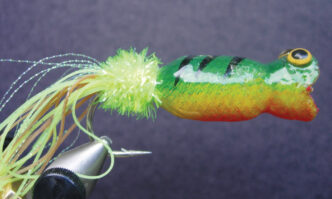
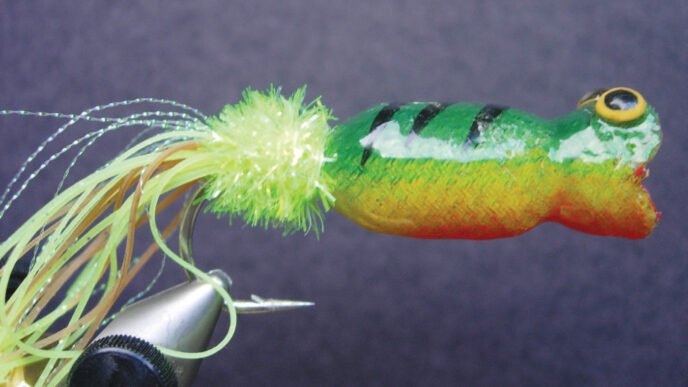
A little scrounging located some quarter-inch-square balsa strips that I had used to make small popper bodies. A quick trip to the garage let me cut a number of short lengths of balsa to provide mounting blocks to go between each bass bug and the matte board background. I also grabbed some tiny corks to create even more mounting blocks (I wound up not using the corks, but they would have made an equally good mounting material.)

I thought about using epoxy or some other cement to hold the small balsa mounts to the backboard and did a bit of online research to see how other people had fastened their flies to whatever mounting system they had adopted. I saw everything from using monofilament loops or fine copper wire to secure tiny flies to little plastic post mounts to the application of hot glue to hold flies in place. Considering the size of the flies I was mounting, hot glue seemed like the easiest thing to use, and I already had a small hot glue gun in my fly-tying kit. I use it to glue various materials on bass bugs and streamer flies. It would work equally well to assemble the flies and fly mounts to the back matte board.
One of the nice things about using the matte board cut to shape for each of the compartments was that I didn’t have to glue the fly mounts and flies into the small spaces. I could glue together the back matte, balsa mount, and fly on the table, then just slide each completed assembly into the box it was intended to fit. This made for an assembly-line approach to fitting each bug to its background matte and then inserting it into the compartment for which it was destined. I then glued the matte board background into place with a couple of tiny dots of hot glue. They should be easy to remove if I want to change flies or background colors later.
Actual construction time (considering that I didn’t have to build the case itself ) was only a couple of hours. The cost was minimal — if you don’t count the many hundreds of dollars spent accumulating the fly-tying equipment and materials. The matte board cost me around ten dollars a sheet, but I used only part of a sheet left over from another project. The balsa and hot glue cost only a few cents. I got my case at a yard sale, and whenever my wife and I stop at one, we’re always on the lookout for a similar find. Of course, you can buy display cases new from a number of suppliers on the Internet or at your local craft or hobby store. While these cases are not inexpensive, they are nowhere near the price of a specialized display case for flies. This is way to show off your larger flies that requires almost no tools and a minimum of labor.